
This post is sponsored by Silhouette America and contains affiliate links, which allow me to earn a small commission at no extra cost to you.
I am so happy to be sharing with you my very first project with the Silhouette Curio! I am still learning about this machine and haven’t quite mastered it but this was a very fast and easy project to do.
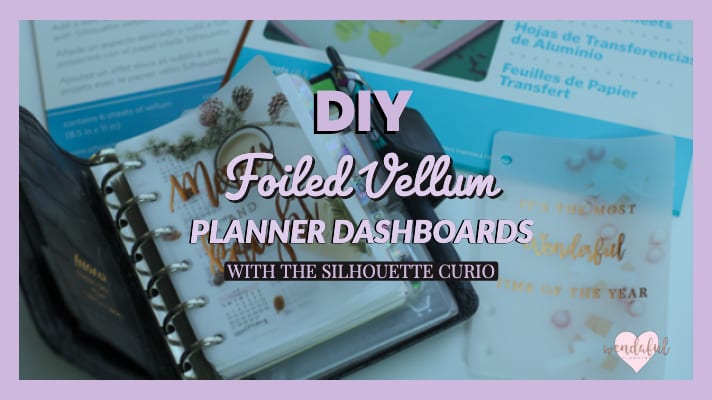
Table of Contents
HOW TO DIY YOUR OWN FOILED VELLUM PLANNER DASHBOARD
For this project we will be creating a foiled vellum planner dashboard. Planner dashboards are great to make your planner look pretty every time you open them up. In addition, they can also be used in between pages as dividers so everytime you open up your planner you get to see a pretty little design.
Foiling has been all the rage lately and now you can easily create the custom foiled look easily with Silhouette’s Foil Transfer Sheets. No laser printers required! These work by just rubbing onto the design. You can even handwrite over these sheets with a blunt pen or pencil to transfer foil to your project (perfect for all you talented calligraphers or if you want to make it more personalized!).
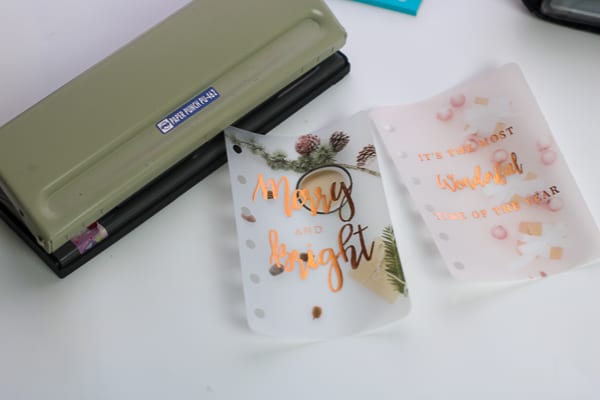
For this project I am using copper foil transfer sheets. I just love how it looks and stands out in my planners. When I first saw these foil transfer papers in action I knew I had to try them! I am so glad I got to try them out for myself, they are so easy to work with and the designs came out flawless!
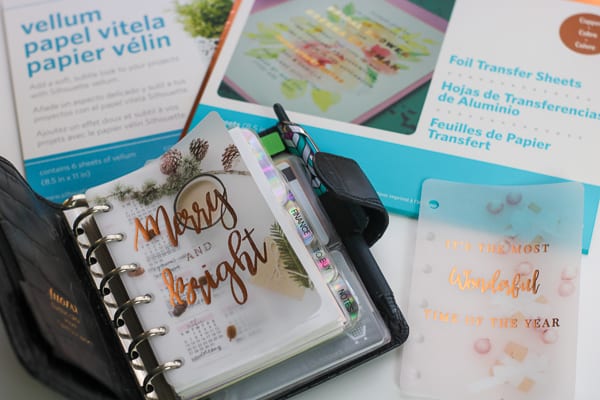
Supplies Needed:
- Silhouette Cutting Machine (Cameo/Portrait)
- Silhouette Curio
- Silhouette Cutting Mat
- Silhouette Cutting Blade (comes with Curio/Cameo)
- Silhouette Fine Embossing Tool (comes with Curio)
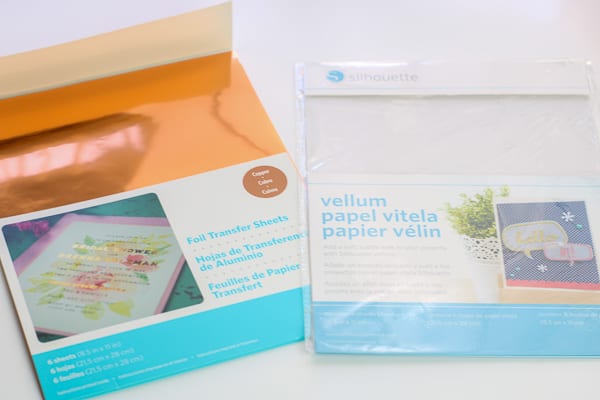
- Silhouette Vellum ($6.99 for 6 sheets)
- Silhouette Foil Transfer Paper (comes in Copper, Gold, & Silver)
- Pocket Size Dashboards File (SVG file, must have Designer Edition or Up to open file)
- or DIY: Get images for the background (check out stock photos from freepik.com, unsplash.com, pixabay.com etc.)
Step 1: Open Silhouette Studio®
For this tutorial you can either create your own or download and open up the file I provided. The one I provide is for pocket sized planners. You can easily resize it to your planner size. If you are just going to open up your file just be sure to click open with and select Silhouette Studio. Or you can open up Silhouette Studio and open the file from your library or directly by going to File>Open and finding where you downloaded the file.
Since it’s almost Christmas, I wanted some holiday images for my planner. You can always make new ones for each season and change it up in your planners. If you need help making a new foiled vellum dashboard just come back to this post!
If you’d like to learn the steps to make your own follow the quick picture tutorial below:
-
Grab and download your stock image from freepik.com or any other free site (remember these should only be used for personal use) -
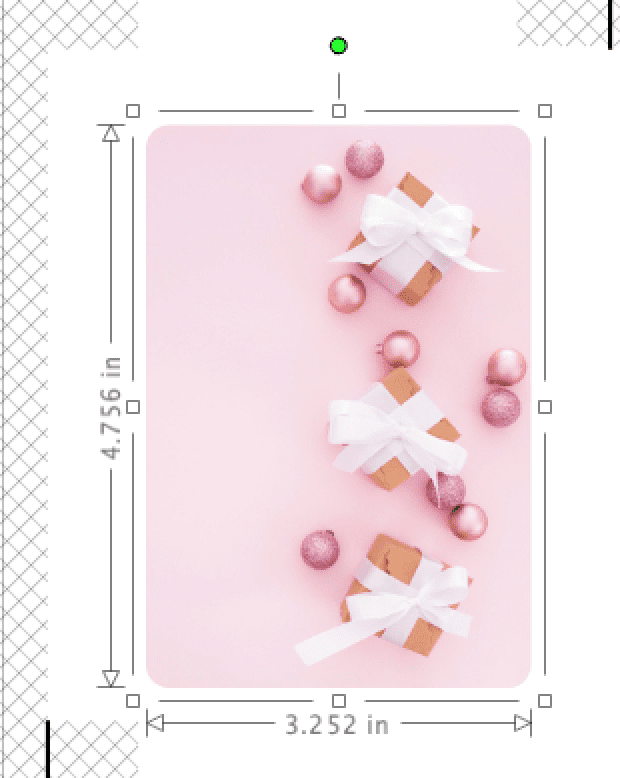
After cropping you should have a shape filled with your image -
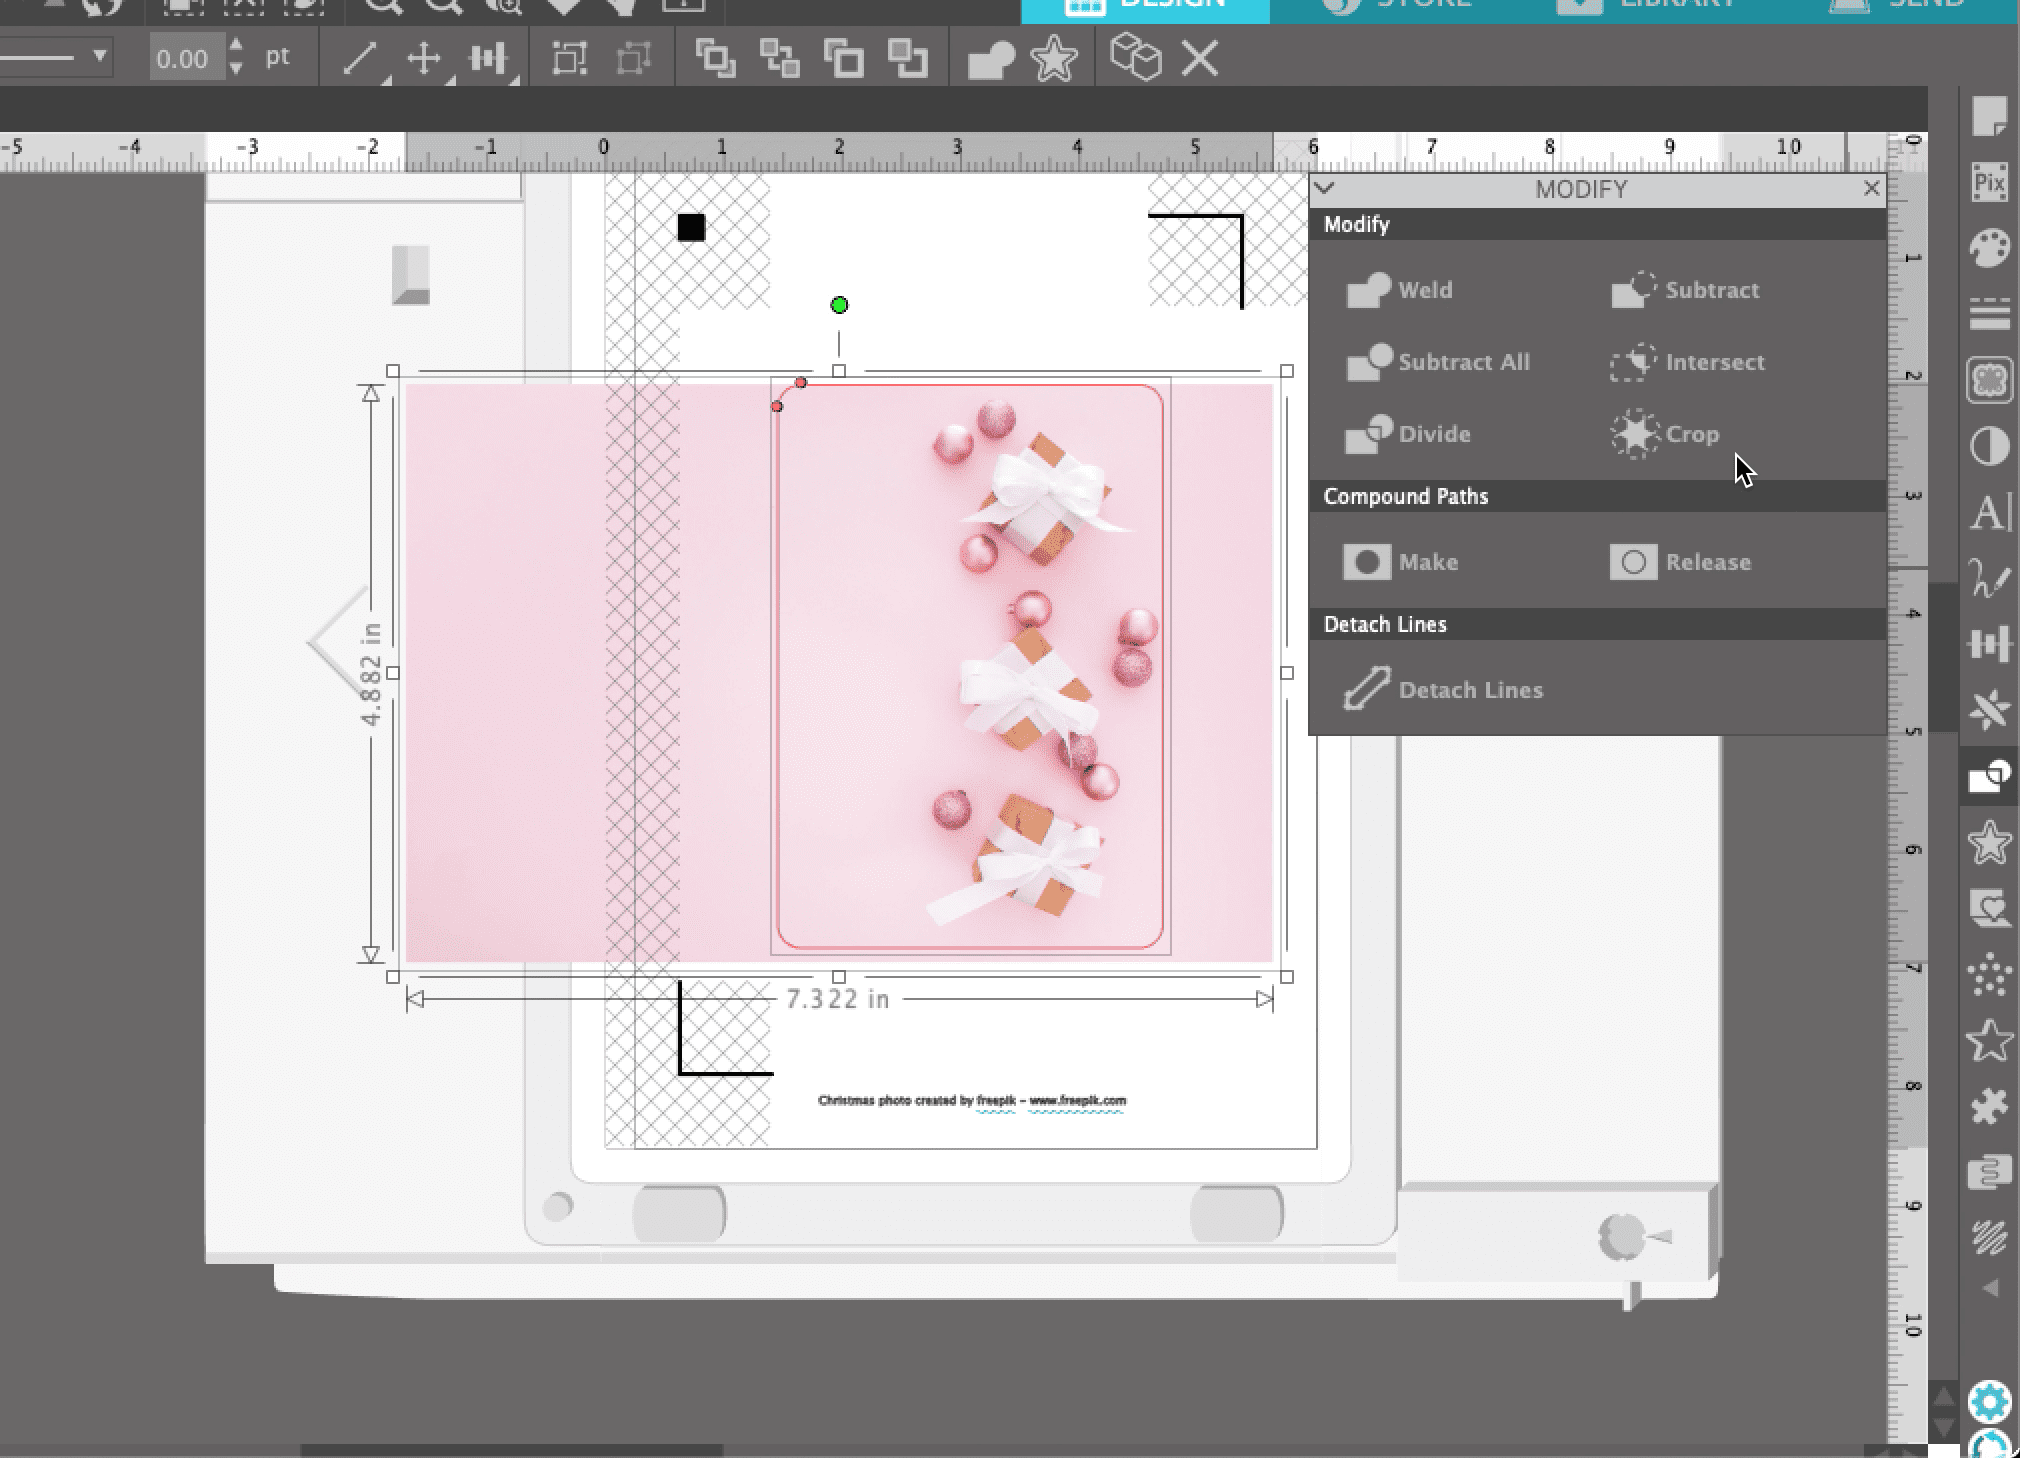
Resize and place the image behind the pocket sized rectangle where you want it. Go to the modify panel and crop it.


Background photo created by denamorado – http://www.freepik.com.
Christmas photo created by freepik – http://www.freepik.com
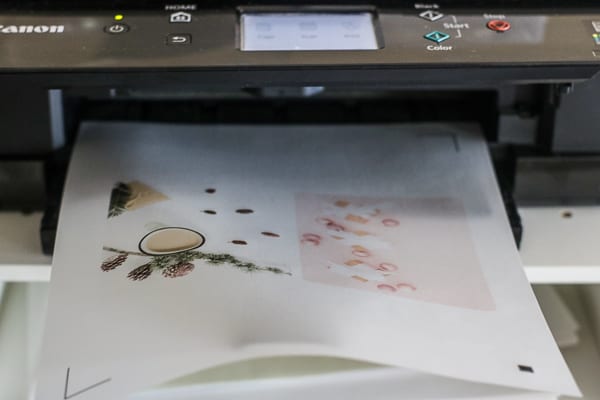
STEP 2: Print & Cut The Background on vellum
Before you design the wording or foiled designs, first print and cut the background of the dashboards on your Cameo or Portrait. I think I could have easily done this all on one machine but I wasn’t sure how printing and cutting worked on the Curio. And since the vellum paper is bigger than Curio’s base I thought it would be easier to just use the Cameo. So I opened up a new design and placed the two pocket sized dashboards with registration marks and printed them out on my printer.
Then I loaded the printed vellum with registration marks onto the Cameo mat and cut them out using the Vellum settings. It cut out pretty quickly! If you need more help with the print & cut feature be sure to check out my previous post here which goes into this much more in depth.

STEP 3: design the foiling details
After cutting your dashboards, place it aside for now.
Then go back to the file with the Curio embossing mat. If you created your own, copy and paste your dashboards from the previous step and arrange it onto the Curio workspace, so you know where you will place your foiling.
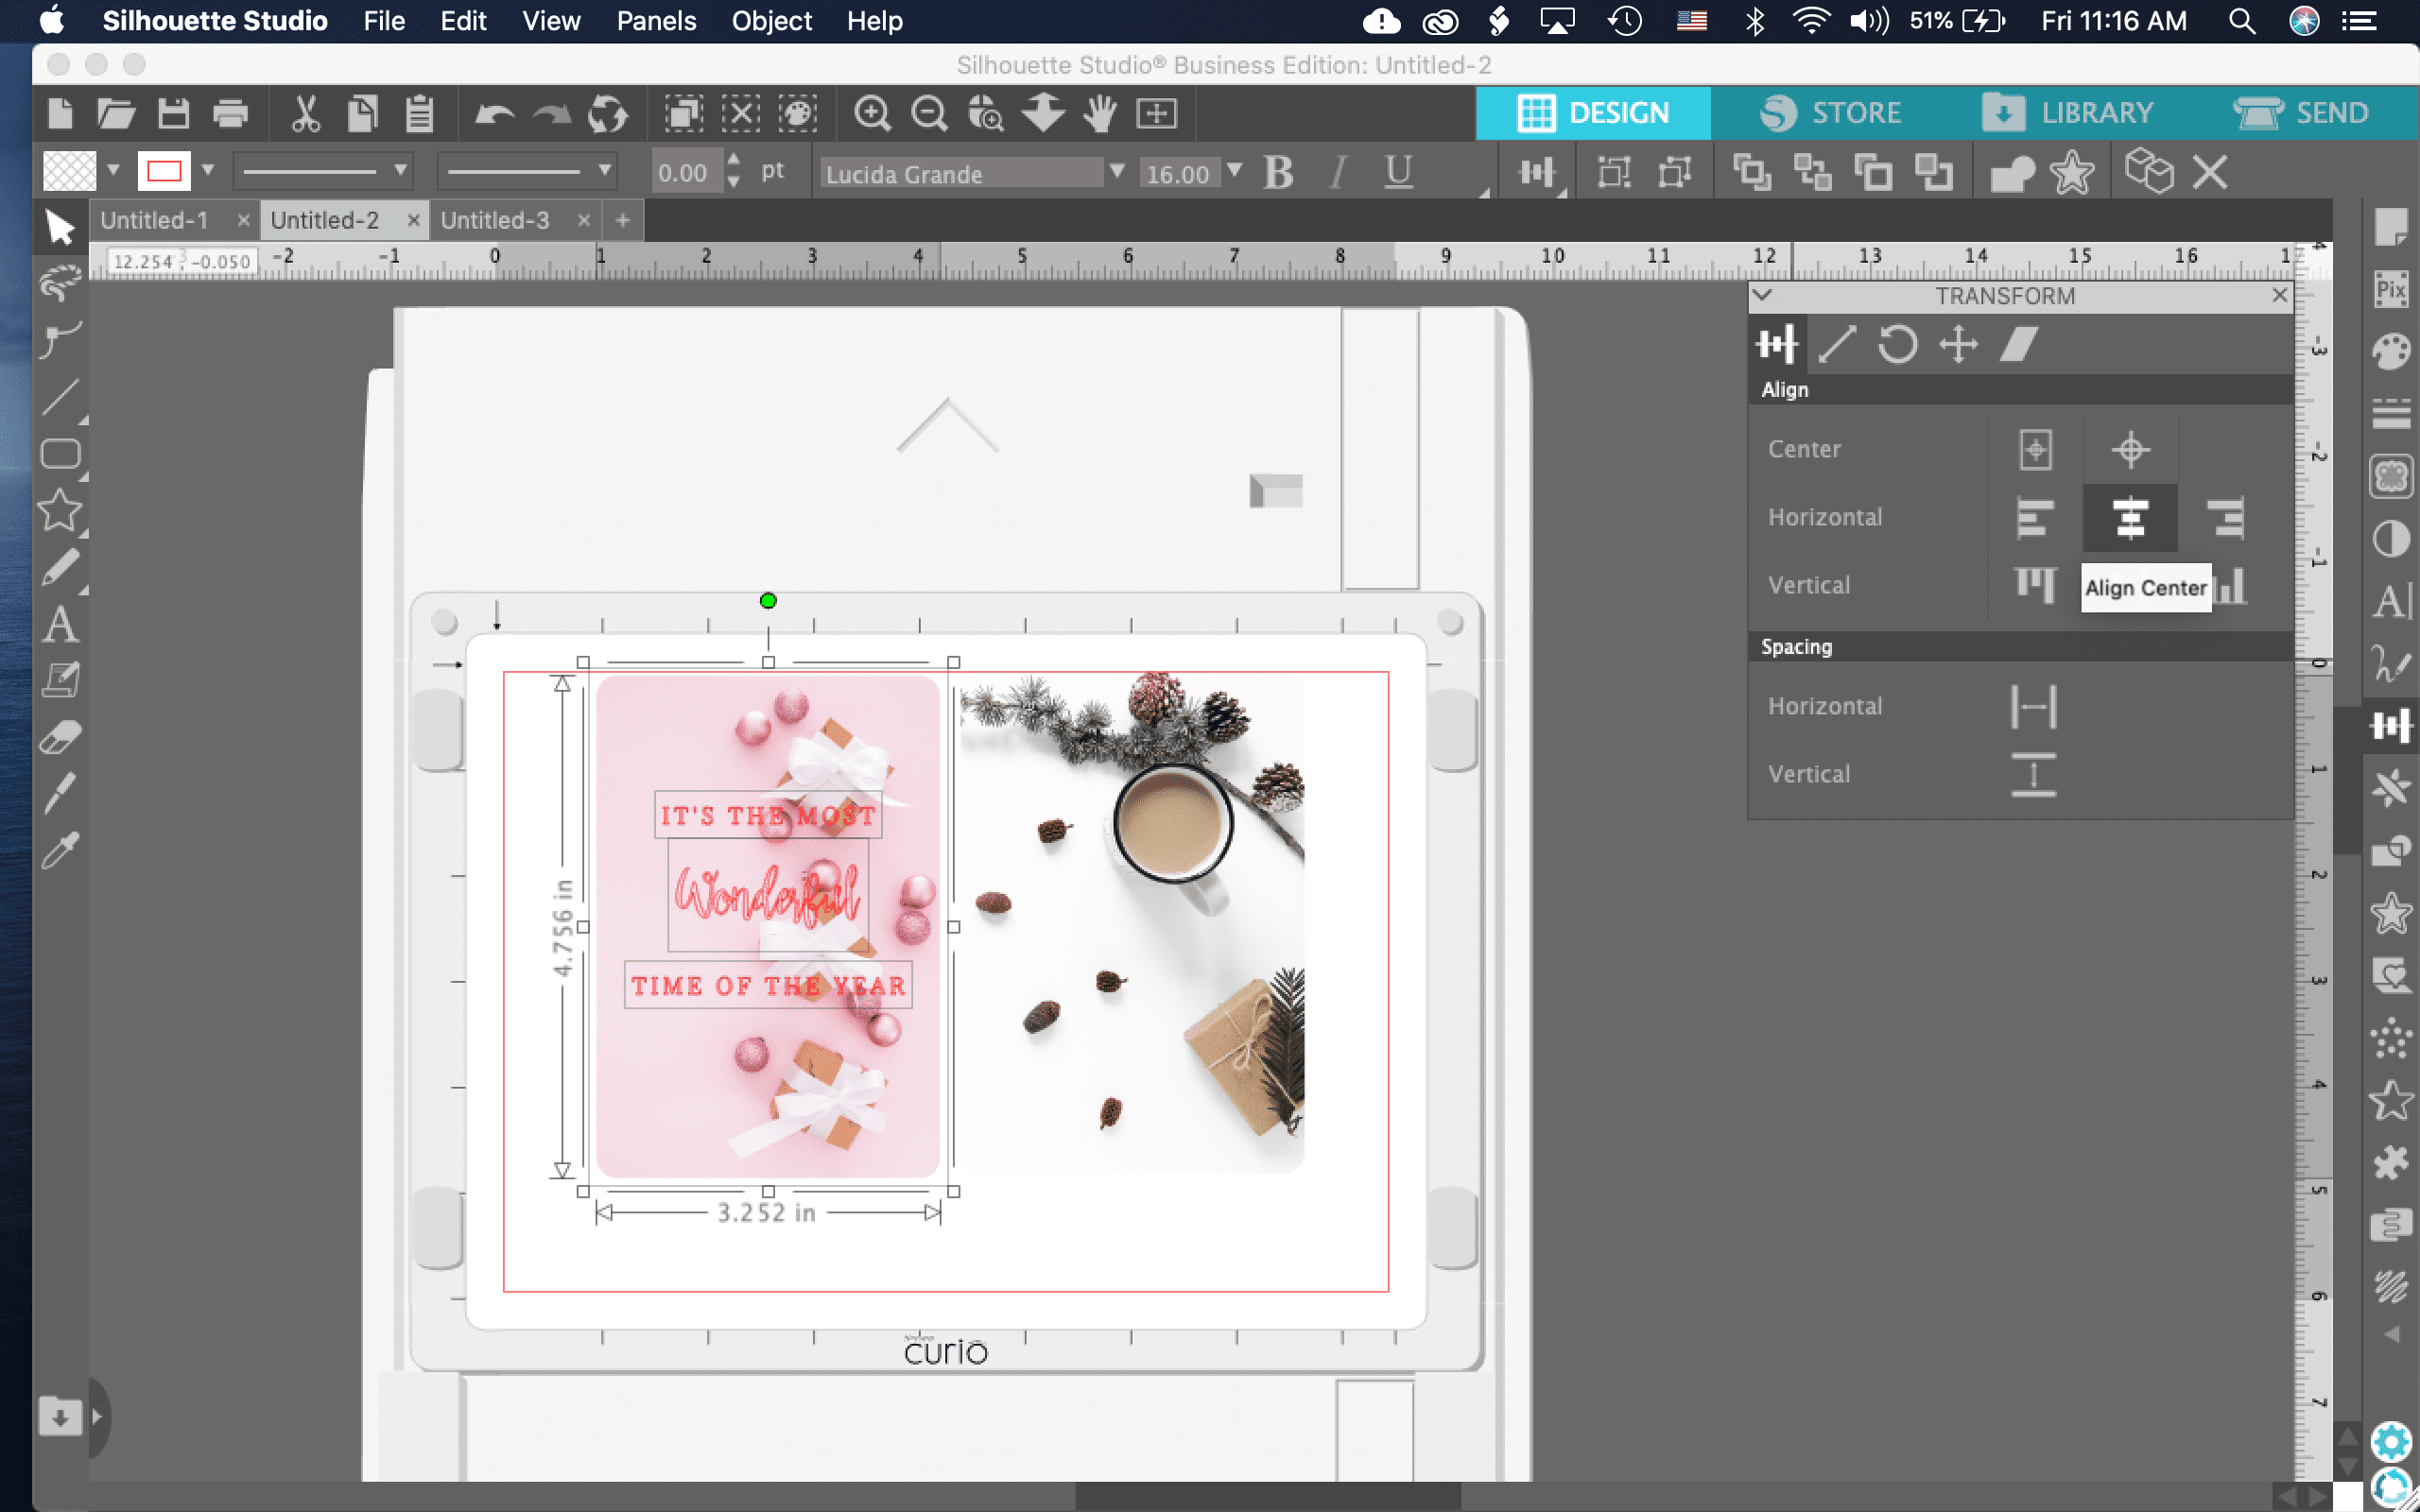
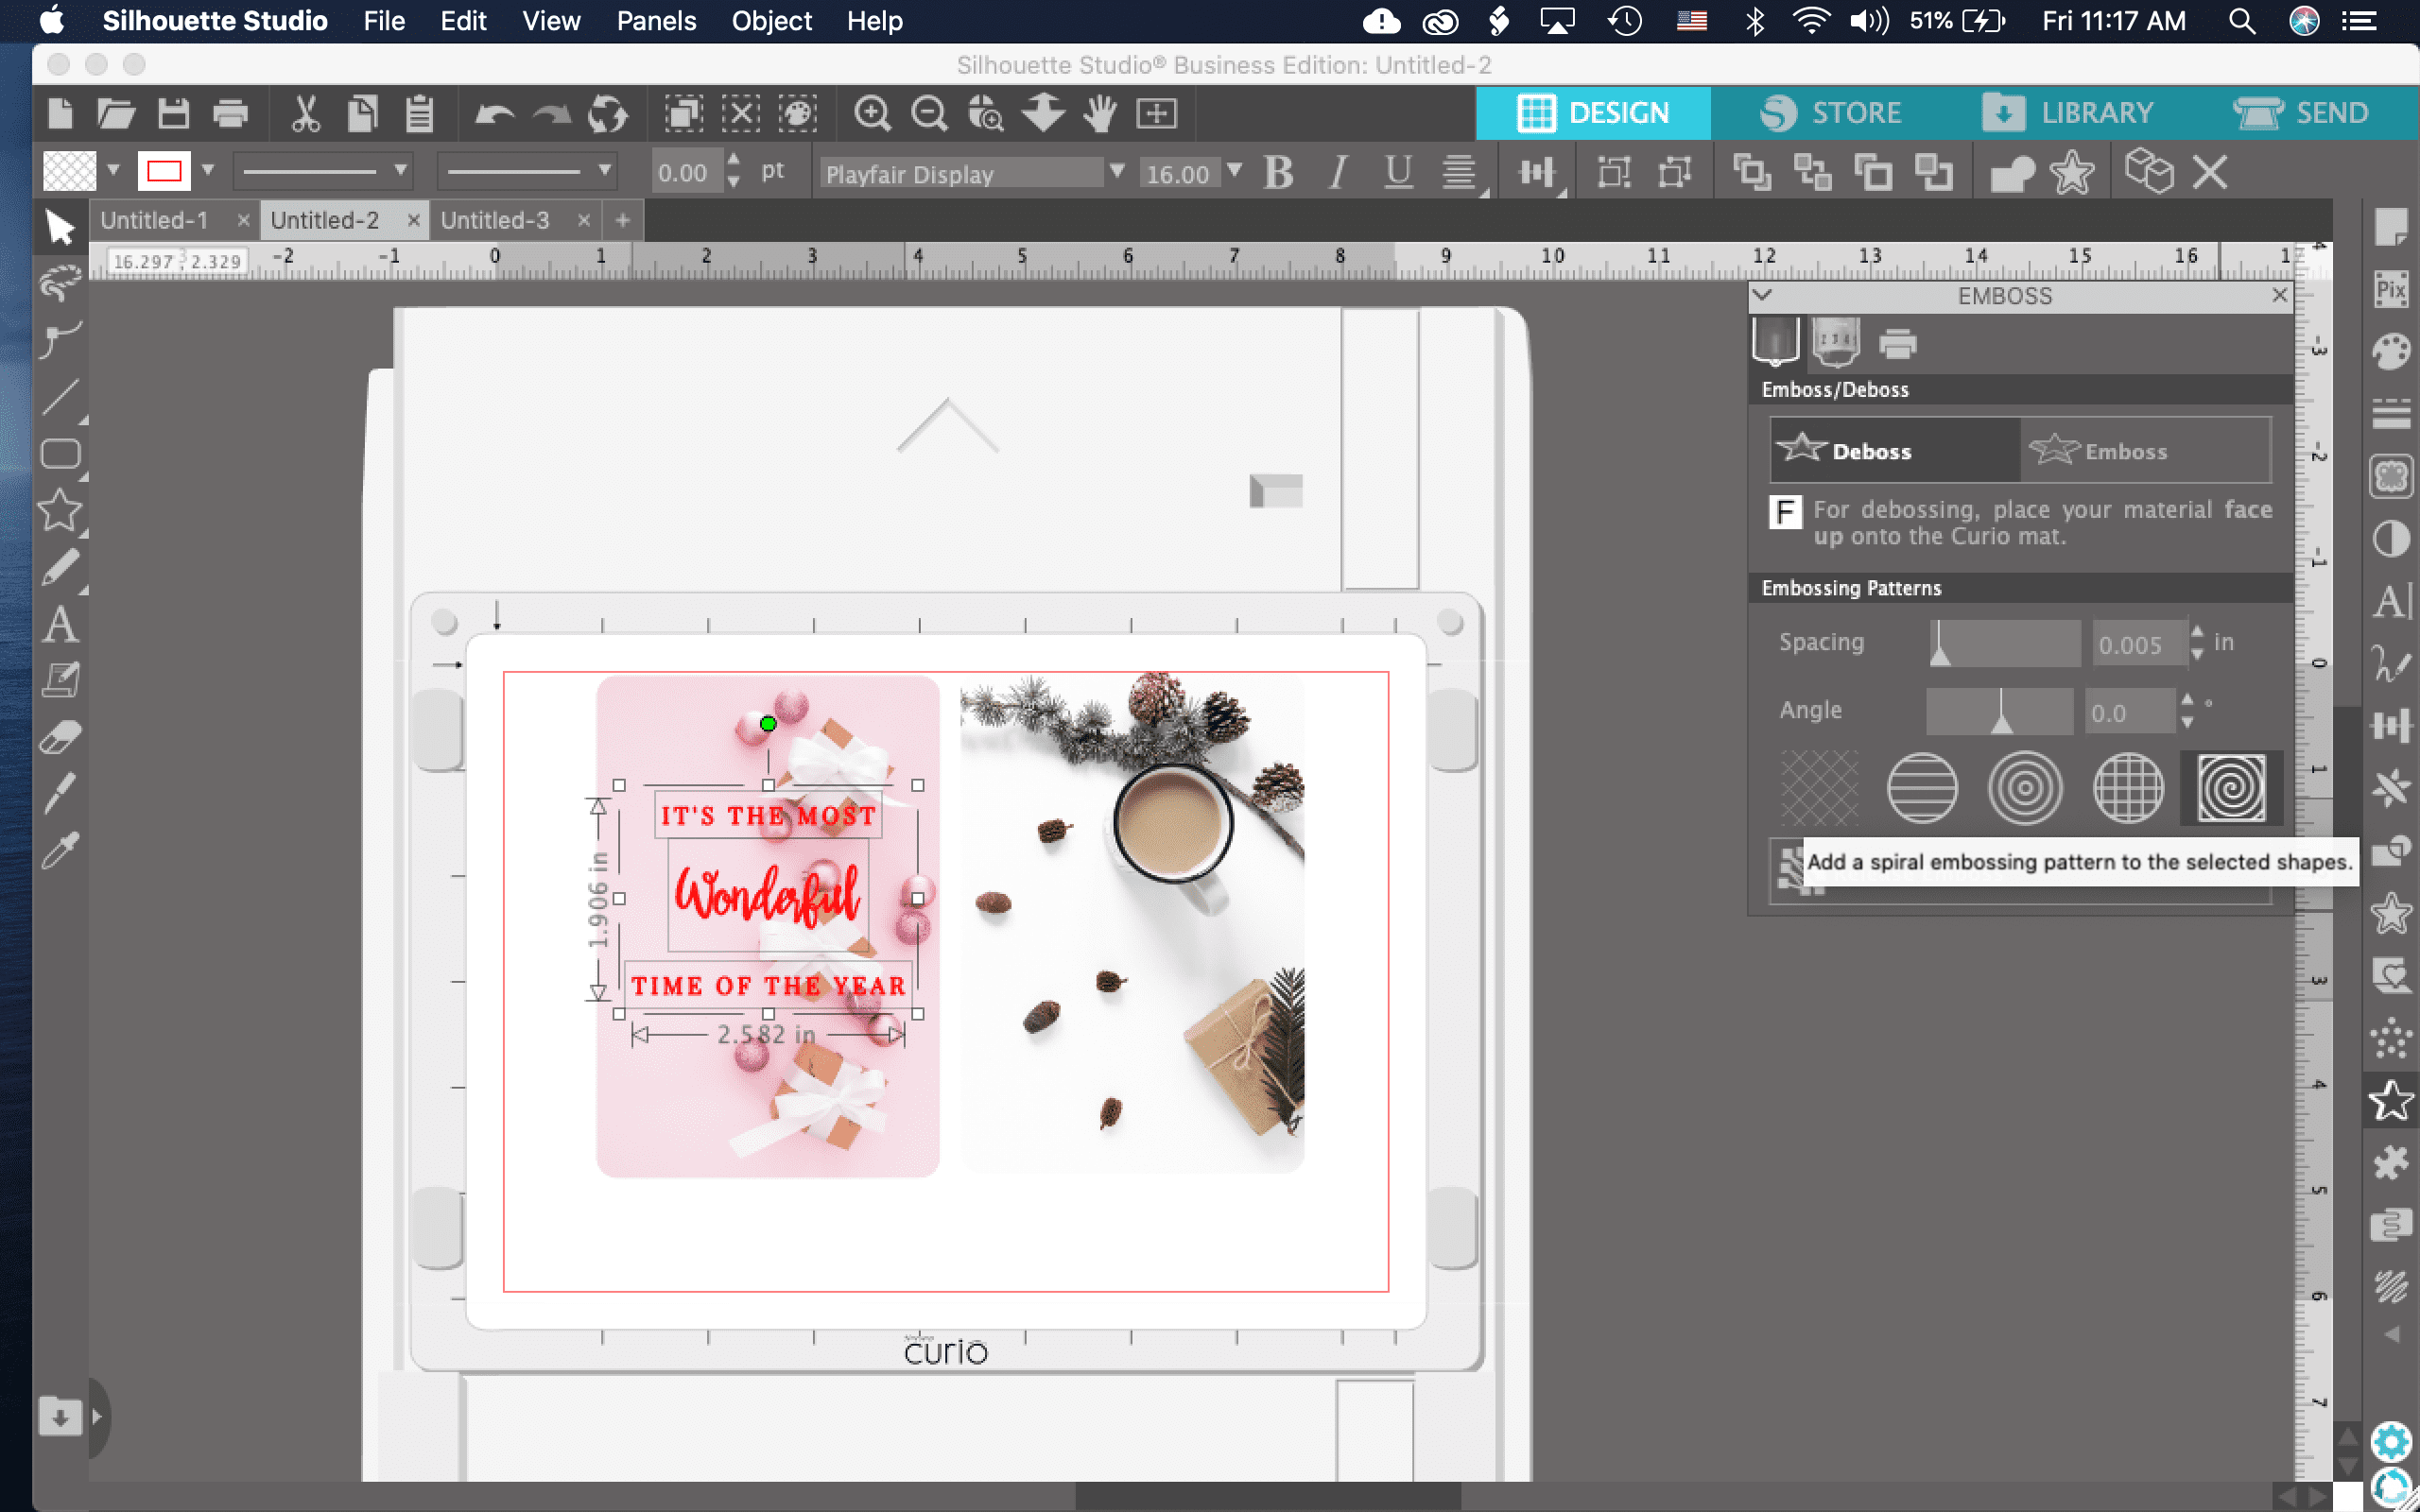
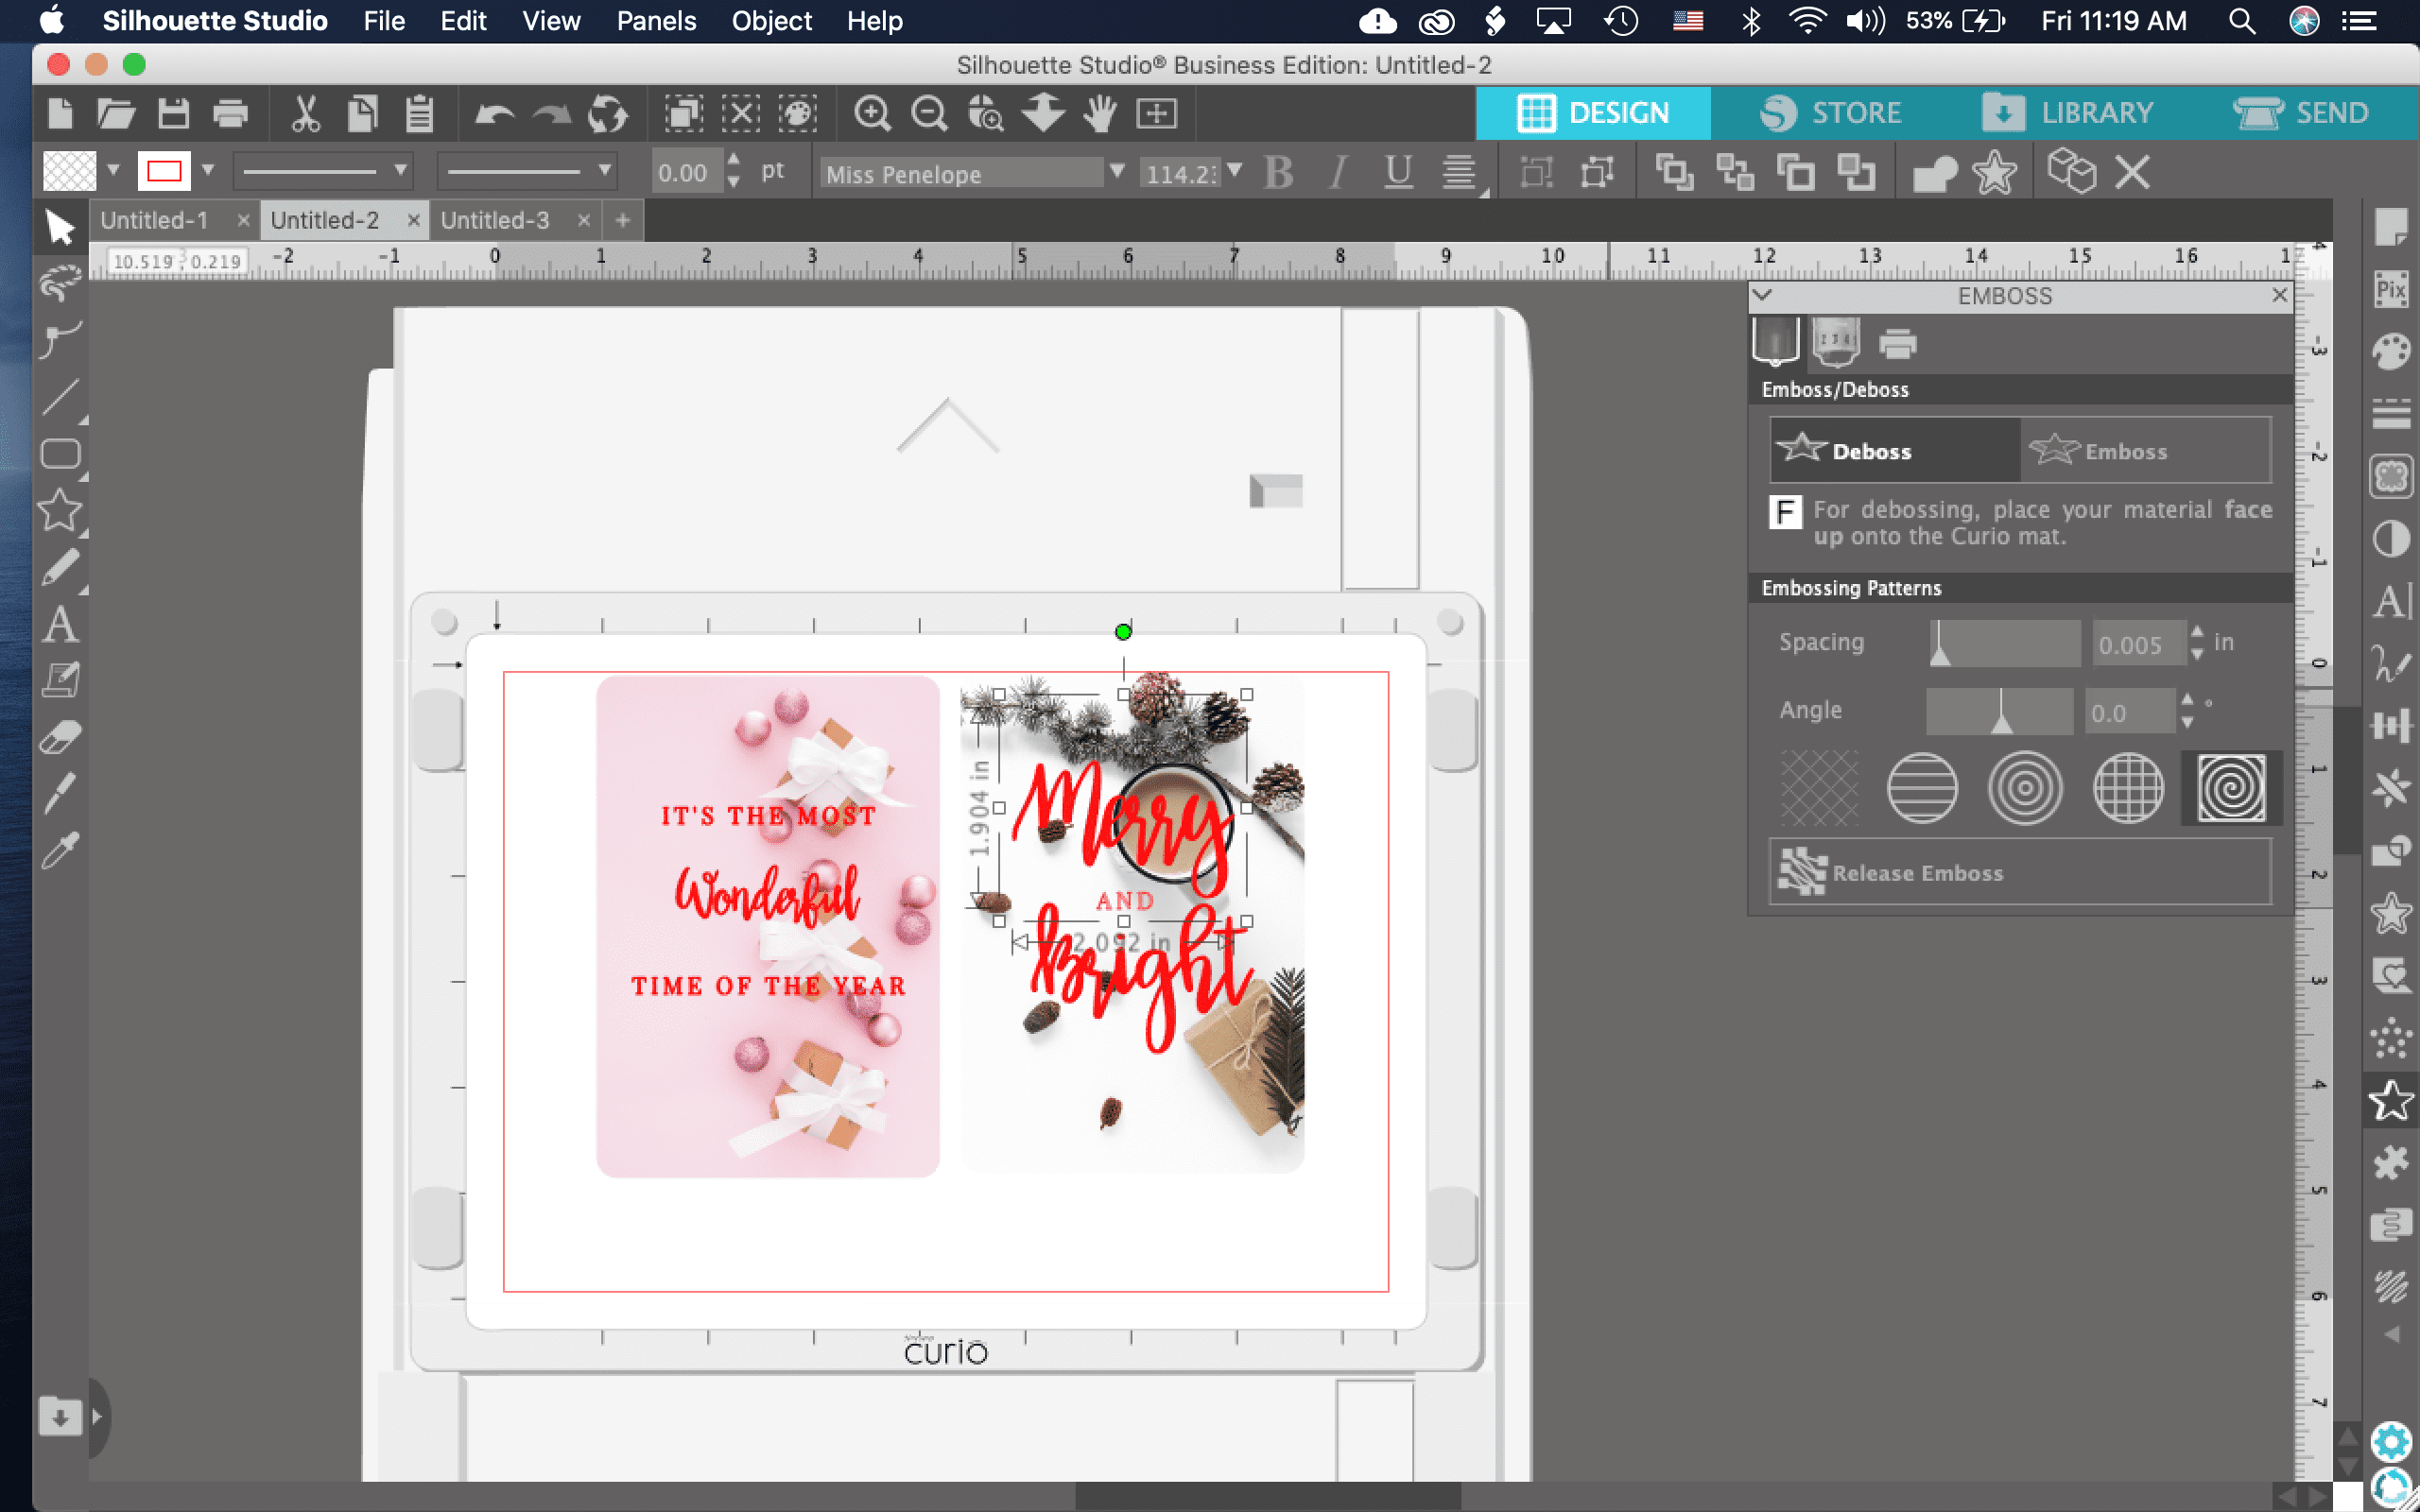
Next, create your text for your foiling details. I went with some quotes, but you can also just use shapes like stars, snowflakes, hearts etc. and make a pattern from it.
When designing your quotes use fonts you like and mix them up with script & print. You can also play with the character spacing to space it out a bit too. Once you’re happy with your text, center it above the background dashboards.
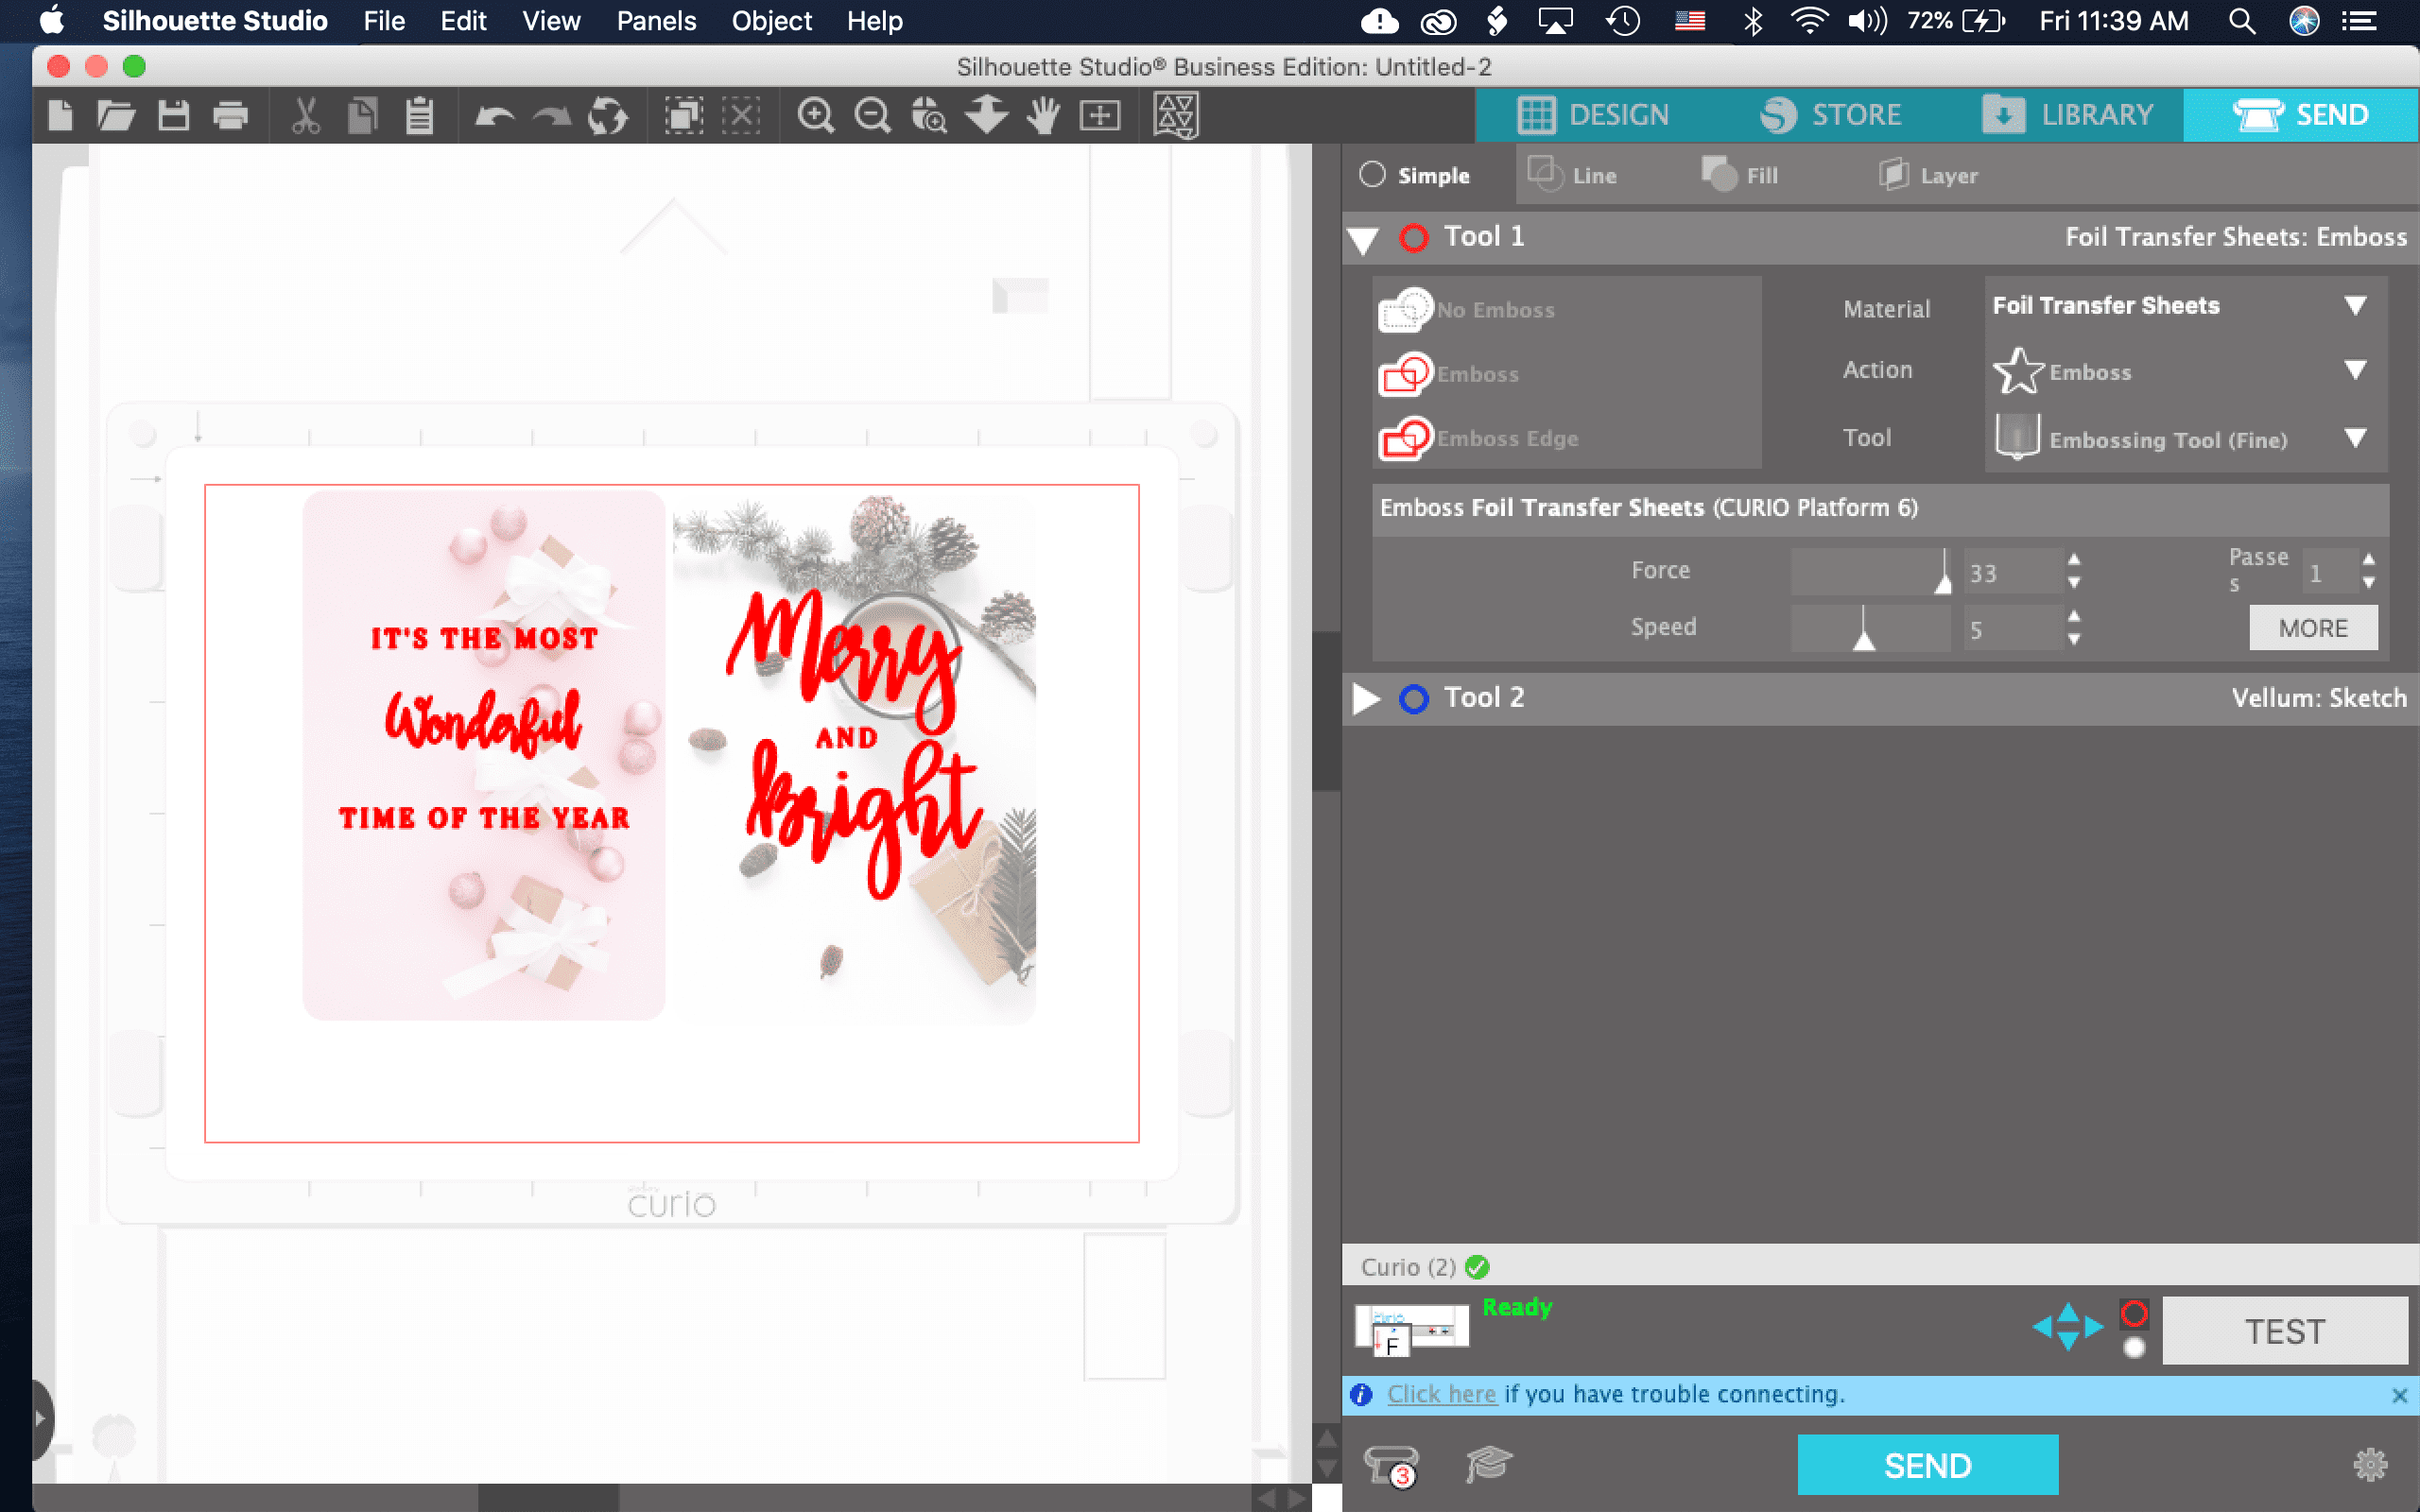
After that, click the text or design, and go to the emboss panel. For the emboss panel to show up, your Curio has to be connected to your machine with the platform loaded in as well. Then click on deboss, and click the spiral fill pattern and change the spacing to the smallest spacing possible (0.005in). This makes sure the words are all filled in and not just an outline.

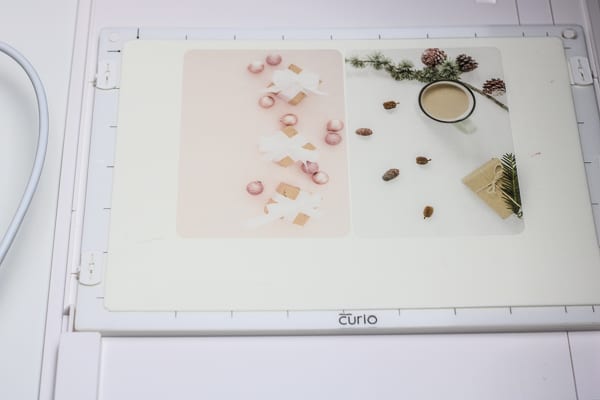
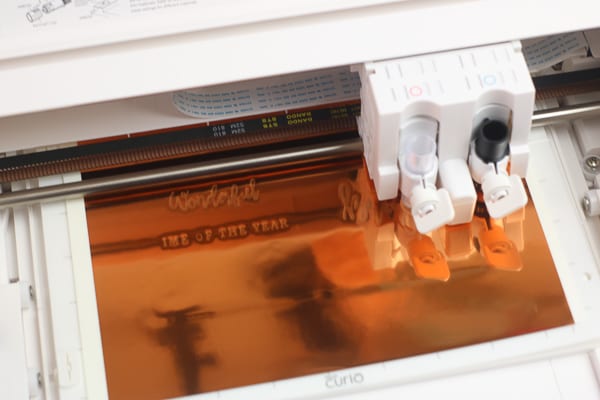
Step 4: arrange Your design & foil Transfer sheets onto the embossing mat
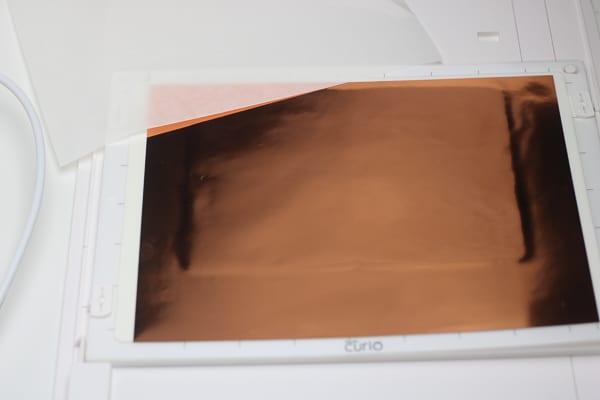
Now you will need to set up the Curio mat onto the platform. I used all the platforms and mats because vellum and foil are very thin materials. Meanwhile, I made sure I placed the pocket dashboards onto the mat to match my workspace in Silhouette Studio. After that, I took the foil transfer paper, removed the backing, trimmed it then placed it on top of the dashboards. (I had some trouble with the foil sticking to the mat, next time I think I would only trim just enough for the design so there is nothing that gets left on the mat, luckily the tape removed most of it from the mat.)
Here’s a quick little video from Silhouette showing how to use the foiling sheets too:
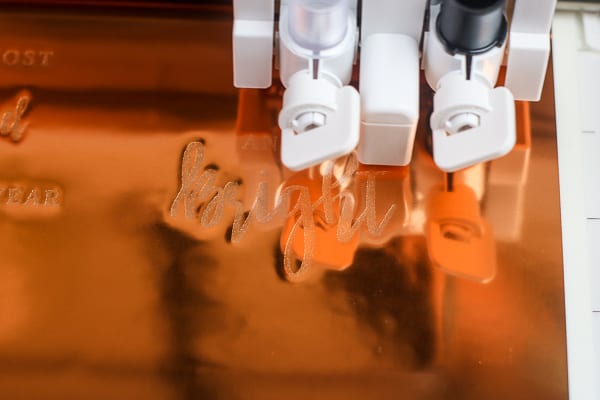
Step 5: send the material to emboss in the curio
Finally, place your platform all the way into your machine and press the arrows on the side of the machine to load it. The tool carriage should be right where the arrows of the mat are. Go to Silhouette Studio and make sure your settings are as follows:
- Emboss
- Material: Foil Transfer Sheets
- Action: Emboss
- Tool: Embossing Tool (fine)
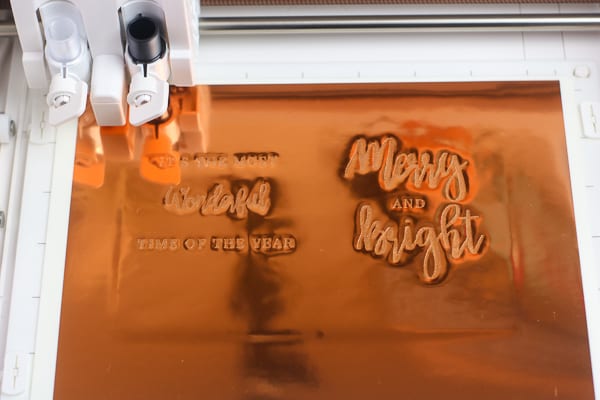
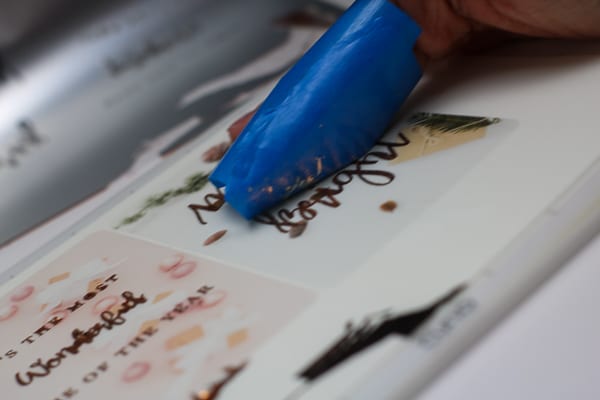
step 6: clean up with tape
Now the design may look a little bit messy but don’t worry! Just grab some masking tape, roll it around your fingers, and gently pat over the design and it will lift up any excess foil that wasn’t embossed.

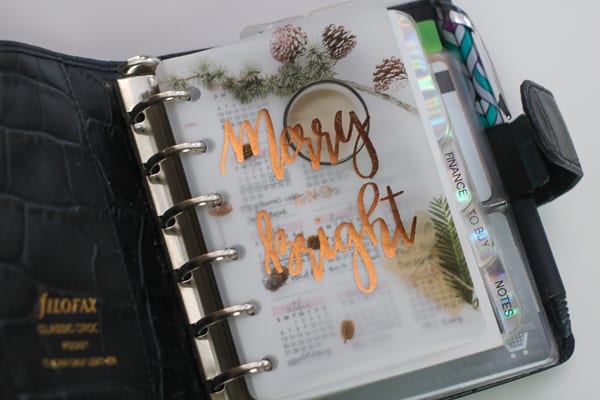
Step 7: Punch holes for your planner & enjoy!
The last step now is just get your planner punch and punch it out for your planner! For the pocket sized I used my 6 hole punch from amazon, this can be used on pocket, personal, a6, & a5! If you have a happy planner or arc, use a disc punch. Then simply place it in the front of your planner or as a divider and enjoy your shiny new planner dashboard!
The beauty of the Curio is the embossing/debossing feature. If you don’t have foil transfer sheets you can still have beautiful vellum dashboards with a cool and pretty dimension by just embossing or debossing it.
I hope this little tutorial was helpful for you! Have you tried to make your foiled vellum dashboards with your Silhouette Curio yet? Give it a try and let me know how it turned out below!

Click here and use code 10OFF to get 10% off regular priced items (bundles and promo items not included).