
This post was sponsored by Silhouette America. The opinions are completely my own based on my experience.
It’s almost November and I haven’t decorated a fun Fall spread at all in my planner! It really hasn’t been feeling a lot like Fall here in California though. But with November just around the corner and all the holidays starting, it is sure to start soon!
I absolutely love my bullet journal. I never felt bullet journaling was for me because I felt I wasn’t artistic enough to draw out such pretty pages every week. But being able to create your very own planning system that caters to you and your life is the best thing to ever happen to a planner girl like myself. I can plan for everything I need, and all I need to do is pick up my journal and my favorite pen.
For most of us, our bullet journal never turns out like the ones we see all over the internet. We love the simplicity of planning and keeping track of our tasks, appointments and random thoughts. But we want more. We want that creative outlet. We want to keep these journals for years, look back on memories, and draw fun doodles in it whenever we have some time. Wouldn’t you love to do this as you plan your day? But how can we do this when we’re not artists? How can we make sure our spreads are pretty and won’t make us want to tear the pages out every time we mess up?
With stencils of course!
Stencils aren’t only great for pretty spreads though, it’s a huge time saver as well! If you create the same layouts every week but dread counting the number of dots it takes to create your boxes or want perfect circles or boxes that are evenly spaced creating your own custom stencils will definitely come in handy!
Today, I am going to show you how simple and easy it is to make pretty stencils for your bullet journal so you can have beautiful monthly, weekly and daily spreads, with your Silhouette Cameo or Portrait.
[bctt tweet=”Learn how to make pretty stencils for your bullet journal so you can have beautiful monthly, weekly and daily spreads, with your Silhouette Cameo or Portrait!” username=”wendafuldesigns”]
…Let’s get started!
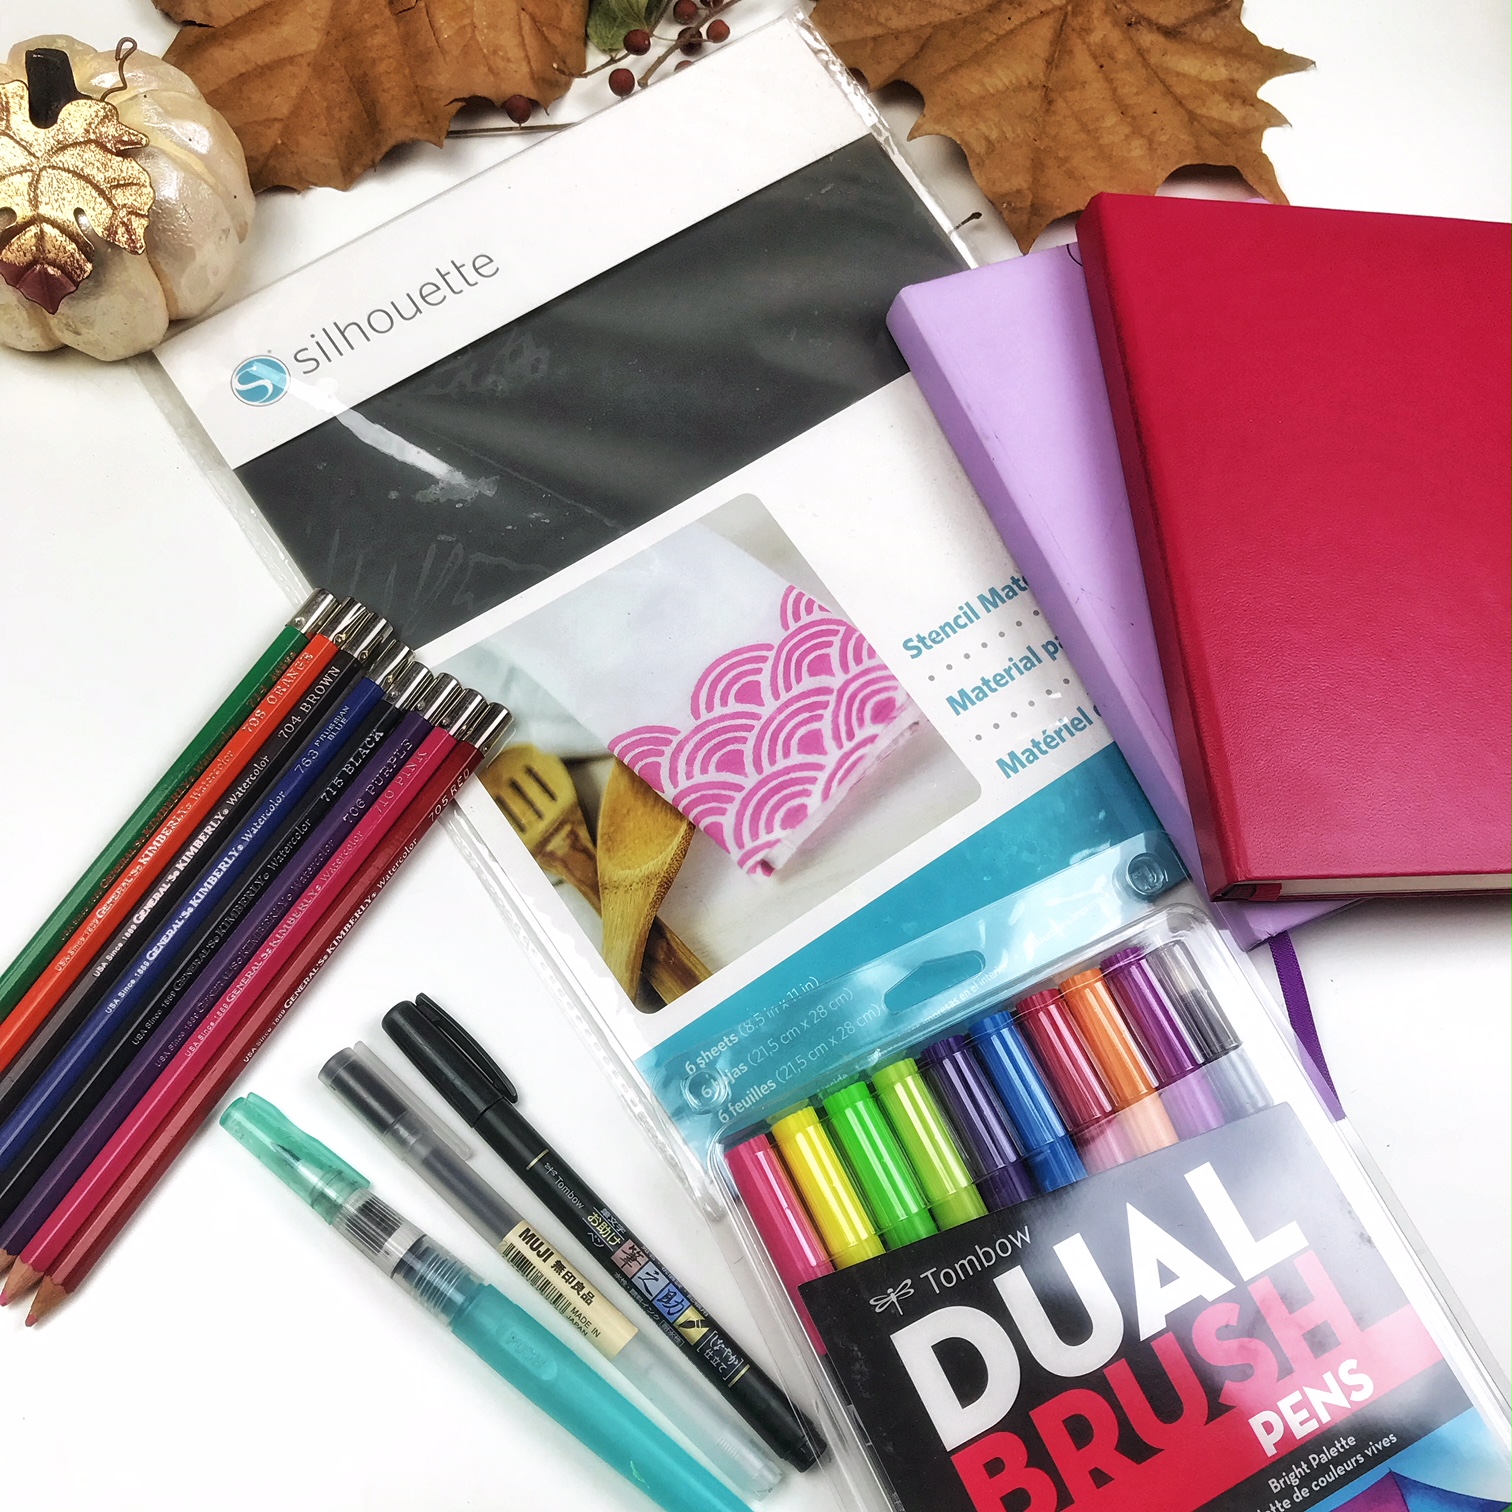
Table of Contents
Supplies Needed:
- Silhouette Stencil Material – Non Adhesive
- Silhouette Studio
- Silhouette Cameo or Portrait
- Fall Stencil Designs
- Other Stencil Designs
- Fine Point Pen or Pencil
- My favorite is my Muji Pen
- My favorite is my Muji Pen
- Coloring Tools of choice
- I personally love using water color pencils
and a water brush
- I also like using Tombow brush markers
- I personally love using water color pencils
- & Your Bullet Journal
- Erin Condren Dot Grid (what I am currently using)
- Leuchtturm 1917 Dotted Medium
(what most bullet journalers use)


Step One: Cut Out Your Stencil Designs
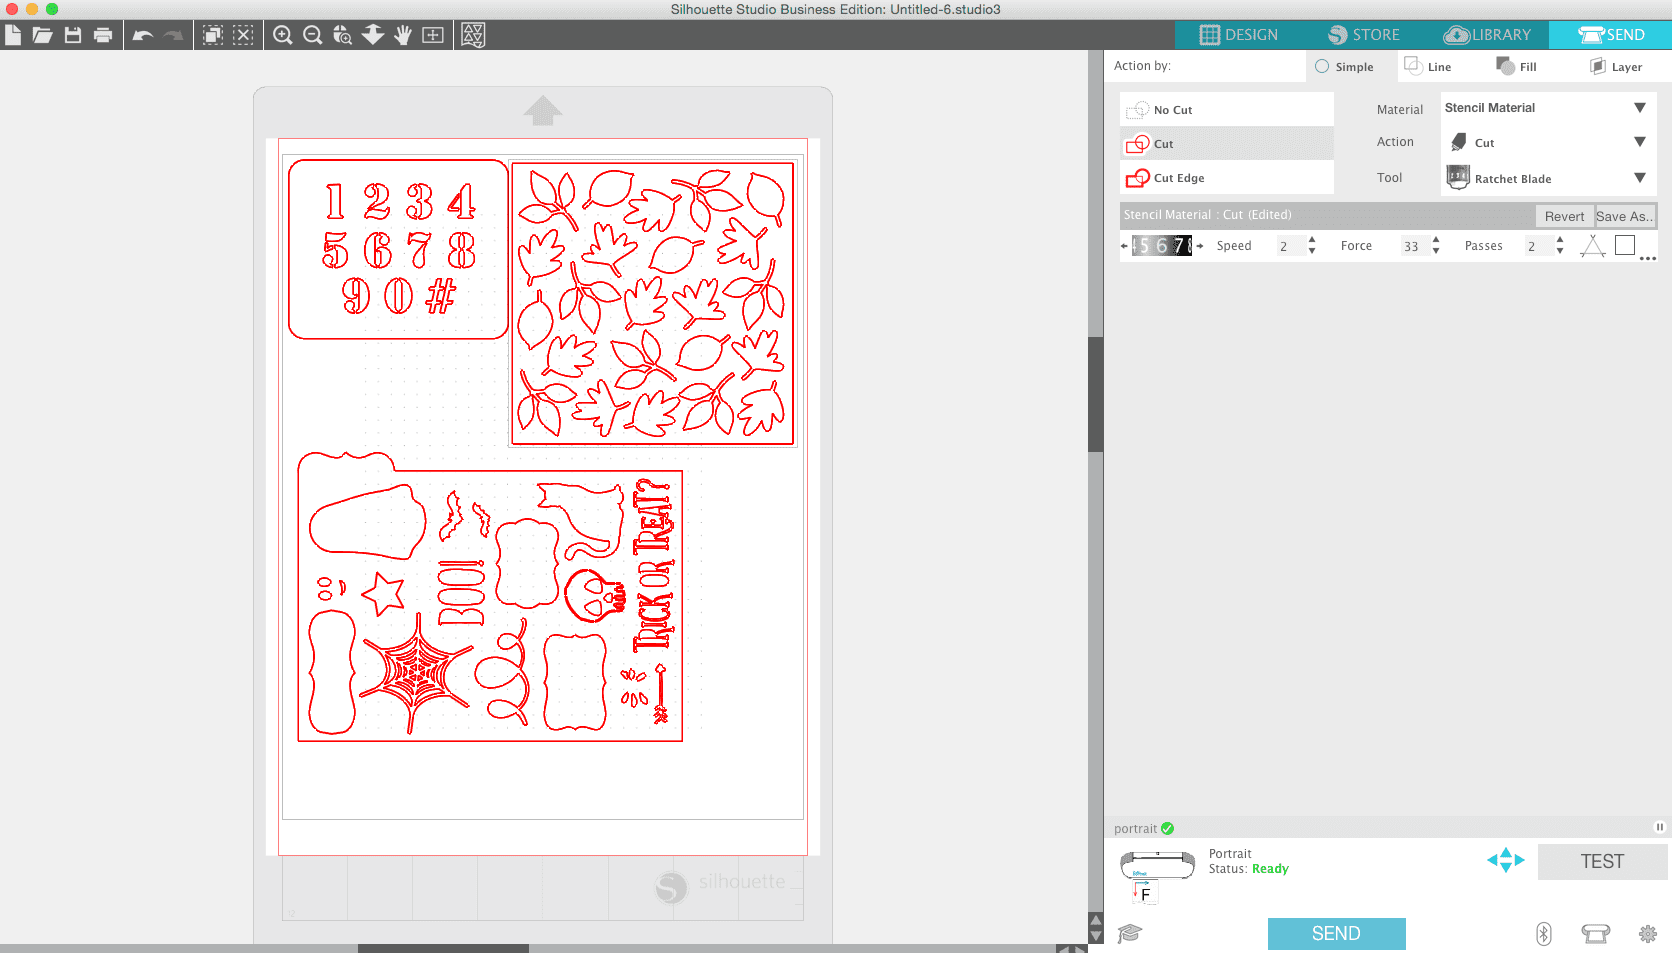
Setup Your Workspace. Click on the Page Setup Panel and adjust your page to the dimensions of your material or machine. In this case, we are using the PORTRAIT and the stencil material is 8.5 in. x 11 in.
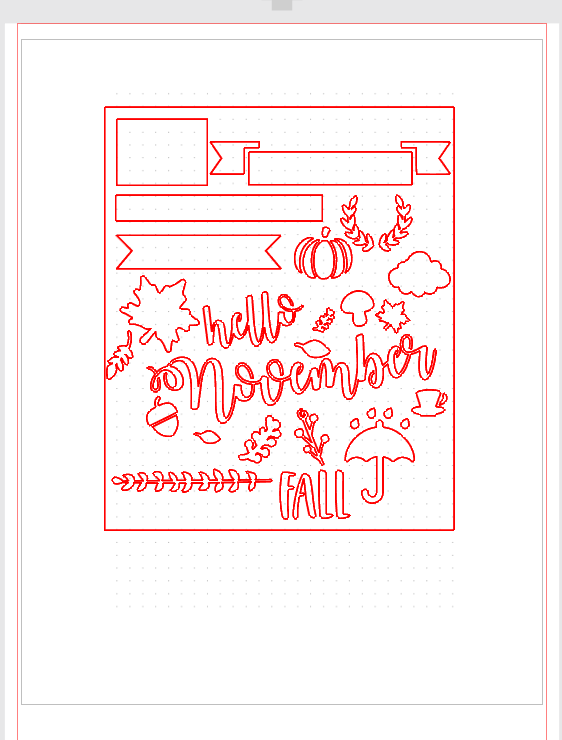
- Find your favorite stencils in the Silhouette Design Store or download the freebie I posted above.
- Resize them as you like and lay them out onto your mat. I don’t like to waste stencil paper so I try to fit as much as I can onto one stencil paper.
- Send your design to machine and choose “Stencil Material”
- I love these stencil material sheets as they’re completely reusable!
- I raised the blade and number of passes on my settings so it can cut through completely without me having to weed out anything
- Start Cutting!
- Weed out any little pieces that may have stuck
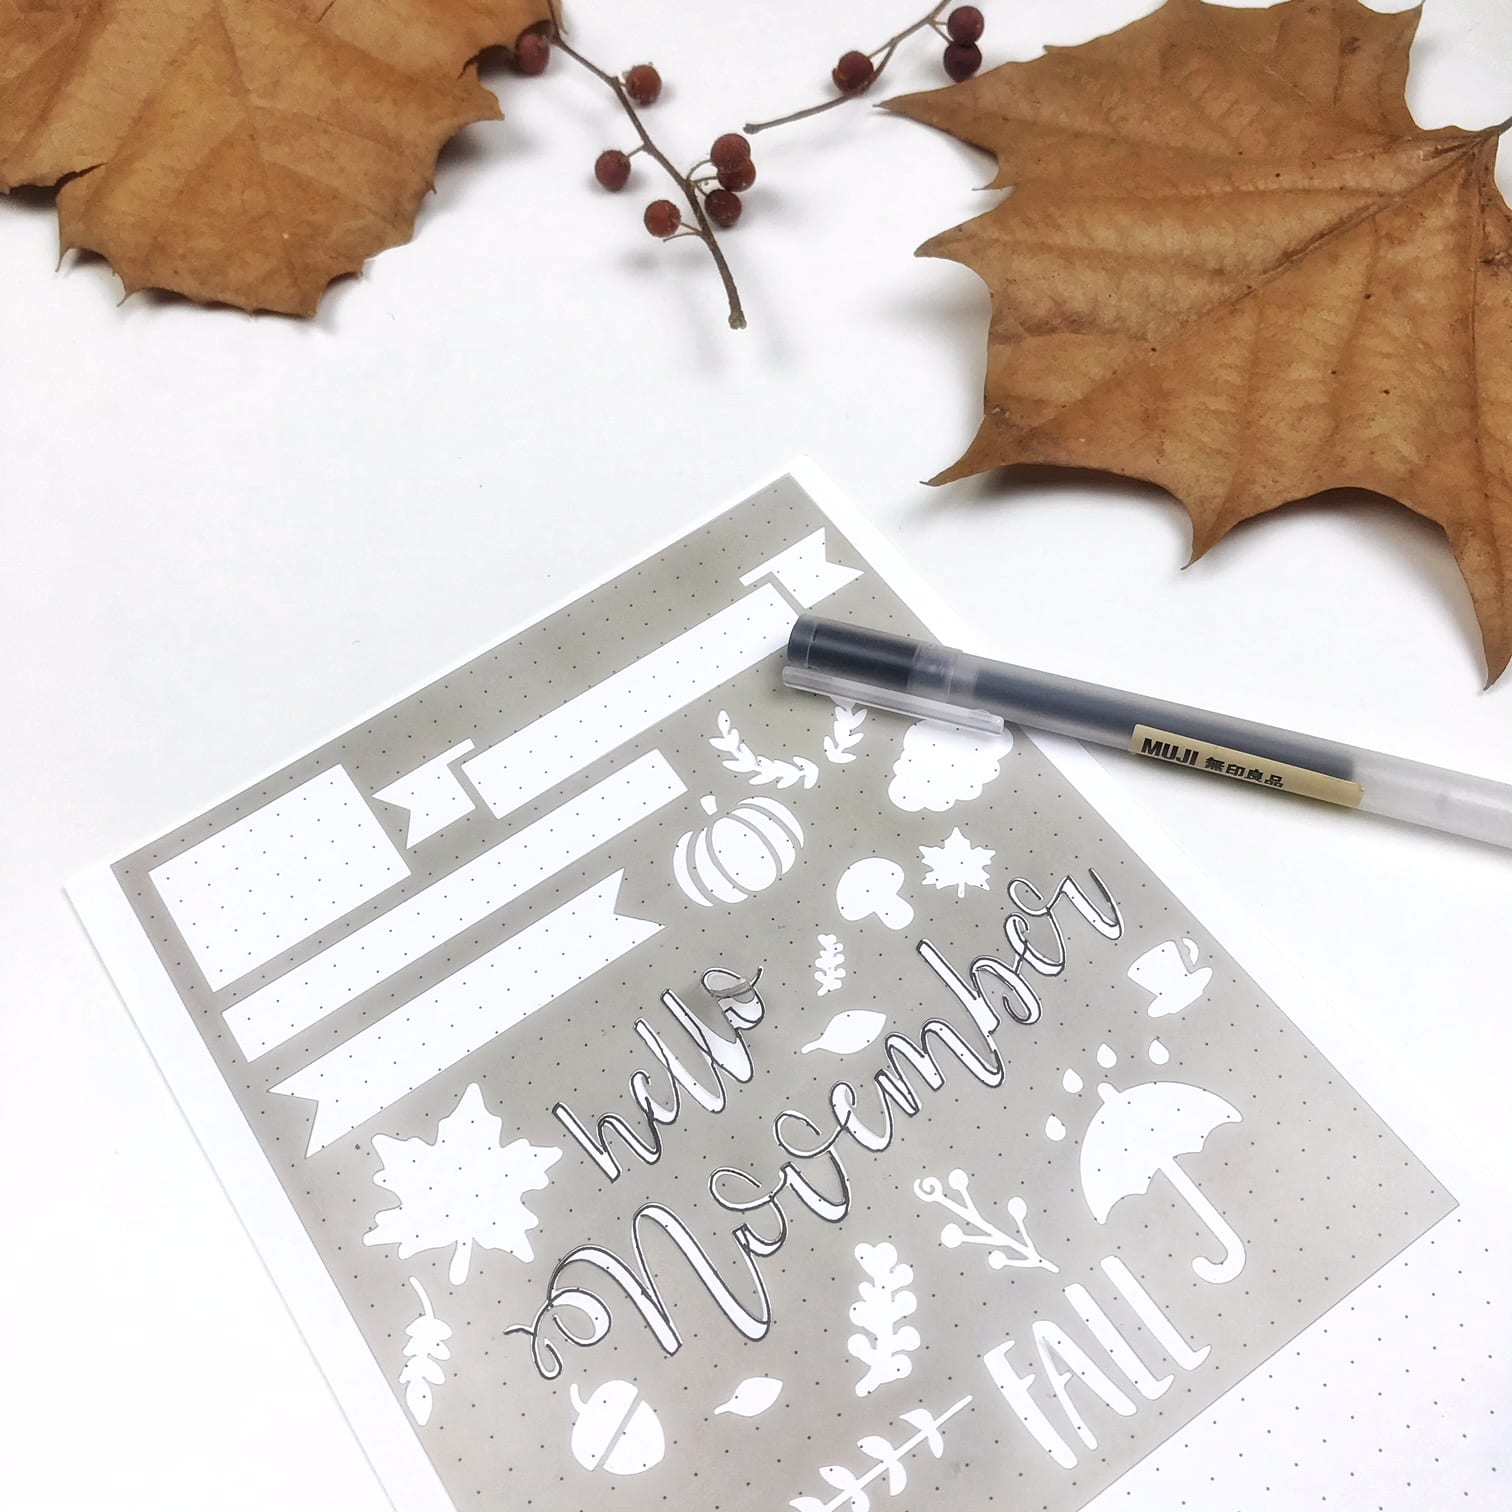
- When finished you should have your stencil all cut out and ready to use!
Step Two: Decorate Your Monthly Spread
-
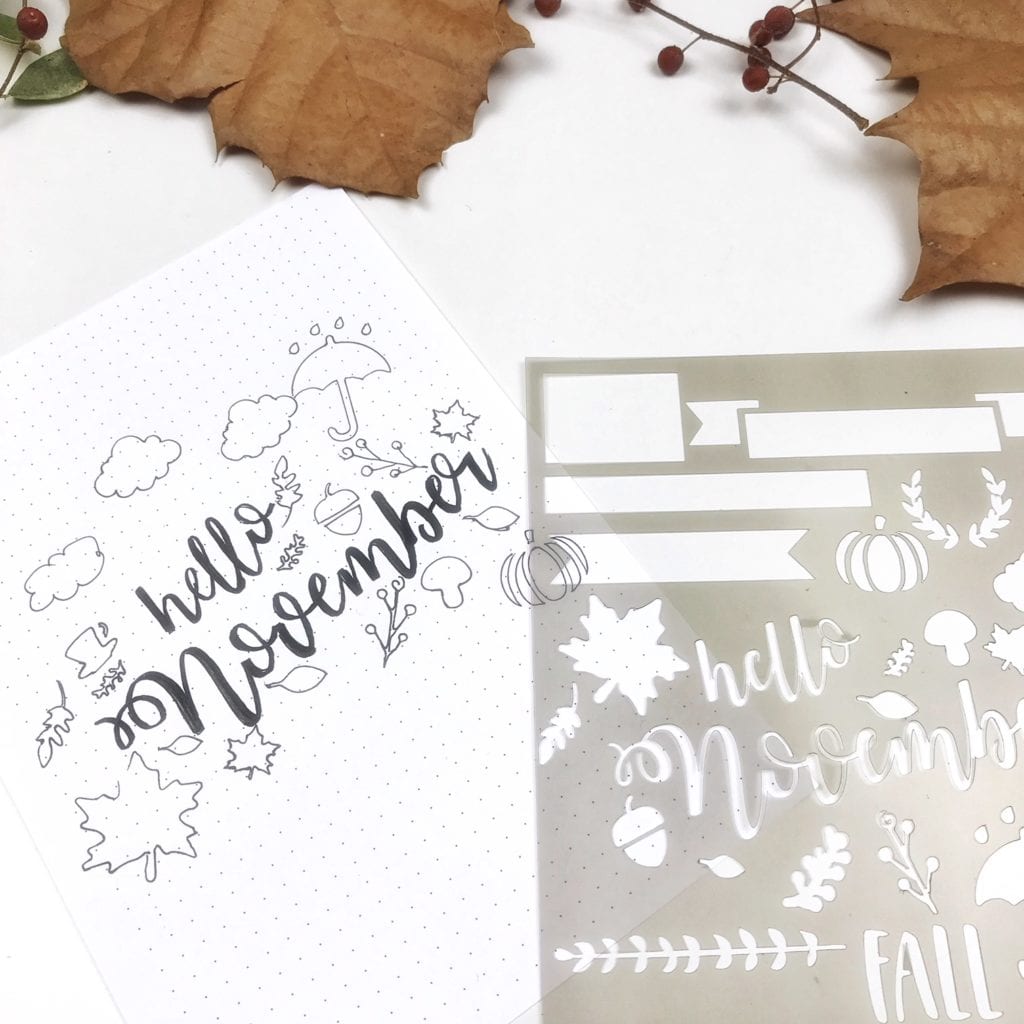
Practice Using Your Stencils. Use a sharp pencil or fine point pen and get used to stenciling in your journal. I printed out some dot grid paper to practice on.
- It’s okay to not fill in the complete design, you just need an easy template to trace.
- You can then go back with your brush marker to make it look more natural
-
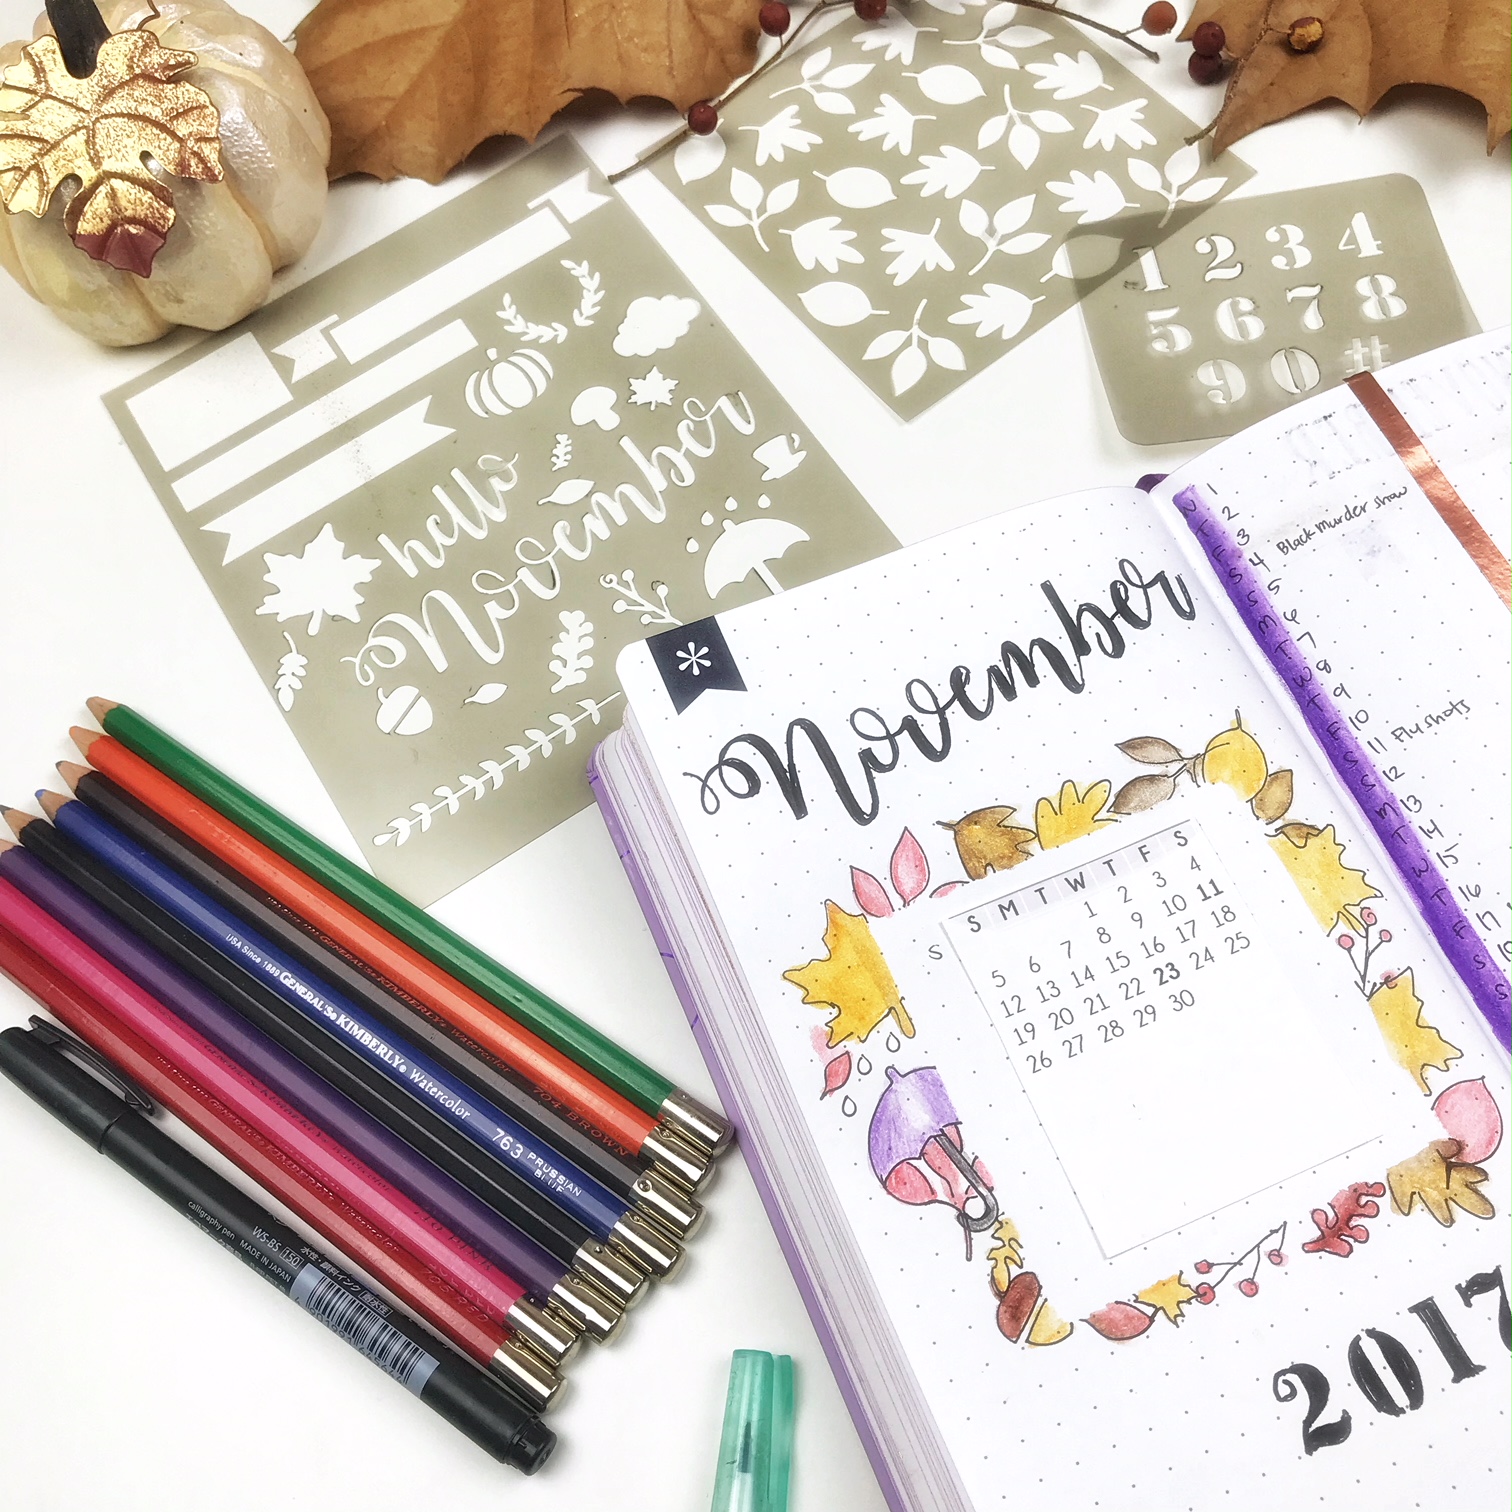
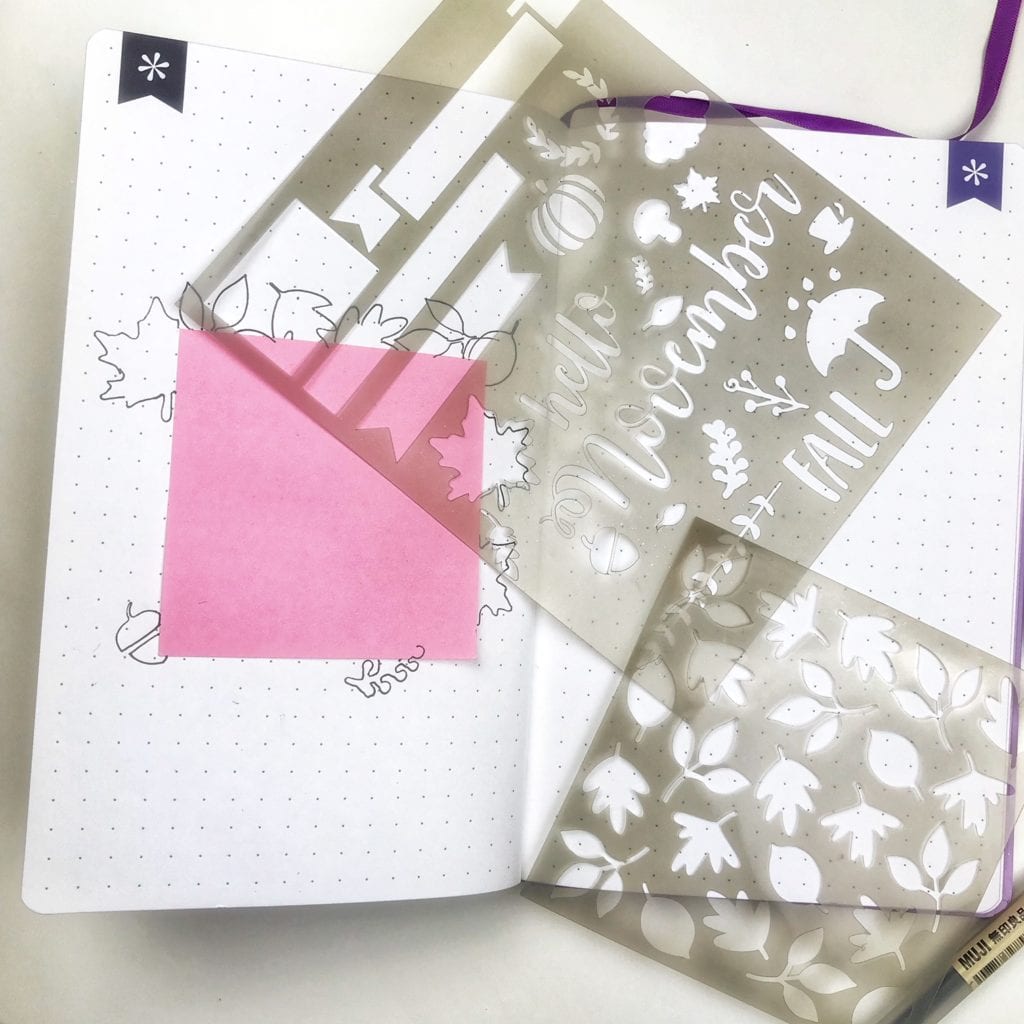
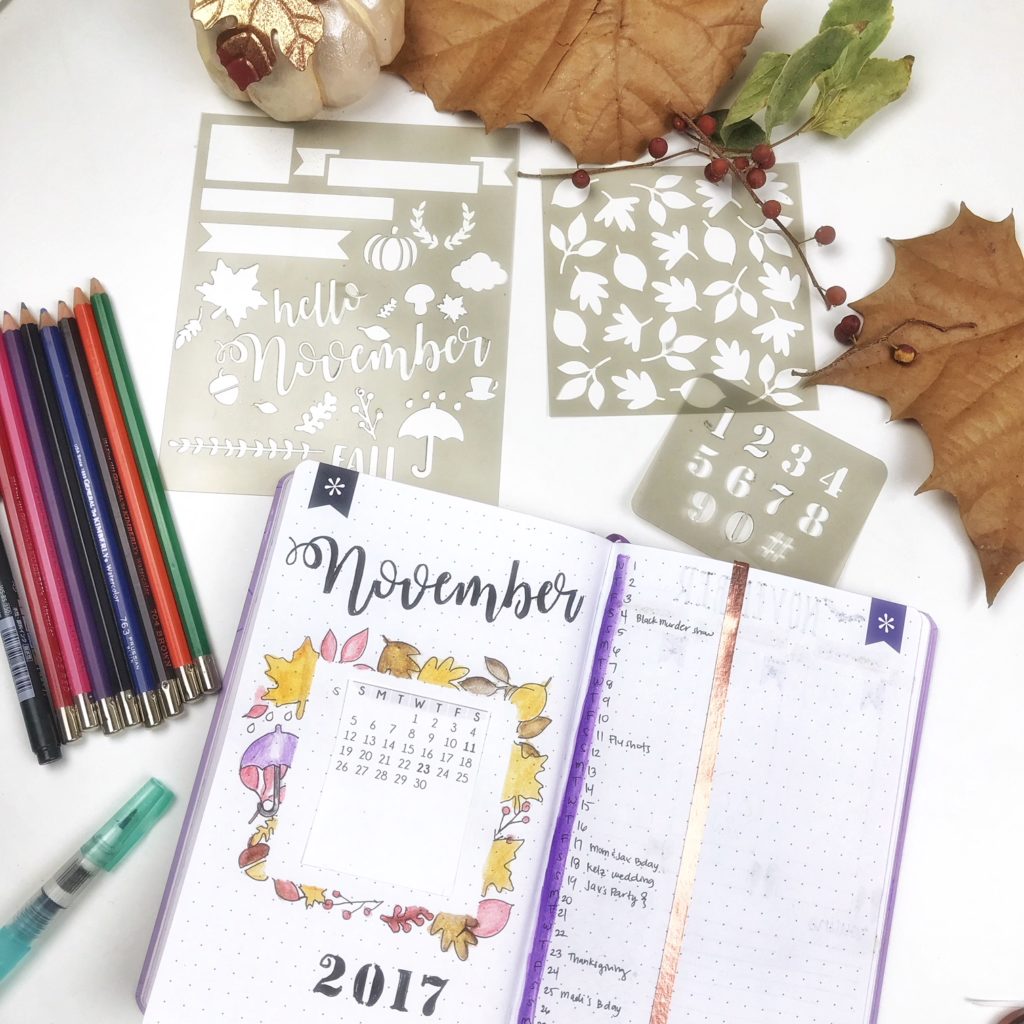
Draw Your Design. Use the stencils to start decorating your monthly page
- You can create a wreath with the doodles or you can make it random like I did below. This is where you can get creative!
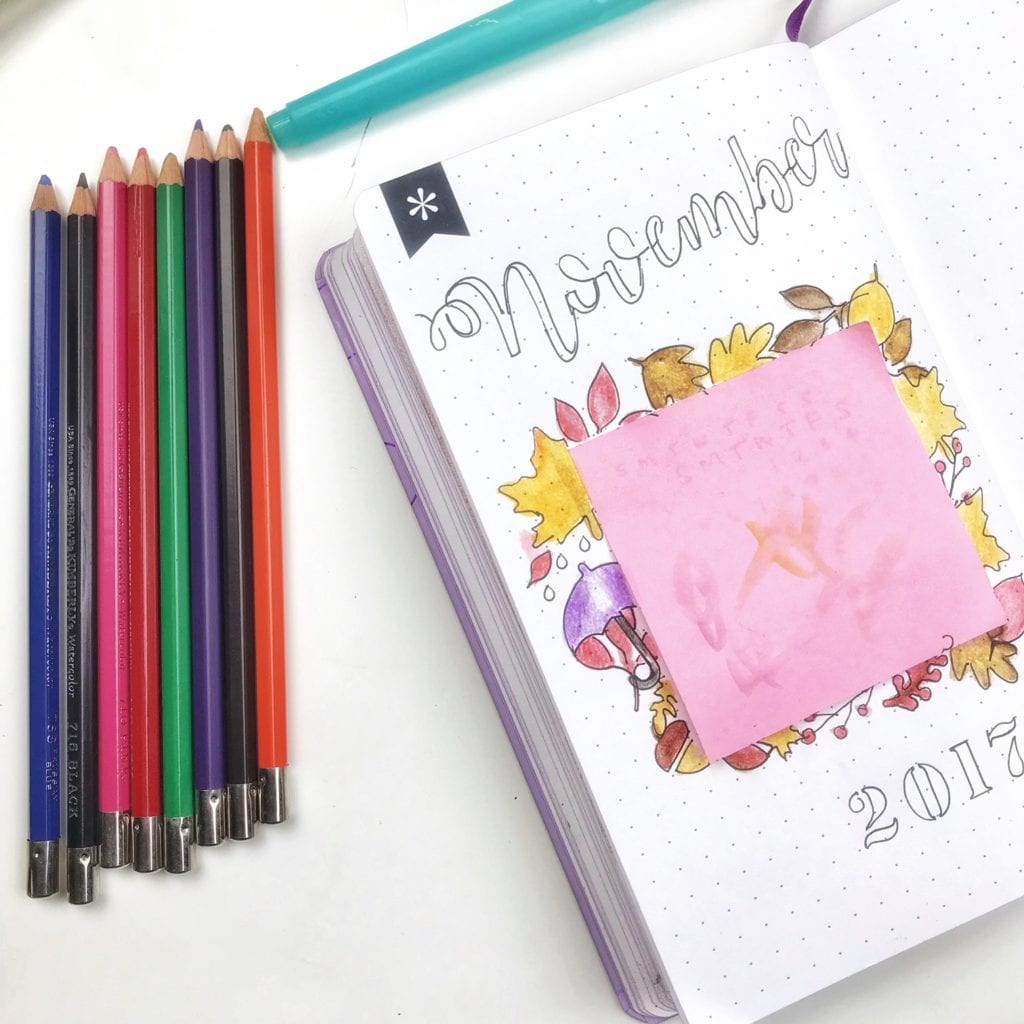
- After you’re all done you will get something that looks like this but don’t worry, it’s not finished yet!
- Another method to create a cool frame look is to use a post-it note or some other shape you’d like and draw around it.
-
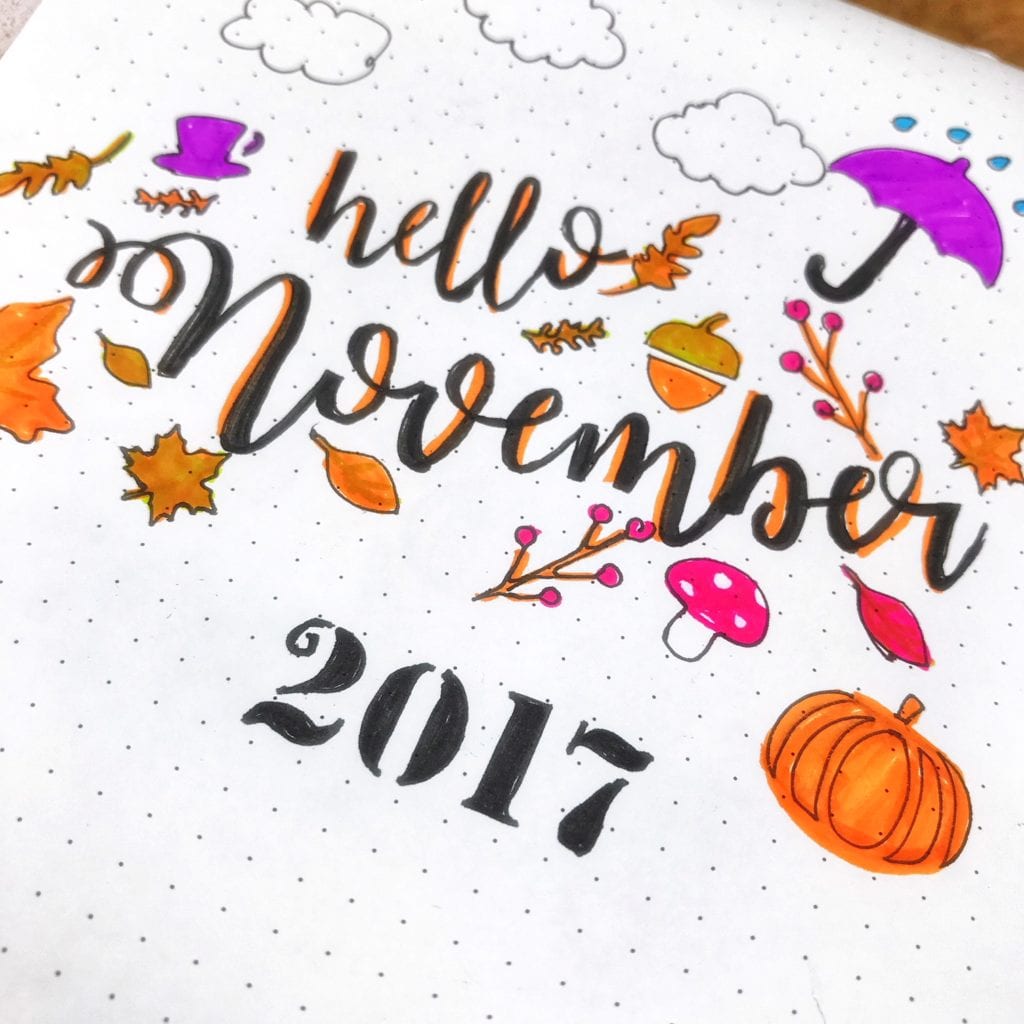
Time to color it in! After drawing your design, it’s now time to color!
- I love using these watercolor pencils with a water brush for easy watercoloring!
- You can also use regular coloring pencils, markers, crayons or whatever you like! The other spread was colored in using Tombow brush pens.
-
Enjoy your beautiful Fall spread!
- This is how my November spread ended up looking like in my bullet journal:
- This is how my November spread ended up looking like in my bullet journal:


Step Three: Decorate Your Weekly Spread
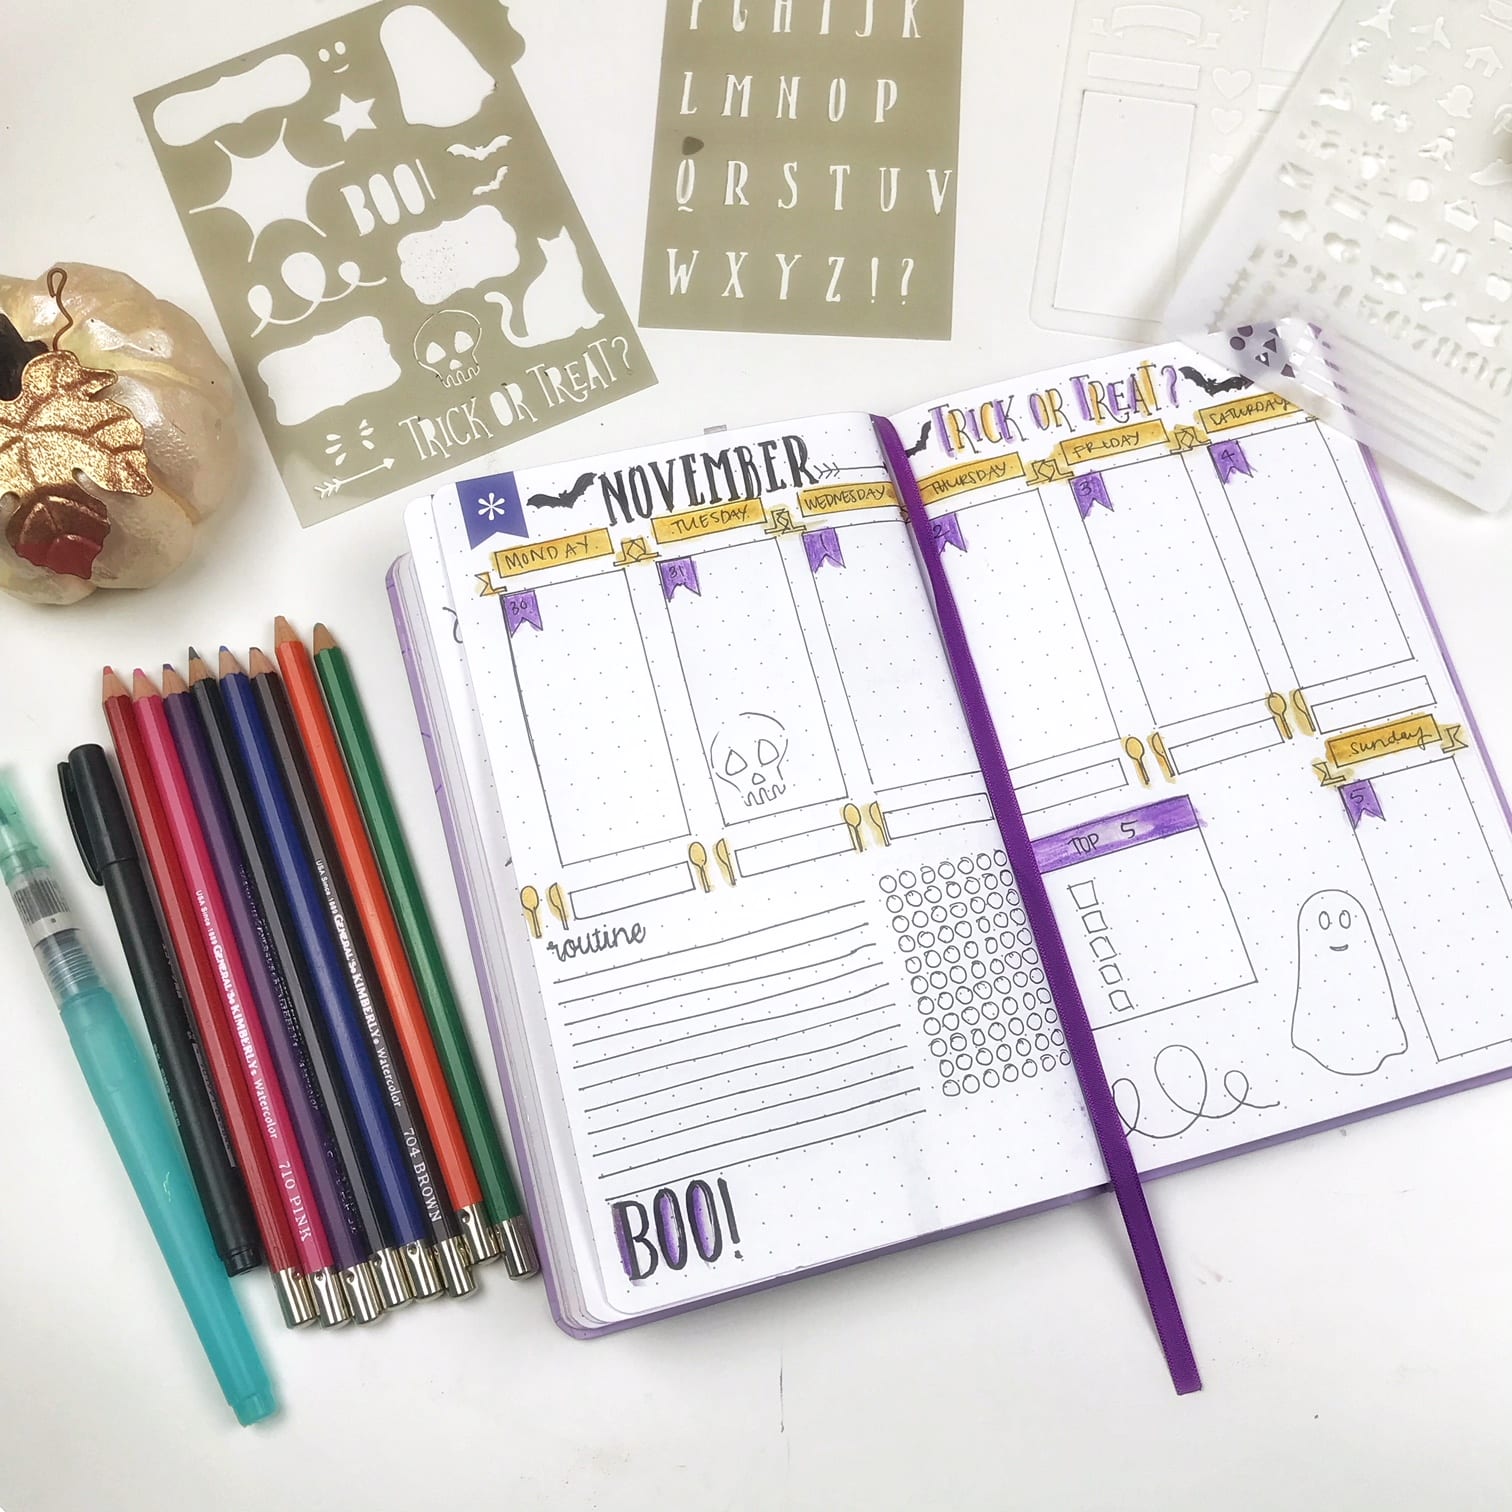
You can also use stencils to make your own monthly and weekly planning layouts, decorate for the holidays and make every page fun and unique!
- Just search for fun designs in the Silhouette Design Store for stencils and you’ll be sure to find a ton.
- You can also make your own customized ones for your bullet journal specifically.
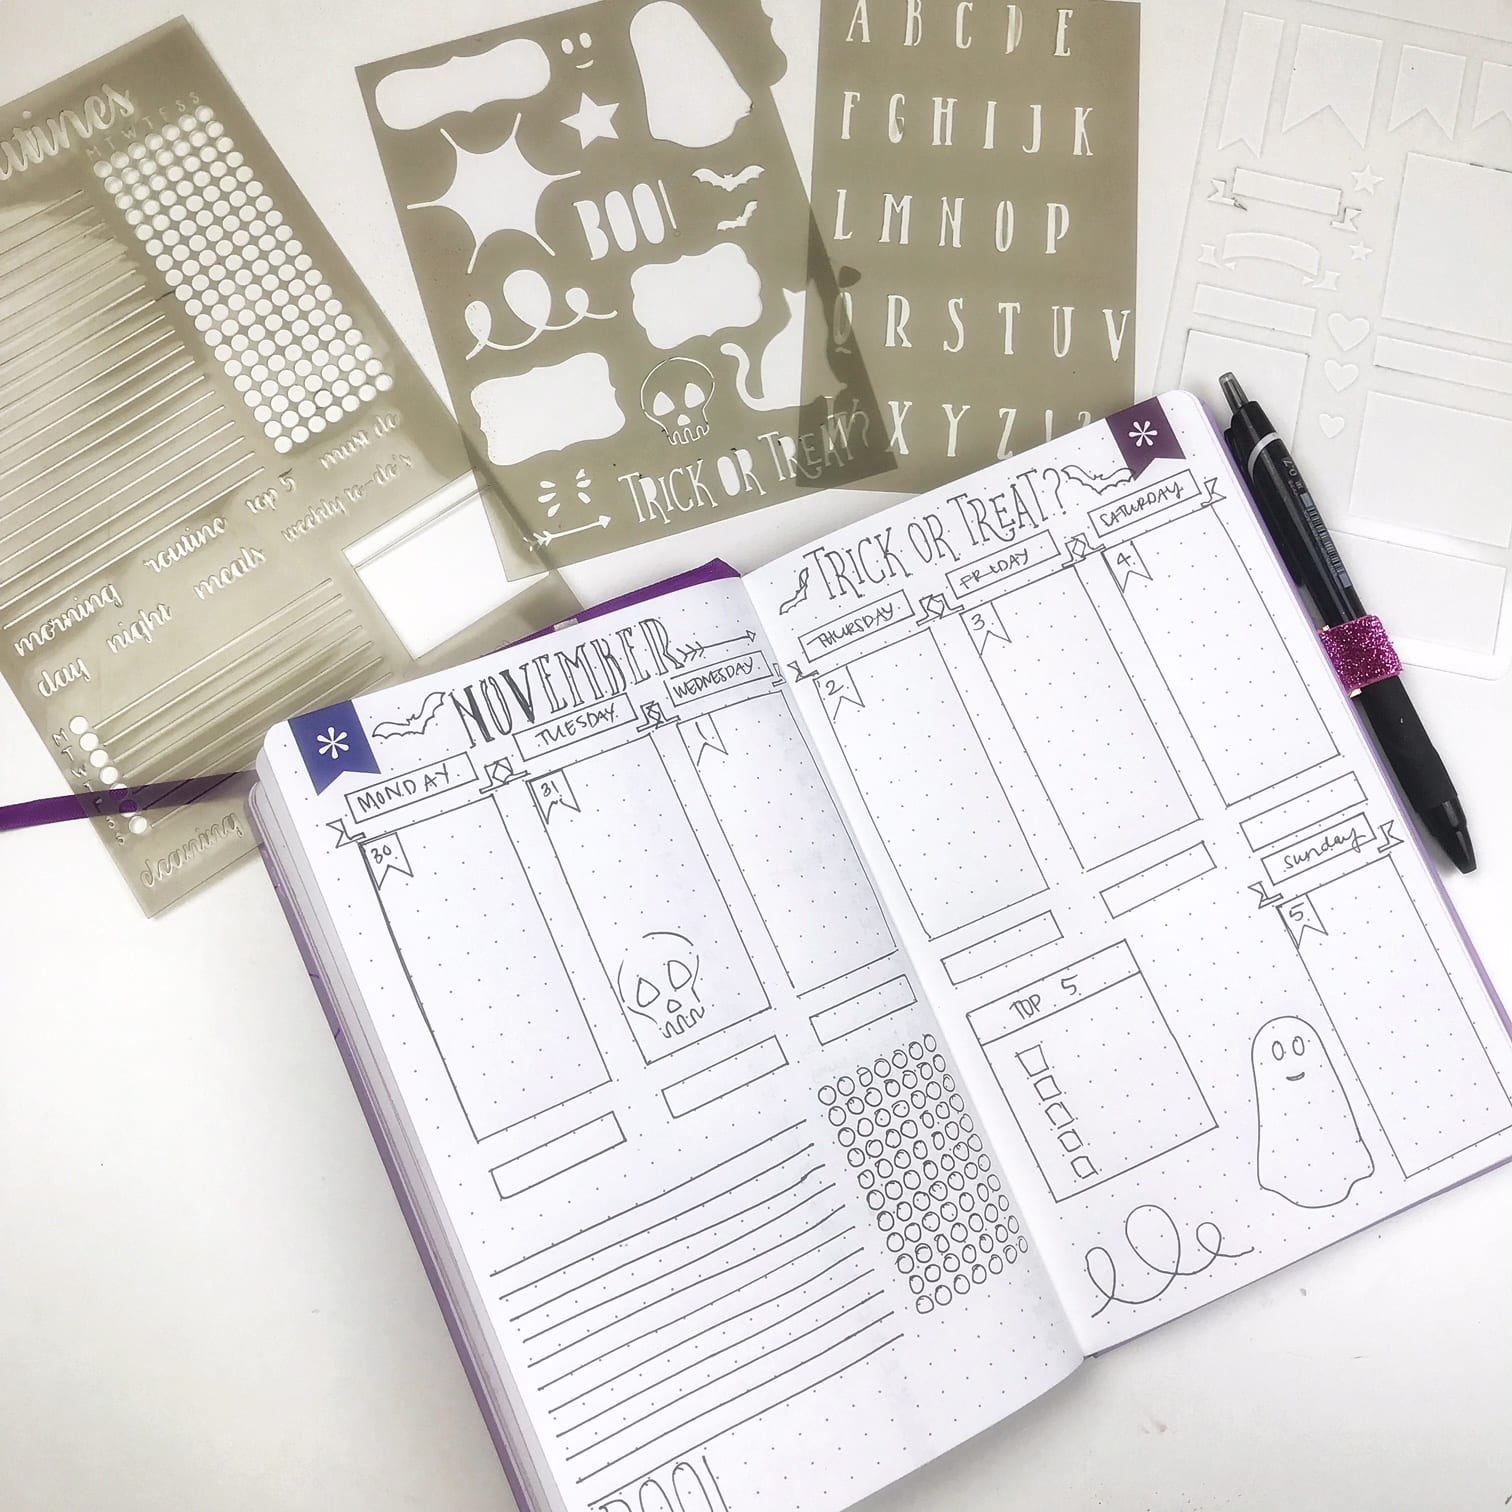
- When decorating my weekly spread I like to use pencil first then go over it in pen.
- I first draw out my boxes and trackers for the week
- Then I write out the titles
- I custom made my daily tracker and the cute font stencils for my bullet journal
- There are tons of stencil fonts in the store as well!
- The boxes were a part of stencil set
I bought from Amazon which was extremely cheap!
- I also like to decorate with cute little drawings, this week is Halloween so it was only fitting to decorate for it! Thank goodness for this design from Sarah Hurley, it’s perfectly cute for this spread!
- Afterwards, I color it in and start planning!
Bullet Journaling can be fun even if you don’t think you’re an artist! I sure am not one! But I am extremely happy with the way my bullet journal is looking thanks to these custom stencils! I am also saving tons of time with using these reusable stencils! Now you can start making your own stencils and have fun decorating your planners!
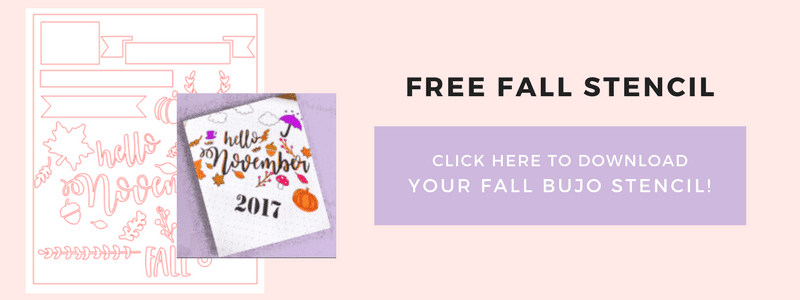
Be sure to grab this free downloadable file so you can start decorating your planners for fall next month!
 Click here and use code 10OFF to get 10% off regular priced items (bundles and promo items not included).
*Please note that some of the links in this post are affiliate links. If you click on the link and purchase the item I will receive a small commission or referral fee at no extra cost to you. Regardless, I only recommend products or services I use personally and believe will add value to my readers. Thank you for supporting this blog!*