
Setting up your planner can feel overwhelming at first, but it doesn’t have to be. In this guide, I’ll show you how to set up your planner from scratch, whether you’re using a digital planner, bullet journal, or traditional paper planner. Imagine a system where all your appointments, tasks, and goals are neatly organized, helping you stay on top of your busy life. We’ll cover everything from assessing your needs and gathering your tools, to creating a system that works for you, and making planning a routine. With these tips, you’ll transform your planner into an indispensable tool that keeps you organized and stress-free. Dive in and discover how to set up a planner that truly works for you!
After you have purchased your planner, the first thing you need to do is set it up. But where do you start? What should you write in it? How will you organize it so that it can be an easy to use
It is easy to become overwhelmed by all the tasks of everyday life, especially if you don’t have a system to organize it all. You have notes everywhere, and you’re late because you forgot where that note with your appointments’ time went! Fortunately, there’s a way to organize all that mental clutter — with a planner!
If you purchased a planner that already has calendars, like the Erin Condren or Blue Sky planners, setting it up should be quicker. But if you have a ring binder or an arc planner, it will require you to purchase or print and cut your own printable inserts.
If you have a digital planner you will have to customize some of the sections in it as well so it can be made just for you! My digital planners comes with over 90 extra inserts in all areas of your life and you can easily move it to a tabbed section so you can customize your planner even more.
You can start using your planner to customize it to keep track of whatever you want so you can make sure you get done the things that important to you. After creating my own planner system set up I no longer feel overwhelmed or paralyzed.
With my planner, I know what to do and when to do it.
Here is a quick guide on how to set up a planner step-by-step efficiently, while also keeping it simple and easy.
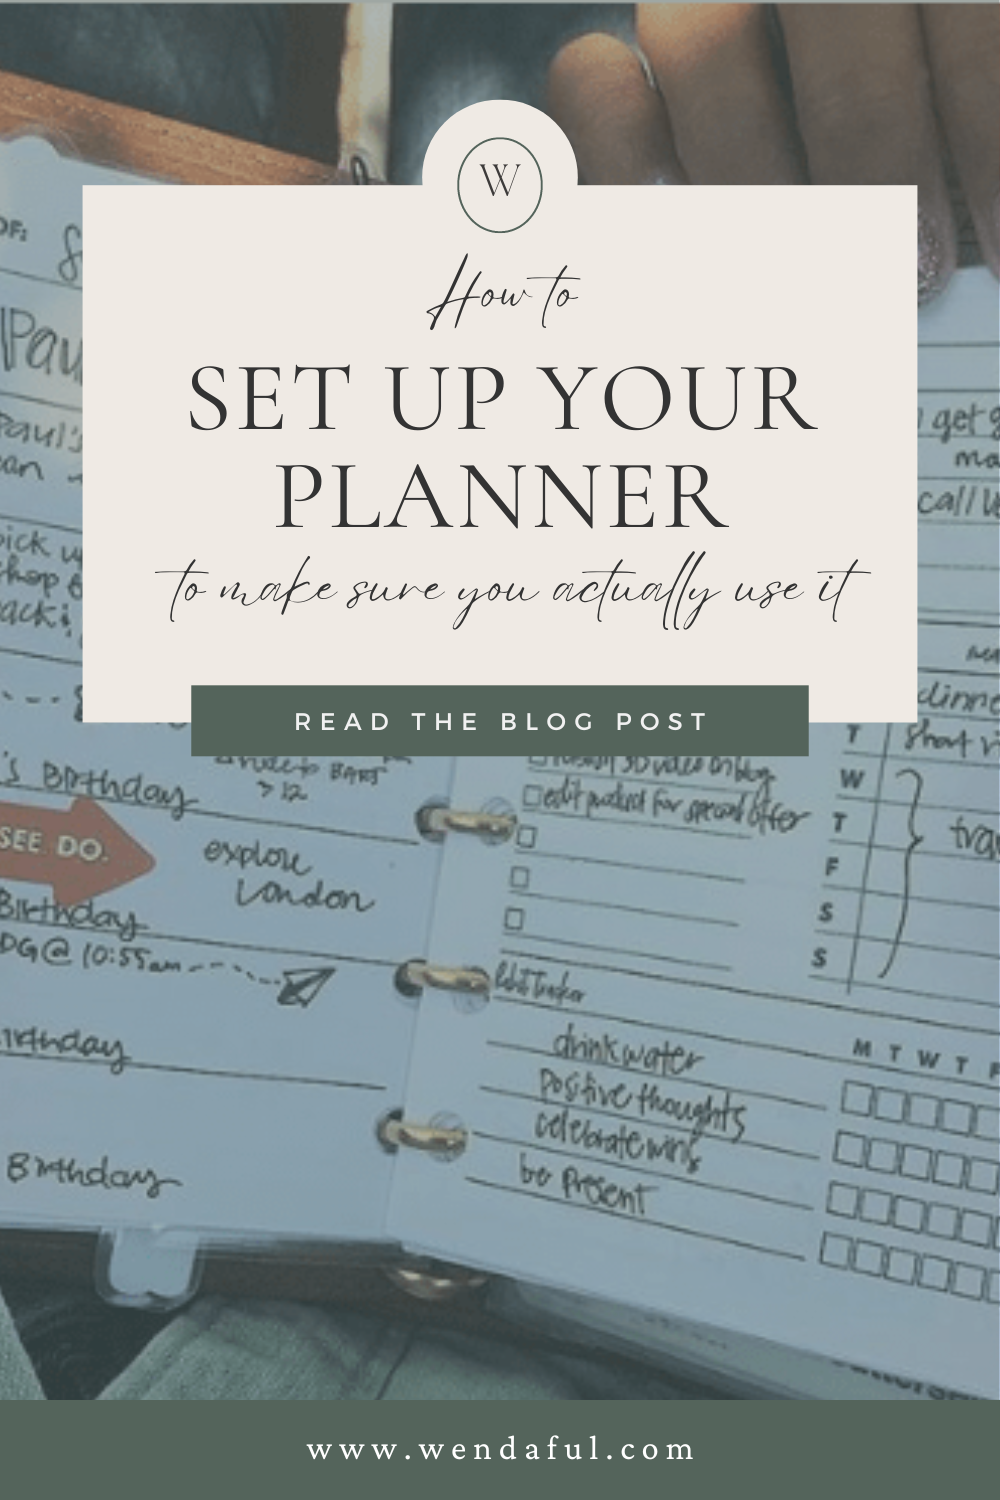
How to Set Up Your Planner Efficiently
1. Assess Your Needs And Choose The Right Planner
The first step in setting up a planner is to assess your needs. Are you a busy mom juggling multiple schedules? A professional aiming to streamline your tasks? Choose a planner that suits your lifestyle, whether it’s a digital planner, a bullet journal, or a traditional paper planner.
2. Tips for Setting Up Your Planner
Setting up your planner effectively can make a huge difference. Here are some tips:
- Start Simple: Don’t overwhelm yourself with complex layouts initially.
- Customize: Personalize your planner with stickers, colors, and sections that resonate with you.
3. Gather Your Tools and Supplies
Before diving into planning, gather all necessary tools. Aside from your planner and any printable pages you are adding to it, you will need something to write with. These might include:
Some other tools you may need include:
- Hole Punch (Buy a Hole Punch on Amazon)
- Stickers (great for repetitive events or making it stand out!)
- Highlighters (for color coding)
- Schedules/appointments/routines
- Printables (if setting up your own ringed binder, get some for free here)
- Paper (This is my favorite to use for printing)
- Dividers and tabs for easy navigation (Shop for these on Amazon)
There may be some other accessories you need, but these are the basics to grab for now. When you start planning more, you will see what else you would need.
Be sure to also check out my last post for some of my favorite planner accessories for planning.
4. Create Your System: Decide What to Track and Where
Next is to decide what you are tracking in your planner. You may already have an idea of what you want to keep track of, but writing it all down will help you better organize your planner and create a system that will work for you.
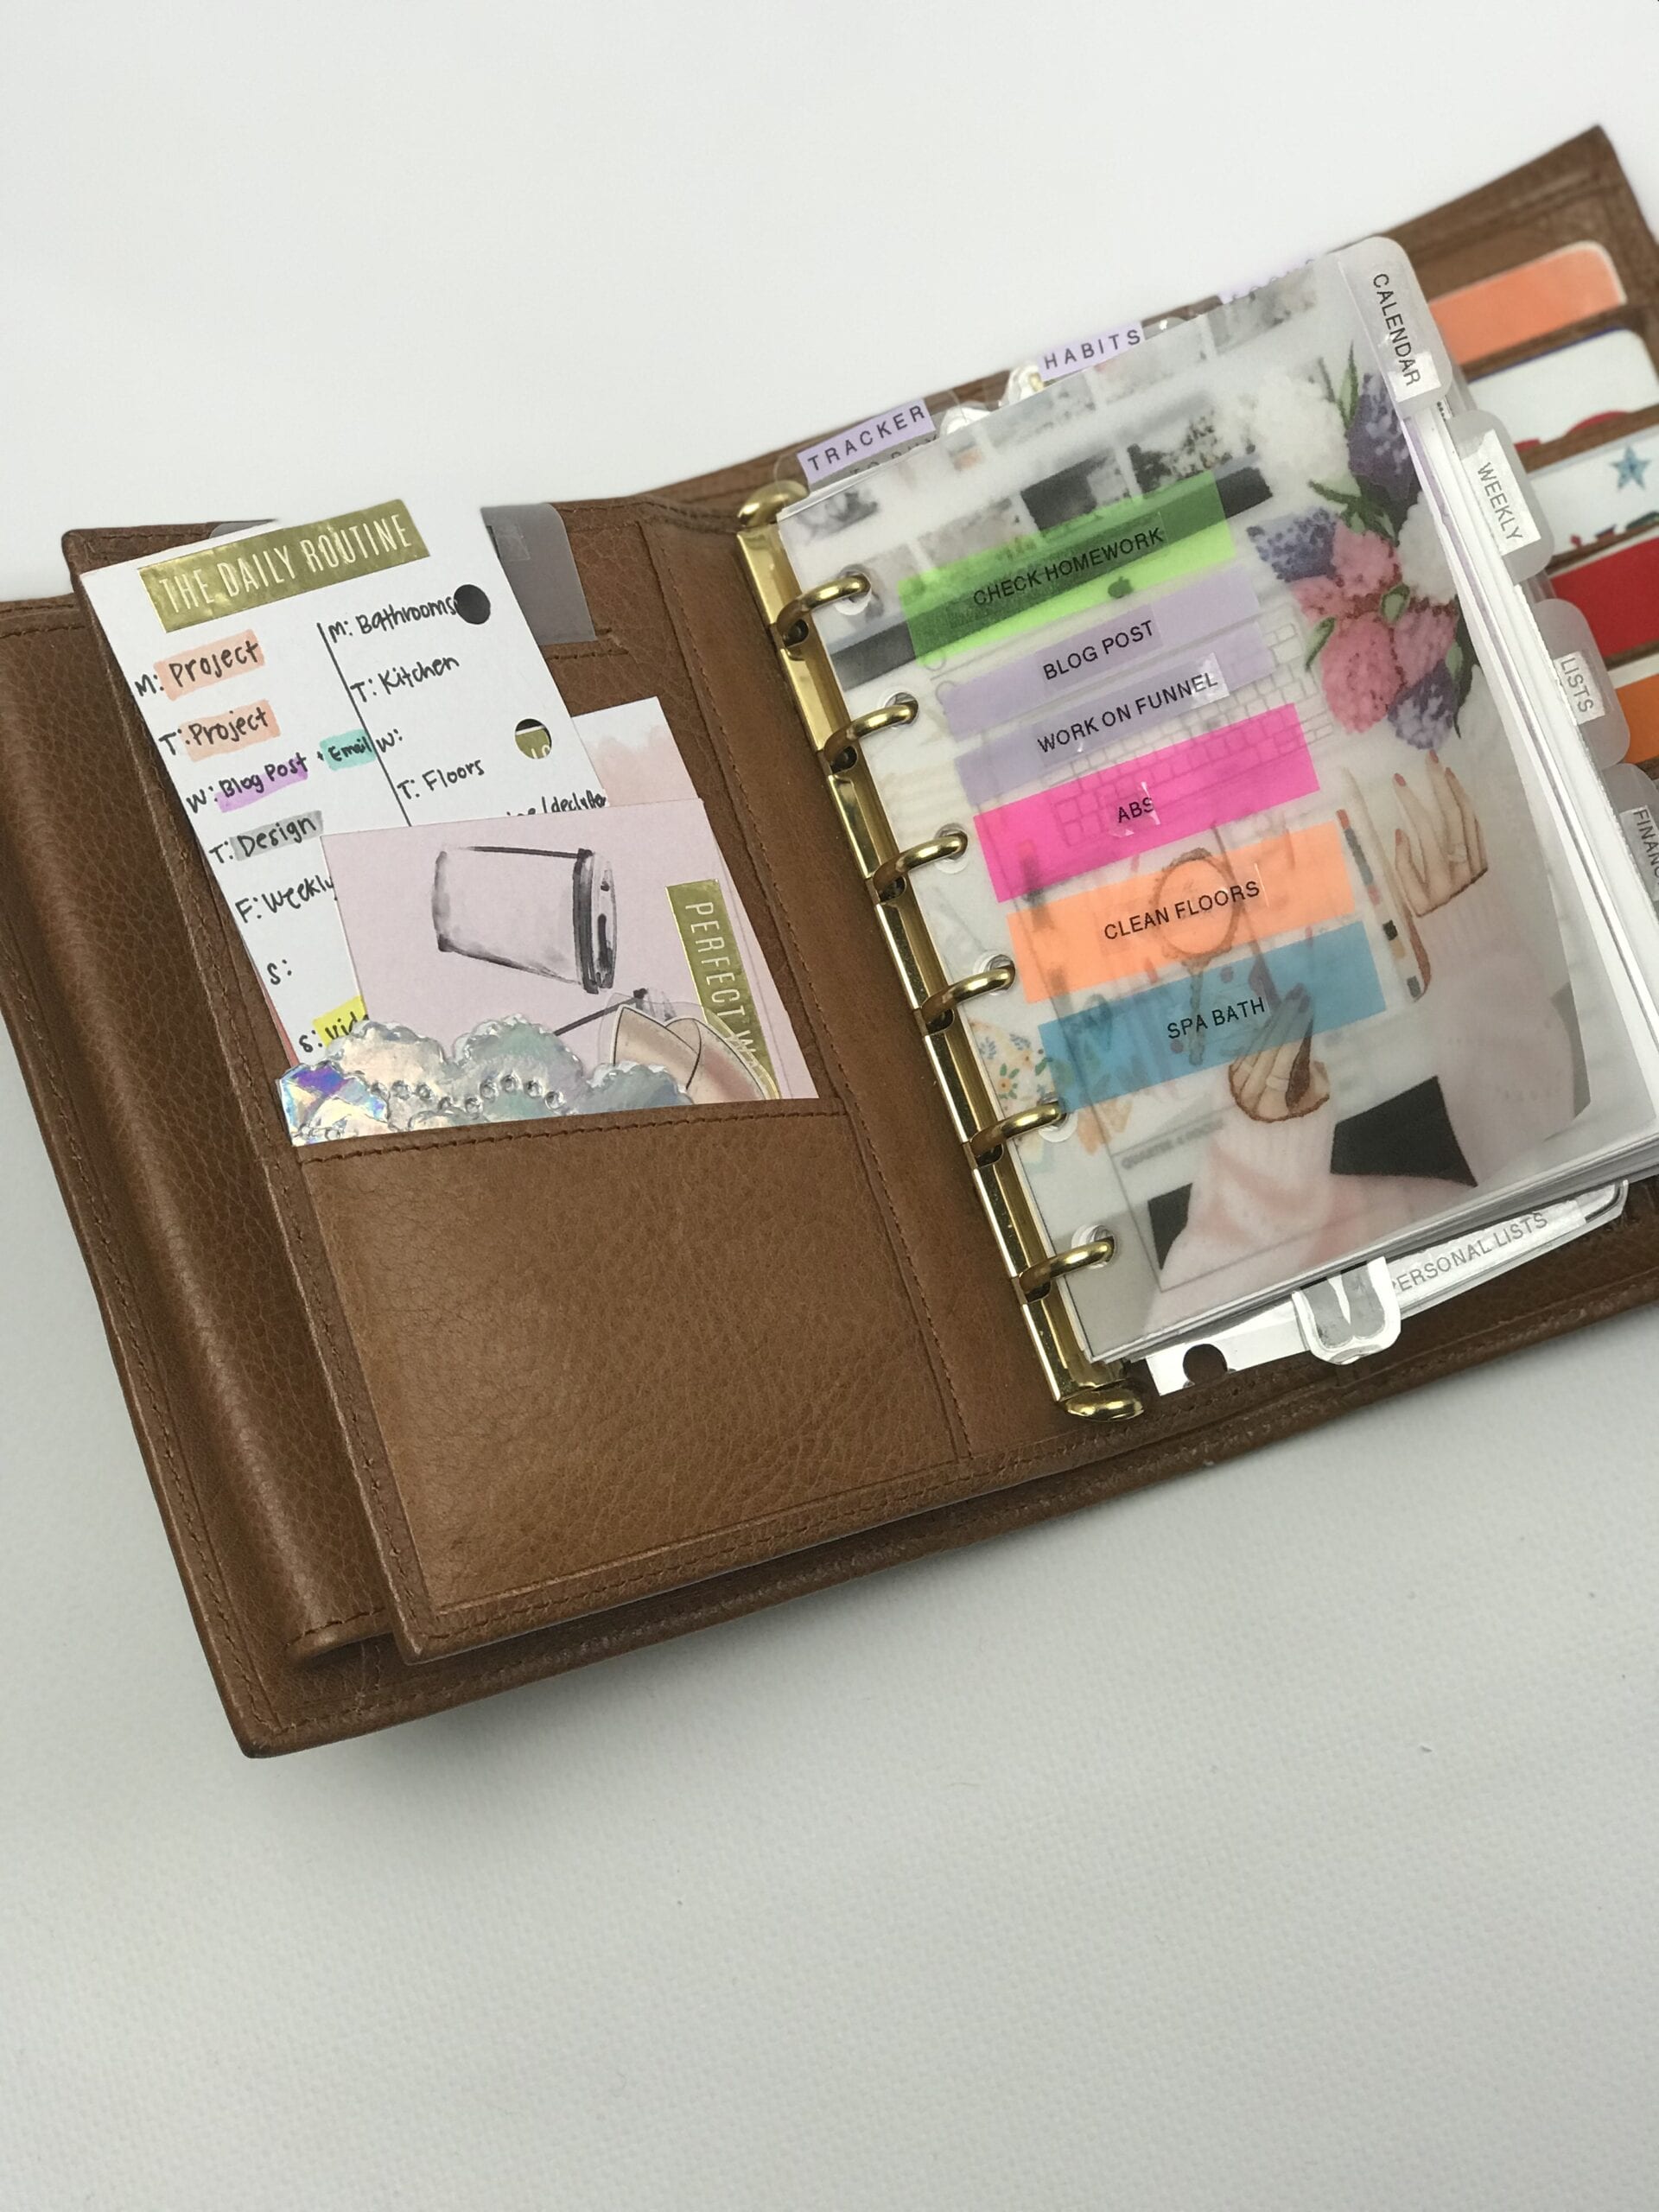
I start by making a list of everything I need to keep track of, then I start grouping them by category. The categories then end up becoming my dividers. Below is an example of most
- Calendar/schedule: appointments, events, birthdays, spouse’s schedule, children’s schedules, school schedules, work schedules, vacations,
- Finances: spending, bills, online orders, debt/savings trackers, income, budgets, shopping lists, wish lists etc.
- Home/Family: cleaning lists, birthdays, anniversaries, kids info, holiday planning, home projects, organizing/decluttering
- Goals: to do lists
, actions , projects, timeline - Health/Fitness: exercise tracker, meal planner, grocery lists, weight /measurements tracker, food log, mood tracker, headache/symptom tracker, period/fertility Tracker, medicine tracker
- Personal: makeup lists, ideas, morning/evening routines, habits, gratitude, affirmations, bucket lists, books read, tv shows, movies, family activities,
- Work/Business: brainstorming ideas/lists, business income/expense tracker, stats/analytics, mileage log, passwords
Now, where will these sections go? If it will be used the most I suggest putting it right in front of your planner. My first page is usually my goals overview. I like seeing it all the time as a reminder of what I am working towards. I follow it up with the calendar/schedule sections, then lists, then finances, and notes. This will be different for everybody. Set it up to the way you know will work for you. Below is a list and picture of my sections:
- Calendar (yearly and monthly calendars)
- Tracker – annual trackers for mood and productivity, income, stats and analytics
- Habits – monthly habit tracker
- Weekly – week on a page with task lists
- Focus (To Do List/Weekly Brain Dump)
- Lists – Ideas, tips, etc.
- Finances
- To Buy – shopping lists, wish lists
- Bills – yearly bills, monthly bills lists
- Expenses – online orders, spending trackers, budgets
- Notes
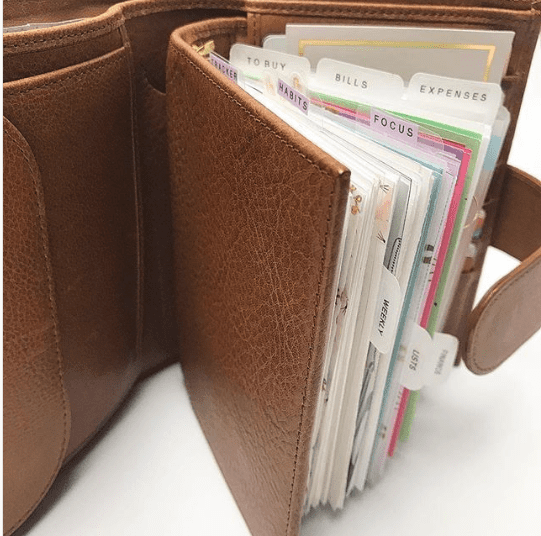
How to Set Up Your Planner Sections
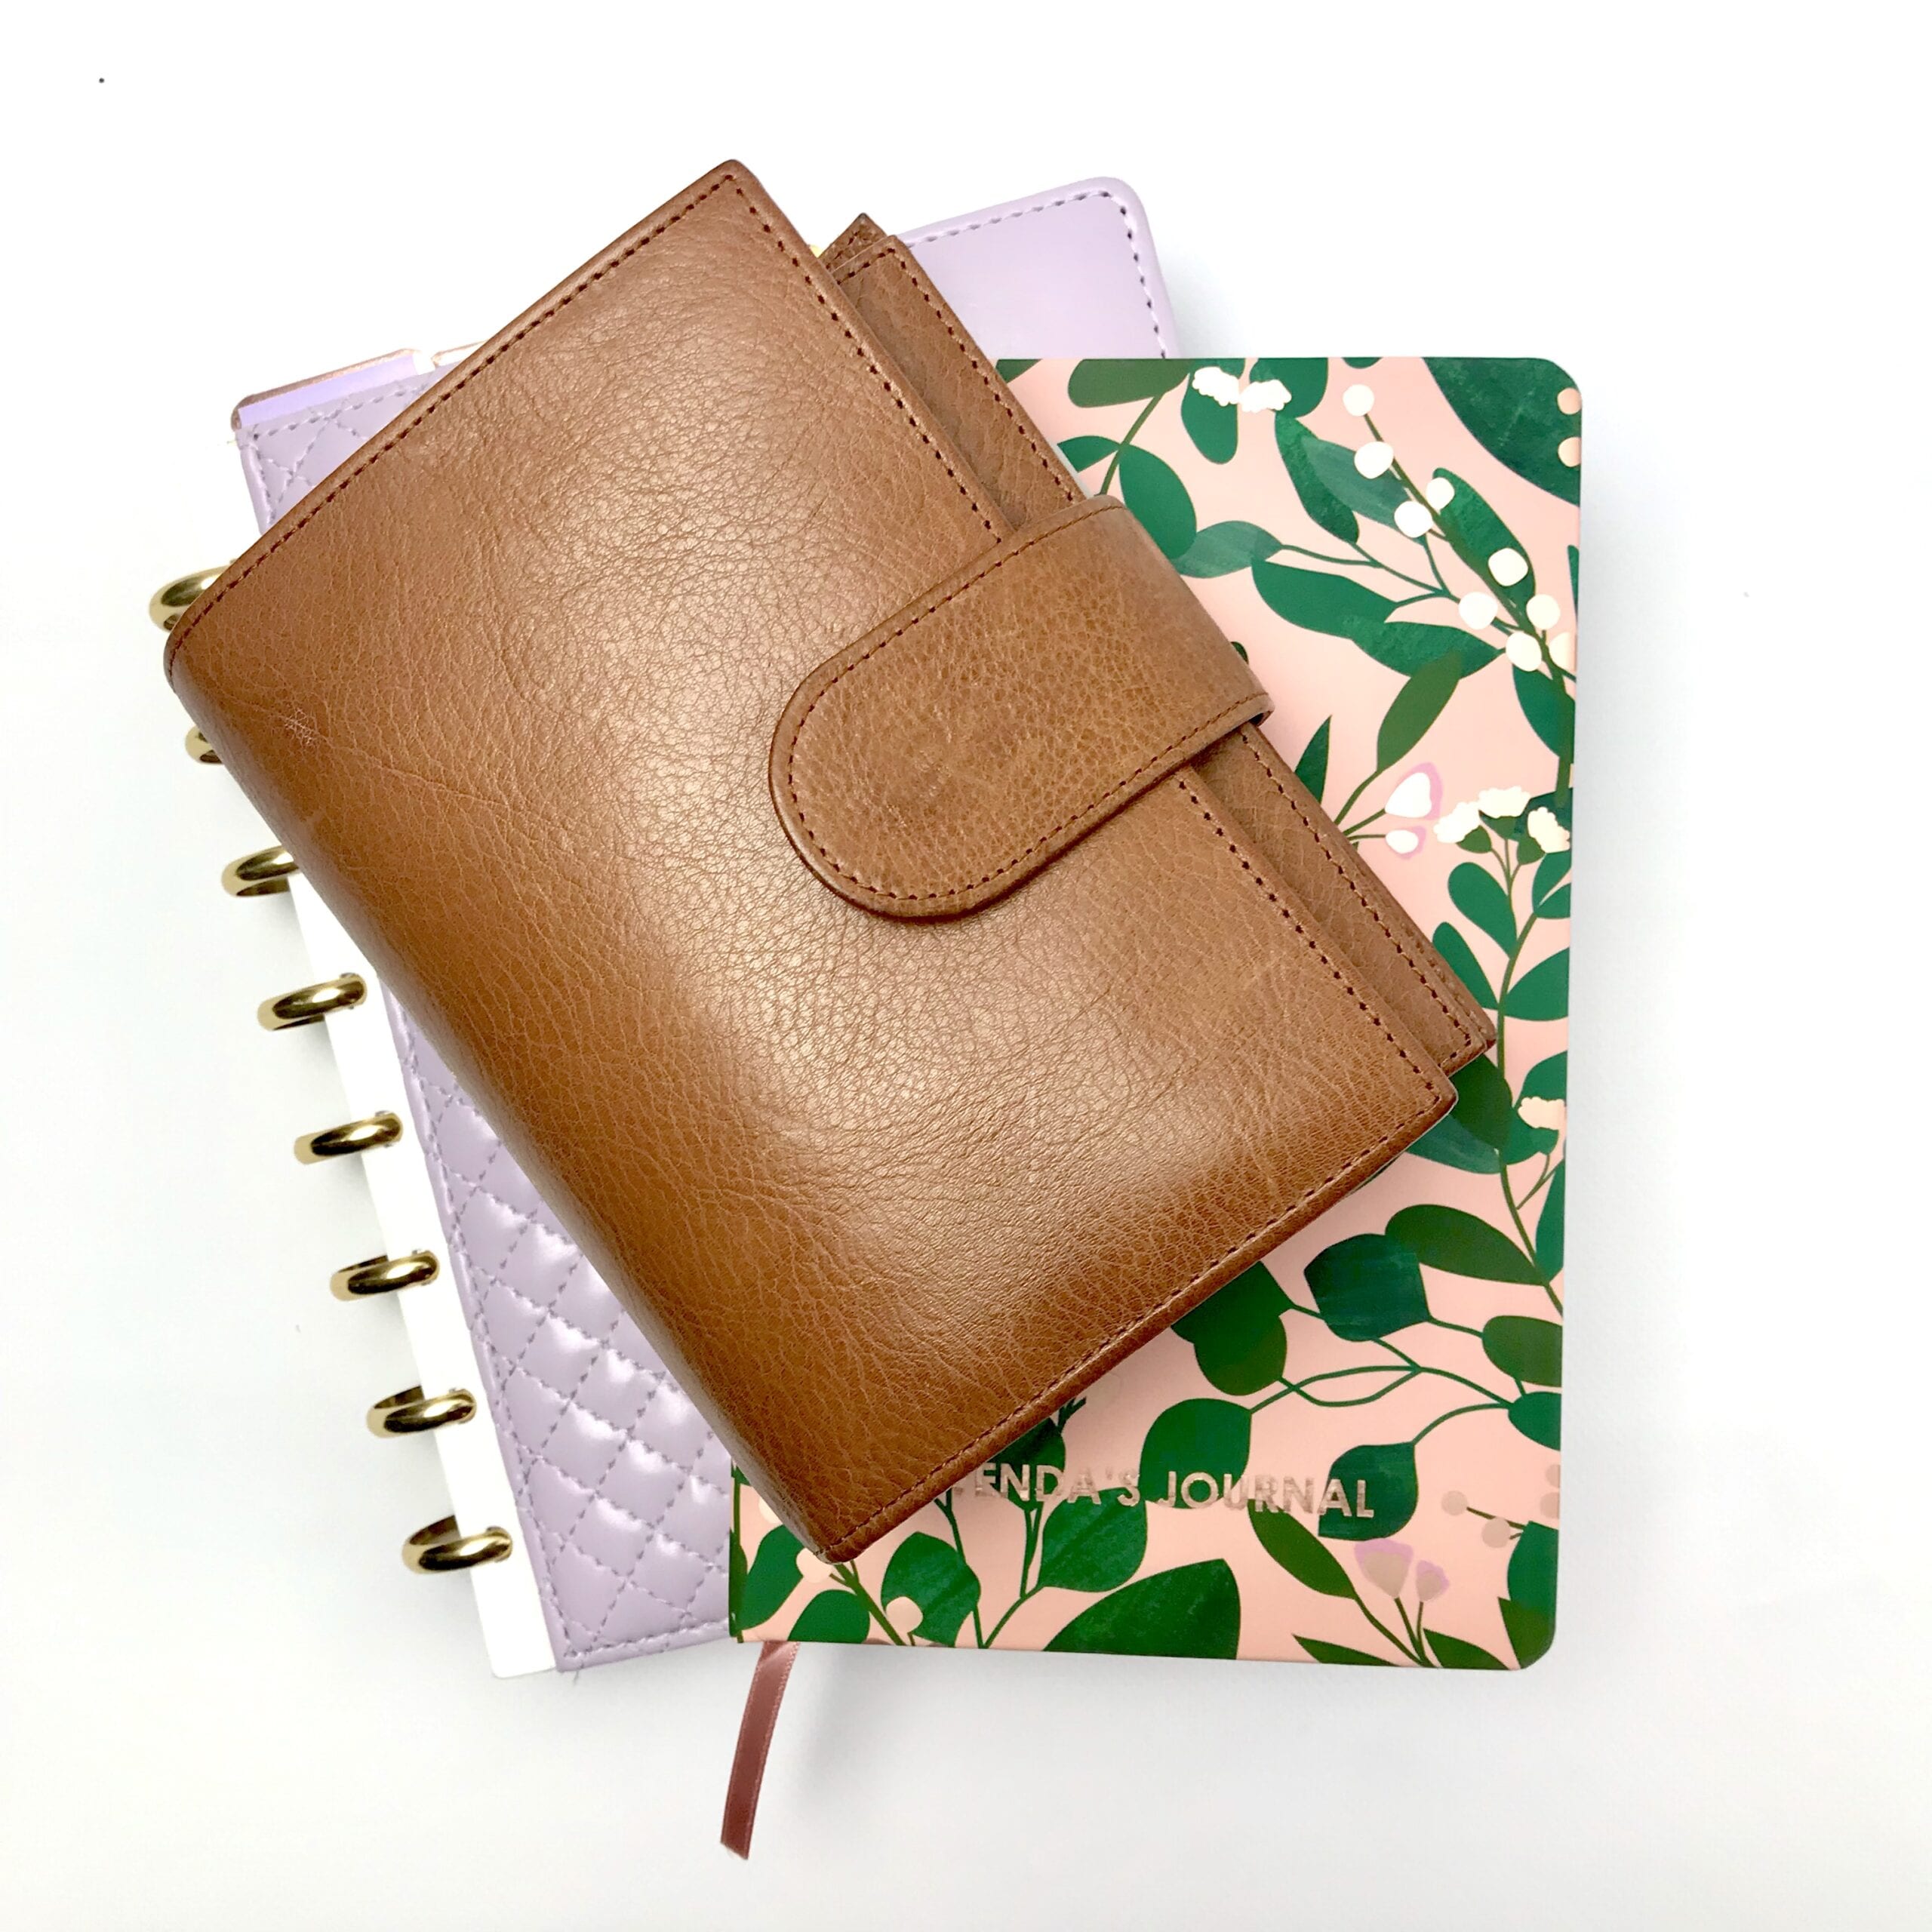
Another option is if you will be using multiple planners/notebooks. Most people like to have different notebooks for different purposes. I personally use 3 different notebooks. One for planning, one for all of my notes, and one for journaling. You can definitely try to fit all of these purposes into one planner or notebook but I love the portability of my pocket planner and I wouldn’t be able to fit all of that in just that planner. The important lesson to know is that if you do use multiple notebooks or planners is that you maintain one calendar. I will be sharing more about using multiple planners in a future post.
Set Up Your Planner for Success
Now determine where your planner will be easily accessed so you can use it daily. When I make my list of things to track I also write down where my planner will “live”. For example:
- my pocket planner goes everywhere with me, most times it’s in my purse when I am out, but when I’m at home it stays on the counter or coffee table.
- My journal is used only at night before bed so I can write about what I had accomplished that day, what I want to work on tomorrow and some memories of the day. I like to reflect on my day and see how I can improve. If I procrastinated on something I will usually ask myself why and try to be aware of it the next day.
- My Arc Notebook from Staples is used to store all of my reference information, processes/workflows for my business, notes, ideas, projects, and more for every part of my life. I divided into multiple sections and use it when I am in my office, so it stays on my desk in my office.
5. Write Down Everything, No Matter How Small
One key to effective planning is writing everything down. This includes:
- Appointments
- Deadlines
- Reminders
- Even minor tasks
6. Determine How You Will Use Your System
Figure out how your planner will fit into your daily routine. Will you check it in the morning, before bed, or both? Consistency is key to making your planner work for you.
Decide how information coming in will be handled. If your planner is always with you, you can write it directly on the month/week/day. Or you can create a page where all incoming information goes (aka Inbox according to the GTD method).
If you know you won’t have access to your planner use your notes app on your smartphone or put it directly into your phone’s calendar. Then transfer it to your planner during your daily planning session.
Determine all the things that you do on a regular basis. These are your routines or recurring tasks. Things that you probably don’t have to write down every day but it still has to be done. You can use the notes pages or on a card to write down a list of things you’d like to be reminded of things to do during certain intervals whether that’s daily, weekly, monthly, quarterly or yearly. For example, if it’s a cleaning routine will you pick a specific day to do it all or will you pick one room or area for each of the week? You can also add tasks like spring cleaning or deep cleaning at different intervals.
The benefit of having this list
7. Utilize Different Sections For Different Purposes
Divide your planner into sections to keep things organized. You might have sections for:
- Work tasks
- Personal goals
- Family activities
- Health and fitness
8. Use the Monthly Calendar
Starting with the current month of your planner start writing in all your calendar events. You can start with birthdays and anniversaries first. You can then start adding in other events or appointments you already know about.
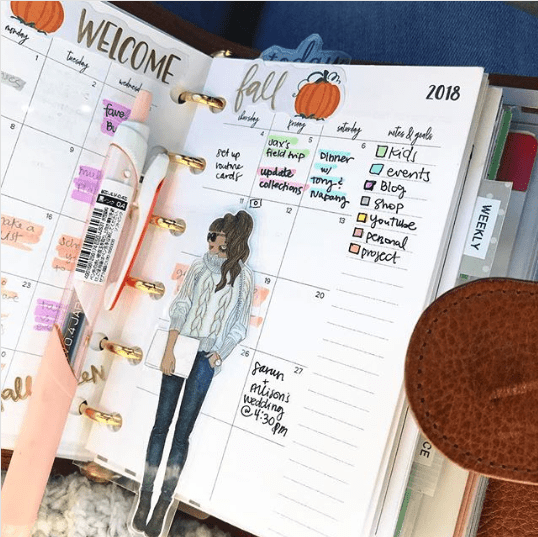
Calendar events are time specific tasks or reminders. These can be either one-time events or recurring. But they always happen at a specific time and date.
It’s also a good practice to use only one calendar for both home/personal and work. I know a lot of people like to use multiple planners but having more than one can make it hard to see how much time you really have. By combining personal and work calendars you can see how much free time you really have, it’s a lot easier to maintain your system, and you won’t double book events accidentally.
You may add more to the monthly calendar later, but the basics are all you need for now. Fill out as many of the monthly calendars as you want, or you can just stick to this month to keep it simple.
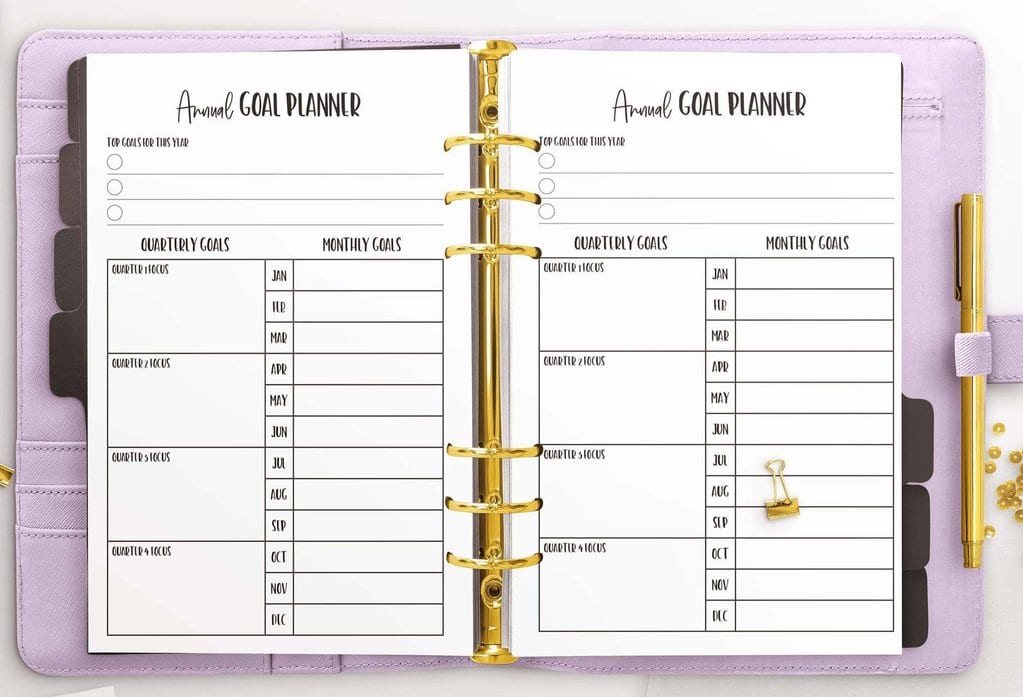
9. Make a List of Goals and Tasks
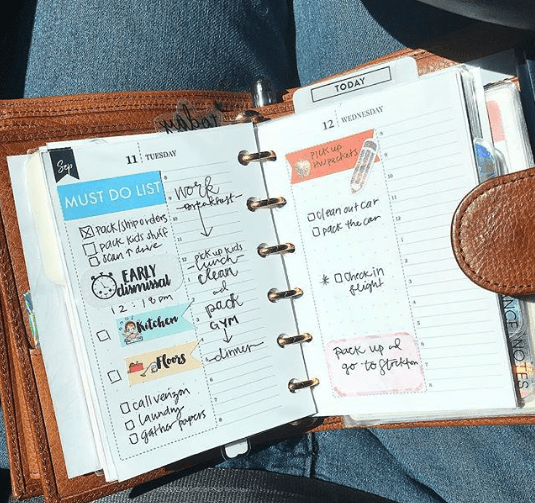
Think about what you’d like to accomplish within the next 3-6 months. Write this list down in your planner, it will serve as your master list. Read more about to do lists here. Then start breaking down these goals into a list of smaller goals or tasks that need to be done this month. This can be added to your monthly to-do list. Follow it up by breaking it down into more specific tasks with more details and add it to the weekly or daily planner pages.
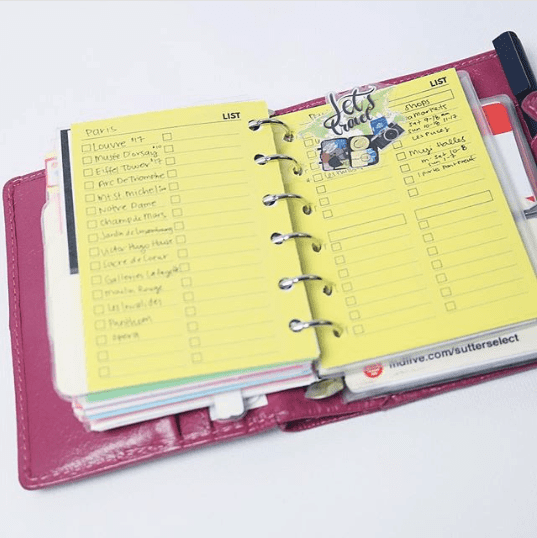
I always like having a lists section in my planner to write down all the tasks that I have to do. Most times little things get missed because it isn’t a part of your goals but still needs to be done. These can be things like errands or calls, things that need following up on, reference information, deliveries, emails, etc. I like to keep this list in my planner and hold it there until I need to transfer it to a specific day to do.
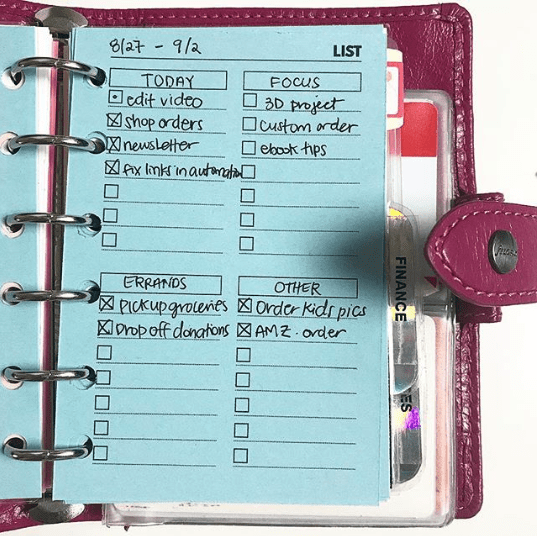
Organize your tasks lists by project or category. By having an organized list you won’t worry about missing anything. Be sure to look back on these lists regularly and do something about it!
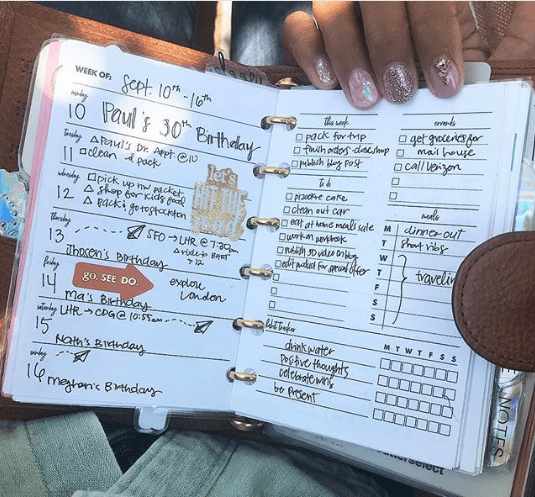
10. Add More Details to Your Weekly or Daily Schedule
Now it is time to set up the weekly section of the planner. Use your monthly calendar to plan out what needs to be done each week, and on which day. The weekly pages usually have larger sections for each day of the week so that you have enough room to write down details like to-do lists for completing tasks or things you need before an appointment or event. You can even journal if you have enough space! If you have ideas in other lists see if you have time to input those tasks into your schedules as well.
Here, you can:
- Schedule specific tasks by the hour
- Include notes and reminders
- Track progress
If you’re using a daily planner like the Day Designer or a daily printable, you can plan out your entire day with your routines, meals, and then input your tasks that need to be done in the space where you will have time. I have this daily routine planner and I find that it always helps me to get all the important things done!
Try to schedule time for life tasks as well in your planner too such as family time, self-care and other non-work tasks. Include buffer time in your schedule so if things don’t go according to plan it won’t derail the rest of your day (this can really demotivate you to use your planner if it happens constantly). Remember: our schedules are supposed to be flexible! Be ready to move tasks around.
11. Create A Schedule And Stick To It
Creating a schedule is half the battle; sticking to it is where the magic happens. Use your planner to map out your day and follow through.
When using this section of your planner, try to make it a routine to review and plan every night or morning. Be sure your to-do list for every day includes only 3-5 main tasks, use action verbs and assign the estimated time it takes to complete the task. Then get to work and do the task when you plan to!
There will always be urgent tasks that come up at the last minute and these will need to be added to your daily lists too. Make sure your tasks keeps moving forward. Check off your tasks, migrate it to the next day if you didn’t finish it, or delete it if it’s no longer can’t.
When planning my days I always try to make sure my tasks are well rounded from doing things for work to taking care of myself, my kids and my home. Every day I use task flags, as introduced by @Madyplans, to put in the front of my planner as a reminder for everything that I should do that day. (More about her Task Management System will be posted in the next few weeks, so stay tuned!)
12. Keep Track of Everything and Anything You Want
By now, you have completed the main part of the planner. Even with all these suggestions, this is really just the beginning of all the things you could do with a daily planner. This is a truly customizable tool, so you can use it in the way that best suits your needs and lifestyle.
Your planner can be a catch-all for all kinds of information, from:
- Expense tracking
- Meal planning
- Exercise logs
- Personal reflections
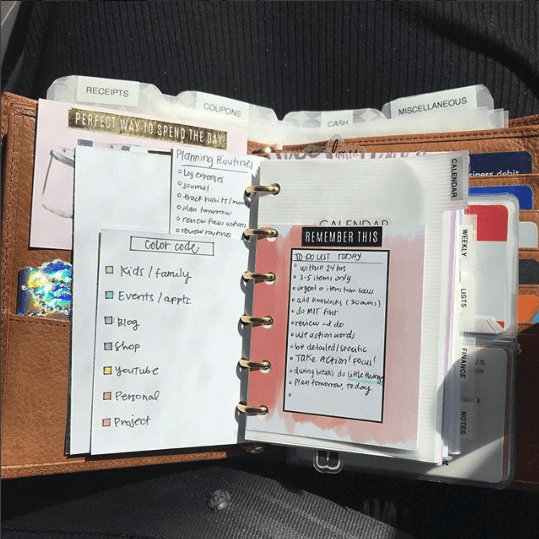
You can decide to stop there or continue with other details. You might want to add a key, do some color-coding, or add additional pages for other productivity requirements you have. You can find monthly/weekly/finance printables for lots of planner sizes in my shop or find free ones throughout my blog.

If you do decide you need more trackers you can easily add it to your ringed or arc planners by just hole punching it. If you have a coiled planner like Erin Condren you can paste into your notes pages or use a coil clip.
I like to keep a separate notebook for all these lists. Just like a bullet journal, I call it collections. I usually put in all my workflows, processes, someday projects/ideas into this notebook since my main planner is pocket-sized.
13. Be Flexible And Make Adjustments As Needed
Life changes, and so should your planner. Be flexible and adjust your system as necessary to fit your evolving needs.
As your life changes, be prepared to change up your planner system. You may find that you no longer need so many lists. Or you may find that a week on one page is all you need to plan your weeks because you don’t only need to see the big events of the week. Or maybe that awesome pocket planner won’t work out for you because it’s way too small and you have way too much to keep track of. Or you may find your big planner is too big and you never use it because you can’t take it anywhere! Just remember, you can start your planner anytime and change it anytime. Even if you didn’t set up your planner on January 1st, you can do it today (another great thing about setting up a printable planner!)
14. Make Planning a Routine
Now that your planner is set up, all that’s left to do is use your planner daily – and you’re ready to get started! Choose a time of day where you will be able to review and plan your days. Don’t just set it up and forget it! The key to getting things done is
15. Celebrate Your Progress And Consistently Review
Regularly review your progress and celebrate milestones. This will keep you motivated and on track.
By following these steps, you’ll know exactly how to set up a planner that keeps you organized and productive.
Have fun planning in your new planner!
The Ultimate Guide To Staying Consistent with Your Planner!
How To Be Consistent With Using Your Planner
How to Plan & Schedule Your Days to Get Things Done
This is super useful! Thankyou for posting.
Since after high school which was ages ago, I can’t seem to stay consistent with keeping a planner. I love the idea of planning and I buy new planners often but they sit empty. I guess I wasn’t able to put all of categories you mentioned into one portable planner that’s not too bulky or heavy. Thanks for your insight!
This was actually the most thorough and detailed post on how to set up a planner I’ve seen. I’ve been trying (and failing) for a long time. Thank you!
This has been the most comprehensive article to date that I have come across on planners.
Great work and thank you
That’s a good idea to set up a time every day to plan out what you are going to do that day. I would think that would be a good way to make sure that you could make the most out of your time. I’ll have to think about giving that a try and see if that would help improve my productivity.
Loved all your ideas – what is the brown planner you have pictures is on page? Thanks.
The brown planner is a Pocket Sized Gillio Compagna in Gold – https://www.gillio.be/en/organiser—compagna-pocket-774—epoca-gold-epoca-2
Hello good morning!
First I would like to say your are so cute girl!
And second I like all your ideas. My problem is being consistency. I have another problem my planner was given to me as gift sonit was not my chose.
haha thank you! If your planner isn’t making you happy I would definitely get another one, you want a planner that will bring you joy. If it does it will be much more likely for you to pick it up and use it.