
This post is sponsored by Silhouette America and contains affiliate links, which allow me to earn a small commission at no extra cost to you.
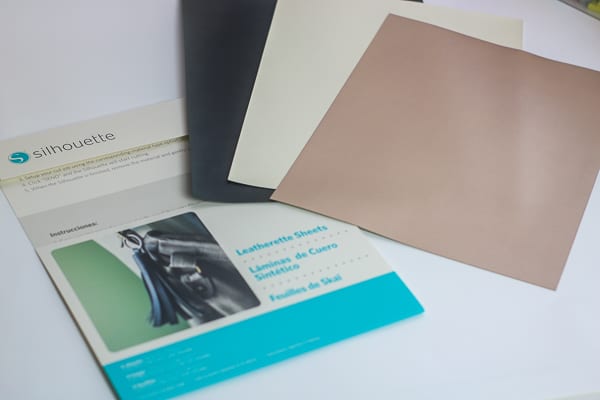
With the new Leatherette Sheets you can make fun faux leather projects! Have you heard of this product from Silhouette America? You can use these sheets in your Silhouette Cameo or Portrait and cut out a custom made project!
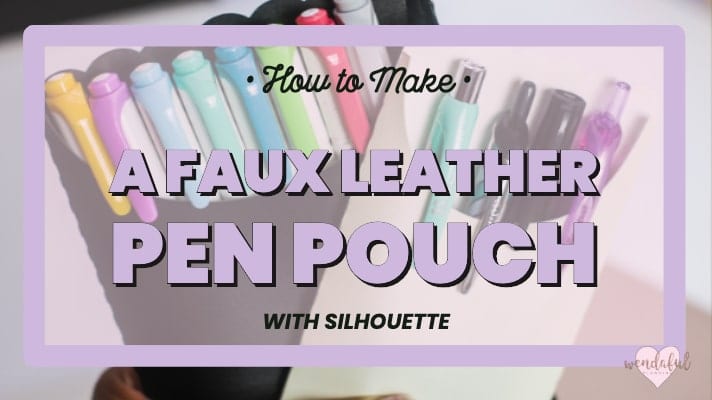
For this project I wanted to share with you how I made a cute faux leather pen pouch or pen sleeve for my favorite pens to take with me on the go. I love having a little pouch or sleeve for my pens so it’s easier to find in my purse.
Table of Contents
How to Make a Faux Leather Pen Pouch
For this project, I love how you can easily resize the design to make it any size you want! I made mine with super glue because I don’t know how to sew and didn’t want to ruin the design with my horrible stitching skills! But if you have a sewing machine or can stitch nicely you definitely can do that to make it more secure! I found the the super glue worked quite well for me as long as I didn’t jam a bunch of pens in my pouch.
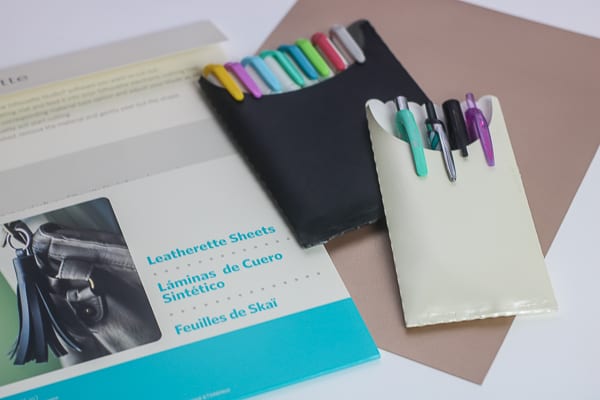
The Silhouette Leatherette sheets feel and look like leather. They are great for creating embellishments with the appearance and feel of leather. Each package has 3 sheets, with the following colors:1 black, 1 cream and 1 gold for only $6.99.
I’ve seen people make earrings, key chain charms, tassels, bows and more! For my project I really wanted a nice pen pouch or pen sleeve, but for less! What better way than to do it yourself at home with your Silhouette and for less than $10! So let’s get started…
Supplies Needed:
- Silhouette Machine (Cameo/Portrait)
- Silhouette Cutting Mat
- Silhouette Cutting Blade
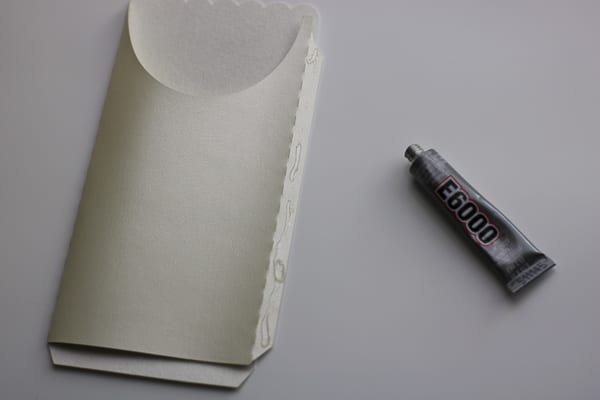
- Super Glue (I used E6000 glue) ($2.88 on amazon)
- Clamps or Clips
- Silhouette Leatherette Sheets ($6.99)
- Scallop Tag with Sleeve by Carina Gardner ($0.99) or any other “sleeve” design you like in the Silhouette Design Store
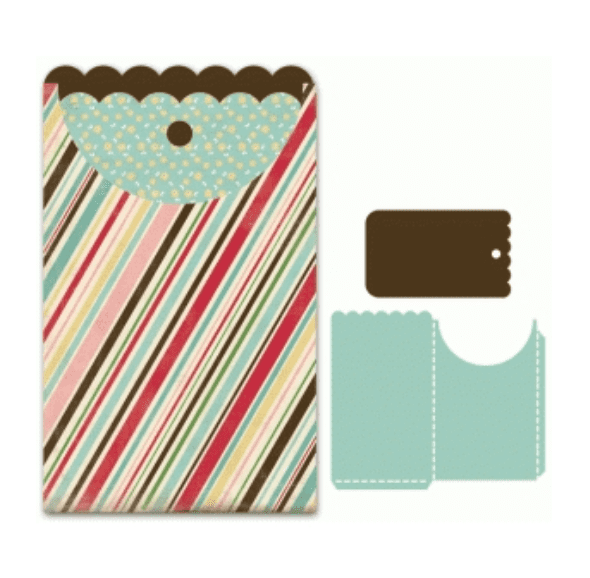
Step 1: Open the Sleeve design in Silhouette Studio®
For this tutorial you will need to purchase the design in the Silhouette Design Store here. It was only .50 cents when I got it but originally I think it’s only .99 cents. When you are purchase and download the design file, be sure to click open with and select Silhouette Studio. Or you can open up Silhouette Studio and open the file from your library or directly by going to File>Open and finding where you downloaded the file.
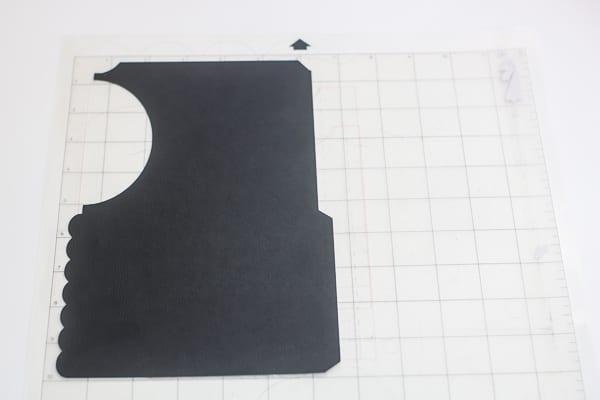
The dashed lines are where you fold, and the flaps are where you will be gluing.
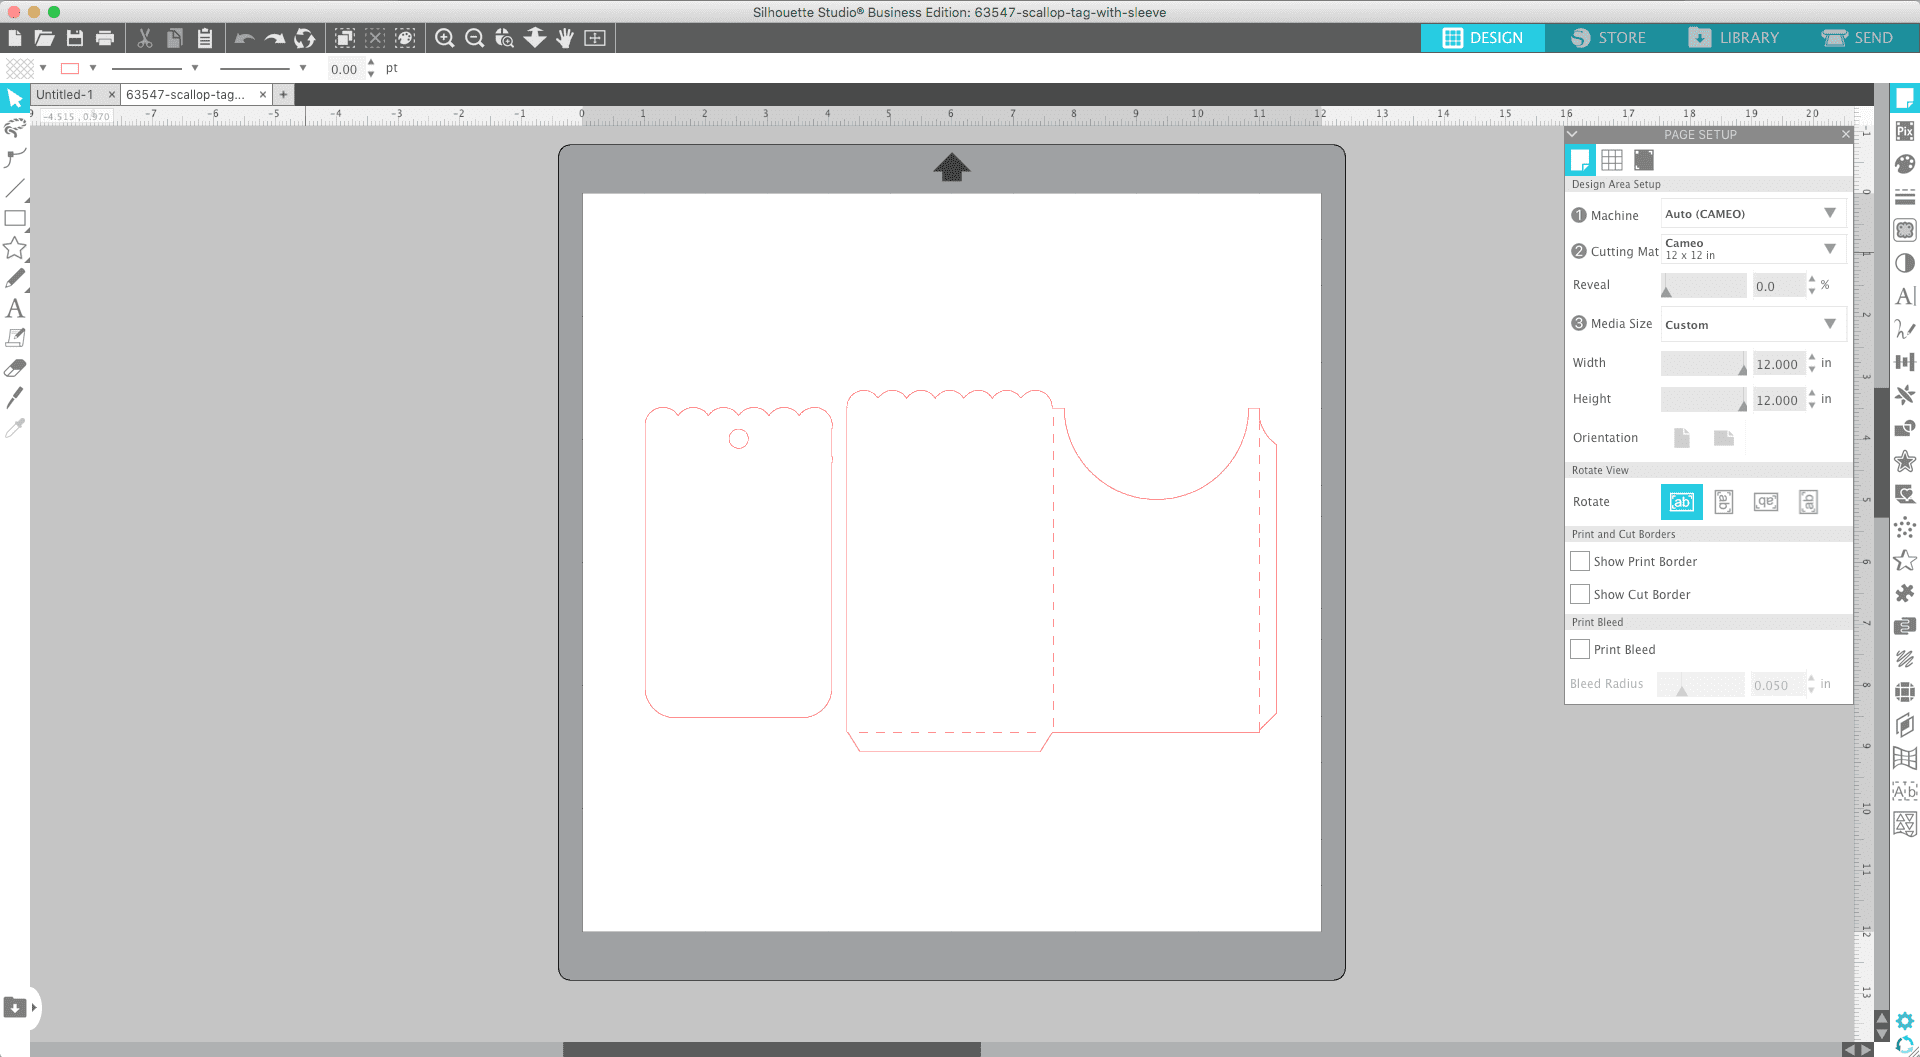
STEP 2: adjust design
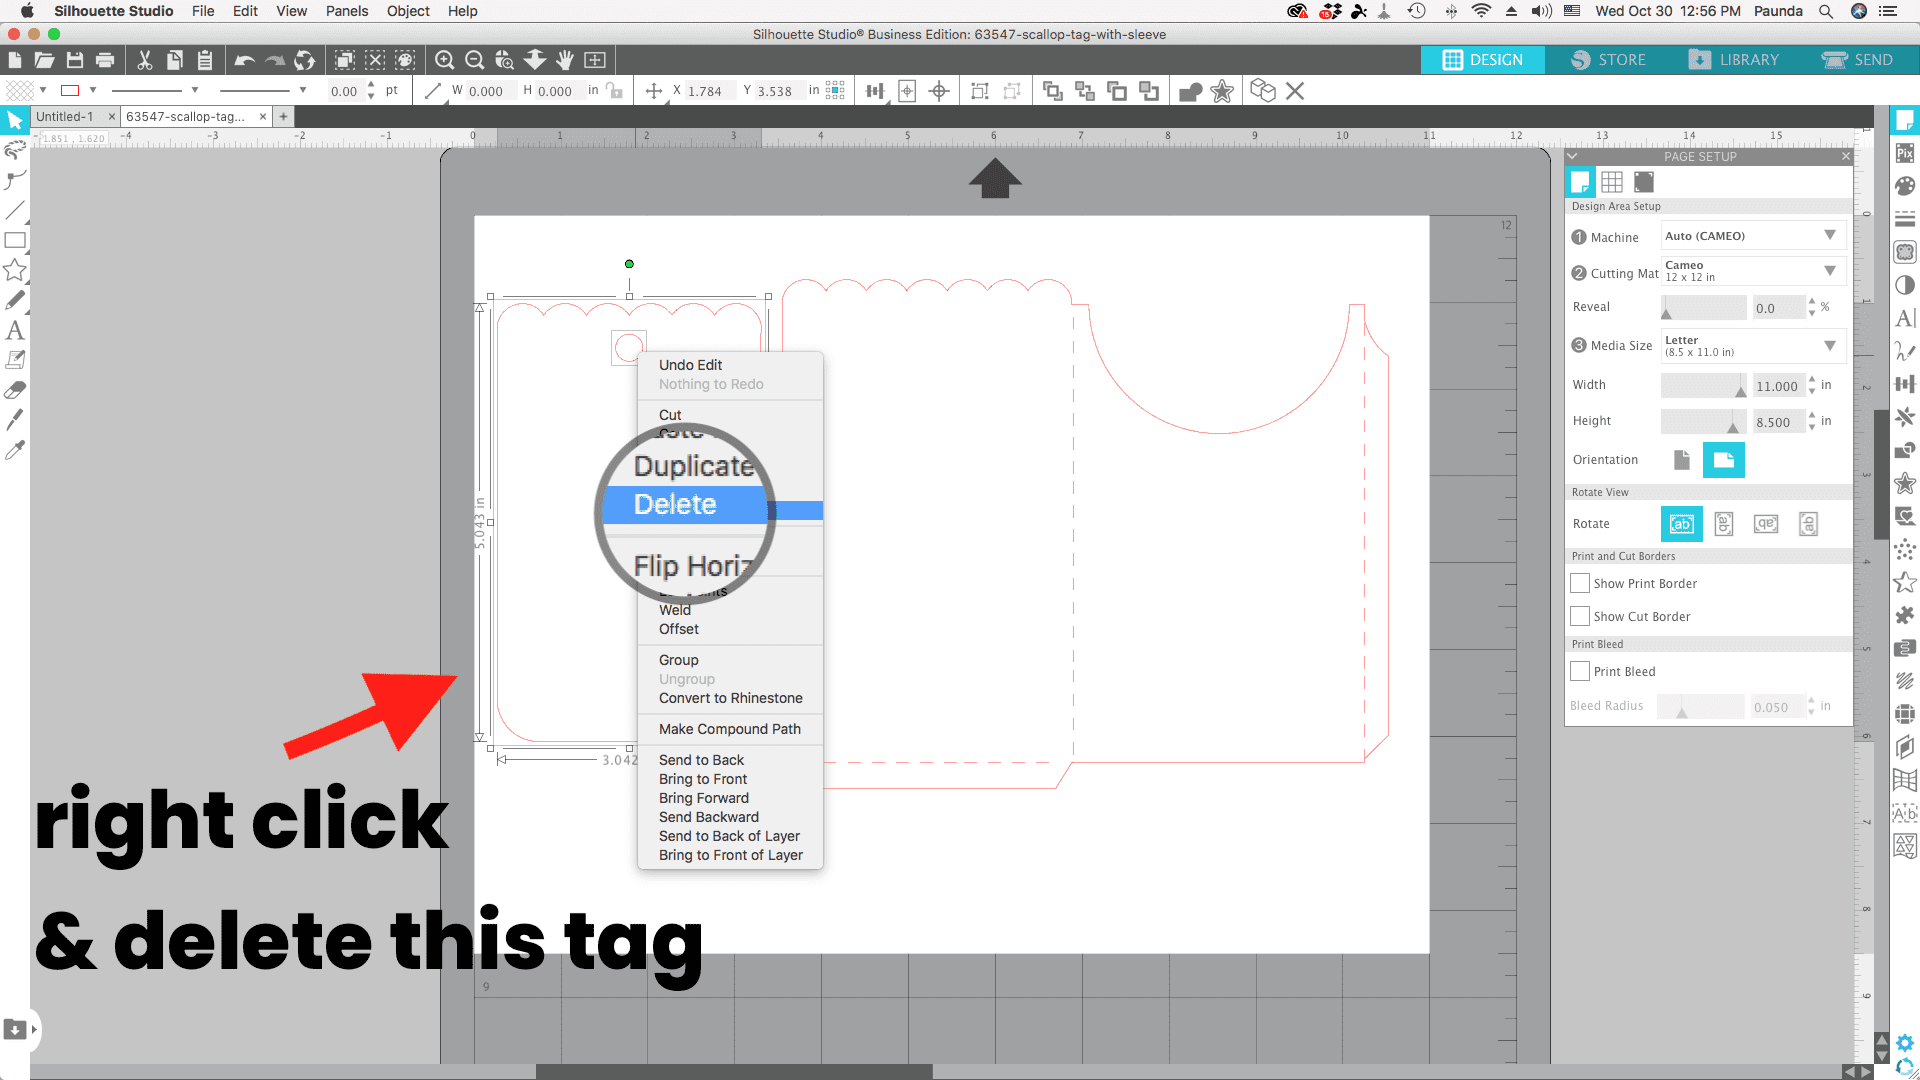
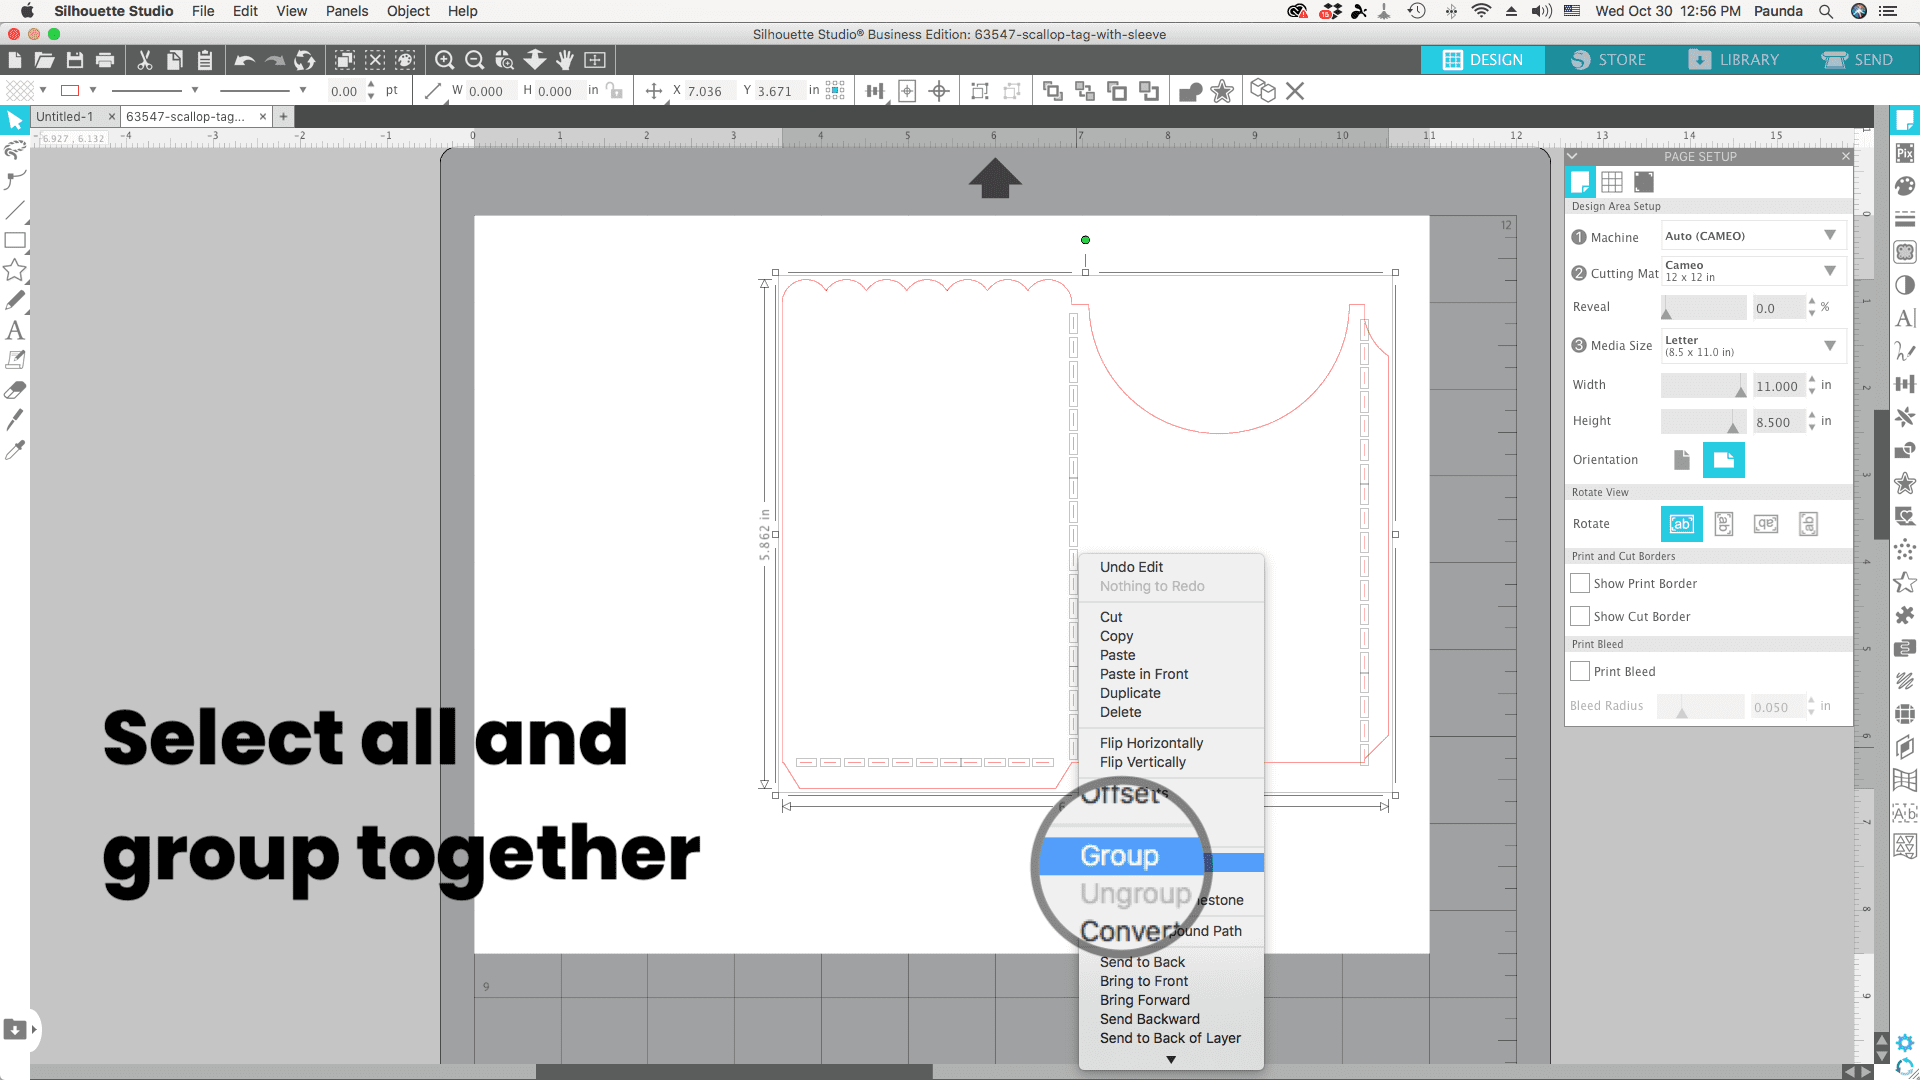
You won’t need the tag so you can just delete that. First ungroup the whole design. Then delete the tag only. Then group the rest of the entire design by selecting all of it and selecting group.

Now you can resize the rest of the design to the size you want your pen pouch to be. I made 2 sizes – the black larger one was 6.3″ tall and 9.7″ wide and the cream smaller one was 6.3″ tall and 6.5″ wide . I liked the size of the cream one much more!
Go to “Page Setup” and make sure your workspace matches the size of paper you will be working with (should be 8.5 by 11 inches) and the cutting mat you will be using (I am using a cameo mat).


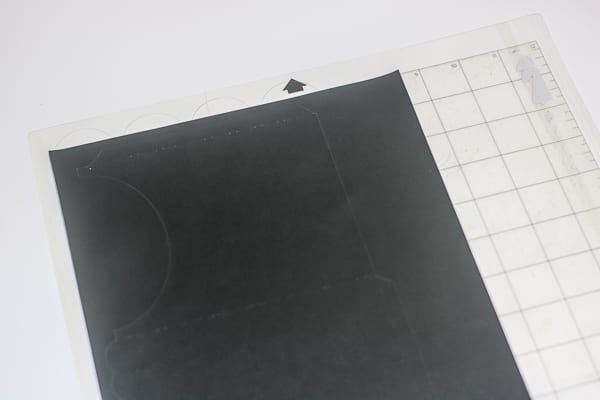
STEP 3: Place your leatherette sheet on your mat, load it into your machine and send it to cut
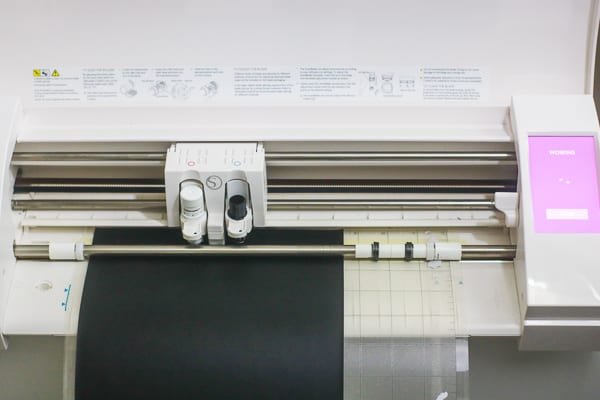
Now your design is ready to cut! Make sure your leatherette sheet is loaded on your mat the correct way. Be sure it matches your workspace design just like in Step 1. Align the printed sheet of paper to the left side of the mat. Then load your mat into your Silhouette Machine. The mat needs to align with the blue line with the arrows. Place the edge of the mat along the blue line. Once aligned, press “Load” on your Silhouette.
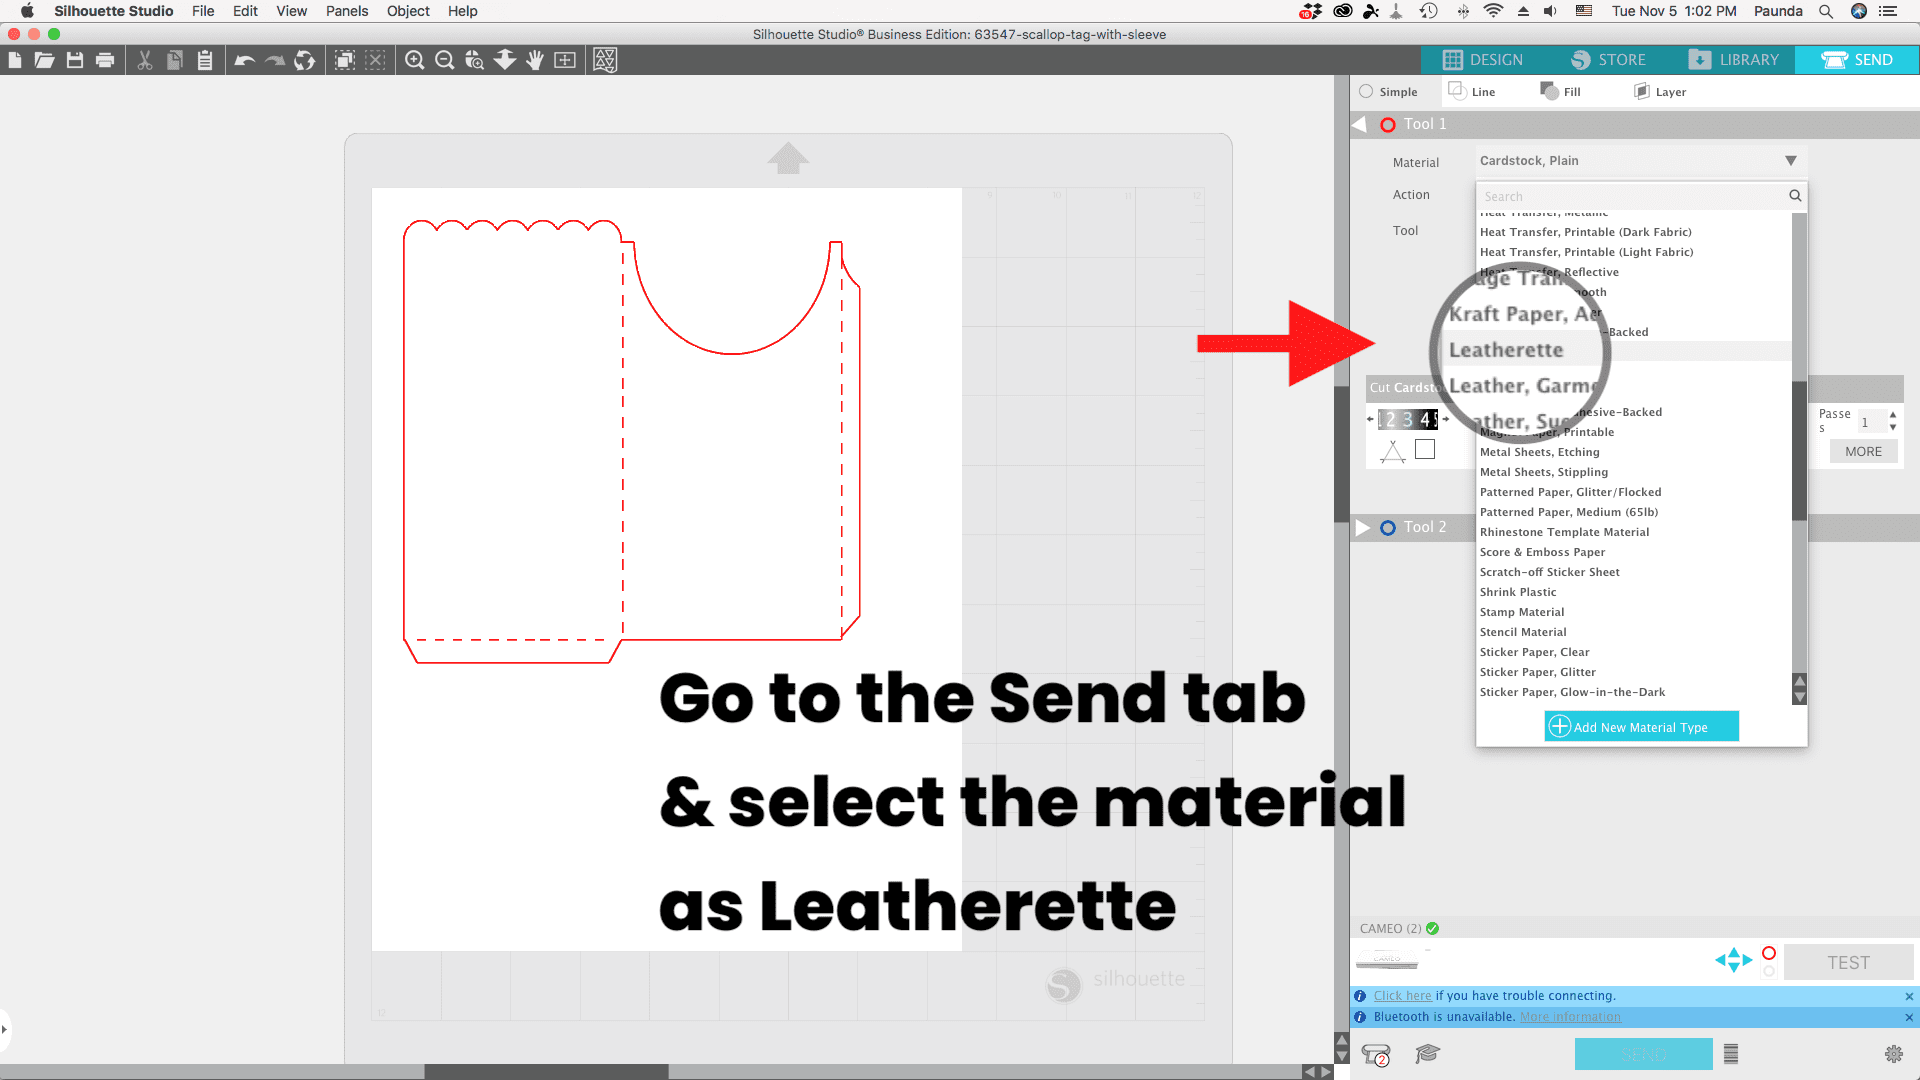
Then go to the “Send” tab and click on the material you are using – Leatherette sheets. The settings for the Leatherette sheets worked perfectly for me. Adjust your blade so it matches, or skip if you are using an autoblade. Then hit Send to start cutting.
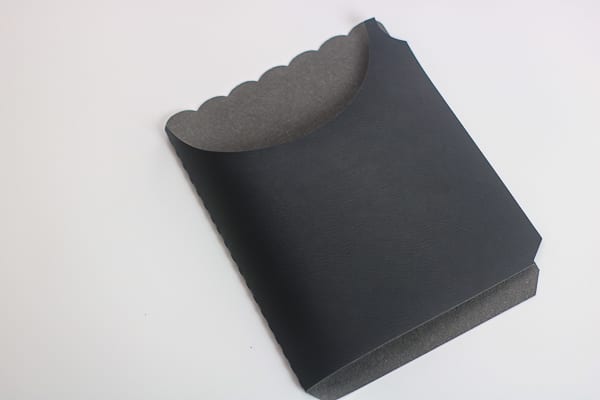
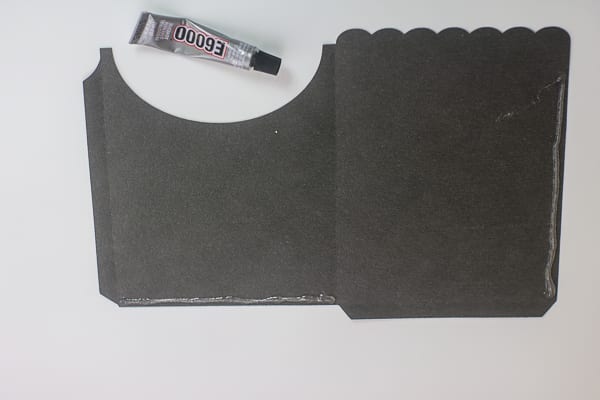
Step 4: Fold & Glue the edges
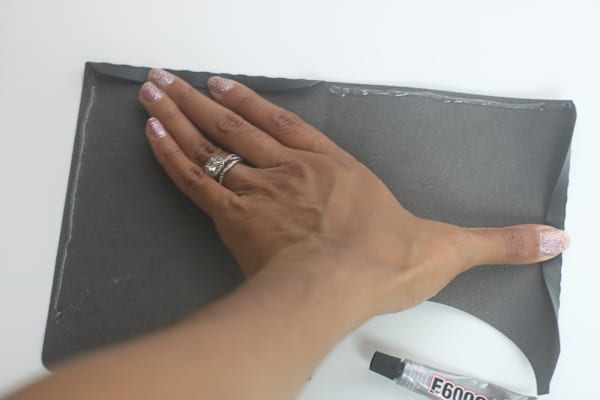
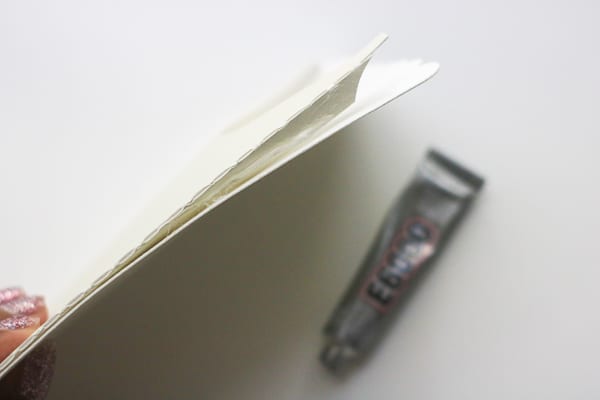
Now you can fold on the dashed lines and put together your design. Fold, glue and press down the folded areas. The flaps looks better if you glue it to the inside of the pouch (the way I did it on the black leatherette sheet). I found it easier to fold the flaps and add glue to the side where the flap would go (rather than placing the glue on the flap itself – like I did on the cream sheet). The glue I used is the E6000, I love using this glue for projects!

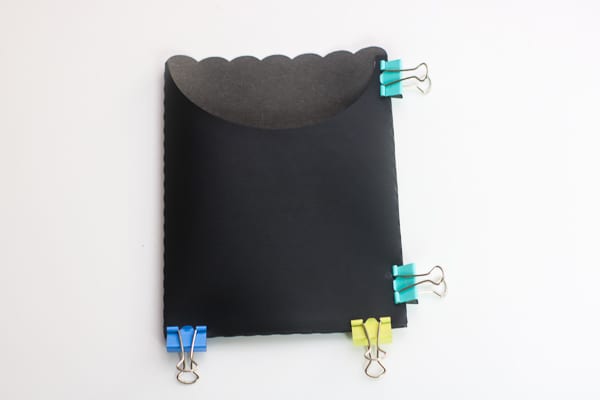
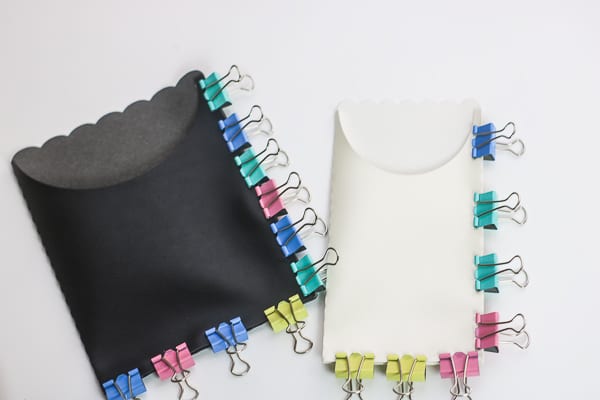
step 5: Clip the edges and let the glue dry
You can use clothesline clips, clamps or binder clips like I did (however these did leave an indent), but anything you have that can hold down the pieces of the leather together. You will find the flaps will want to lift up right away, the best way to make sure it sticks is by first clipping the ends on the bottom and side flaps, then continuing to the middle. Let it sit and dry for about an hour at least.
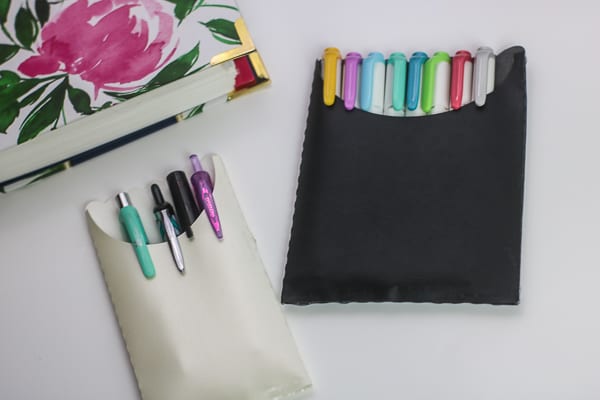
Step 6: add in your pens & enjoy!
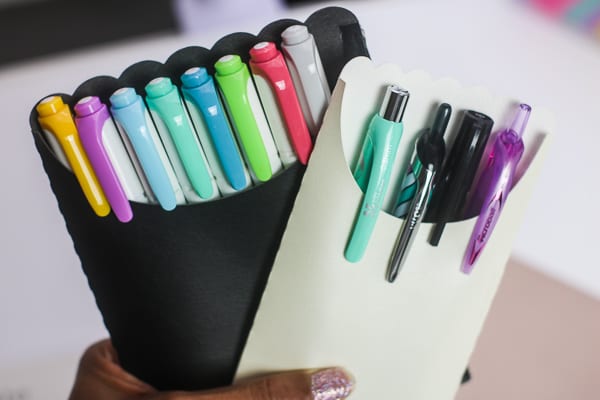
Now that your faux leather pen pouch is all made, check to see if your favorite pens fit! Place them in your pouch and throw them in your purse so you always have your pens with you!
I hope this little tutorial was helpful for you! Have you tried to make your own stickers with your Silhouette yet? Give it a try and let me know below!


Click here and use code 10OFF to get 10% off regular priced items (bundles and promo items not included).