
Table of Contents
Introduction
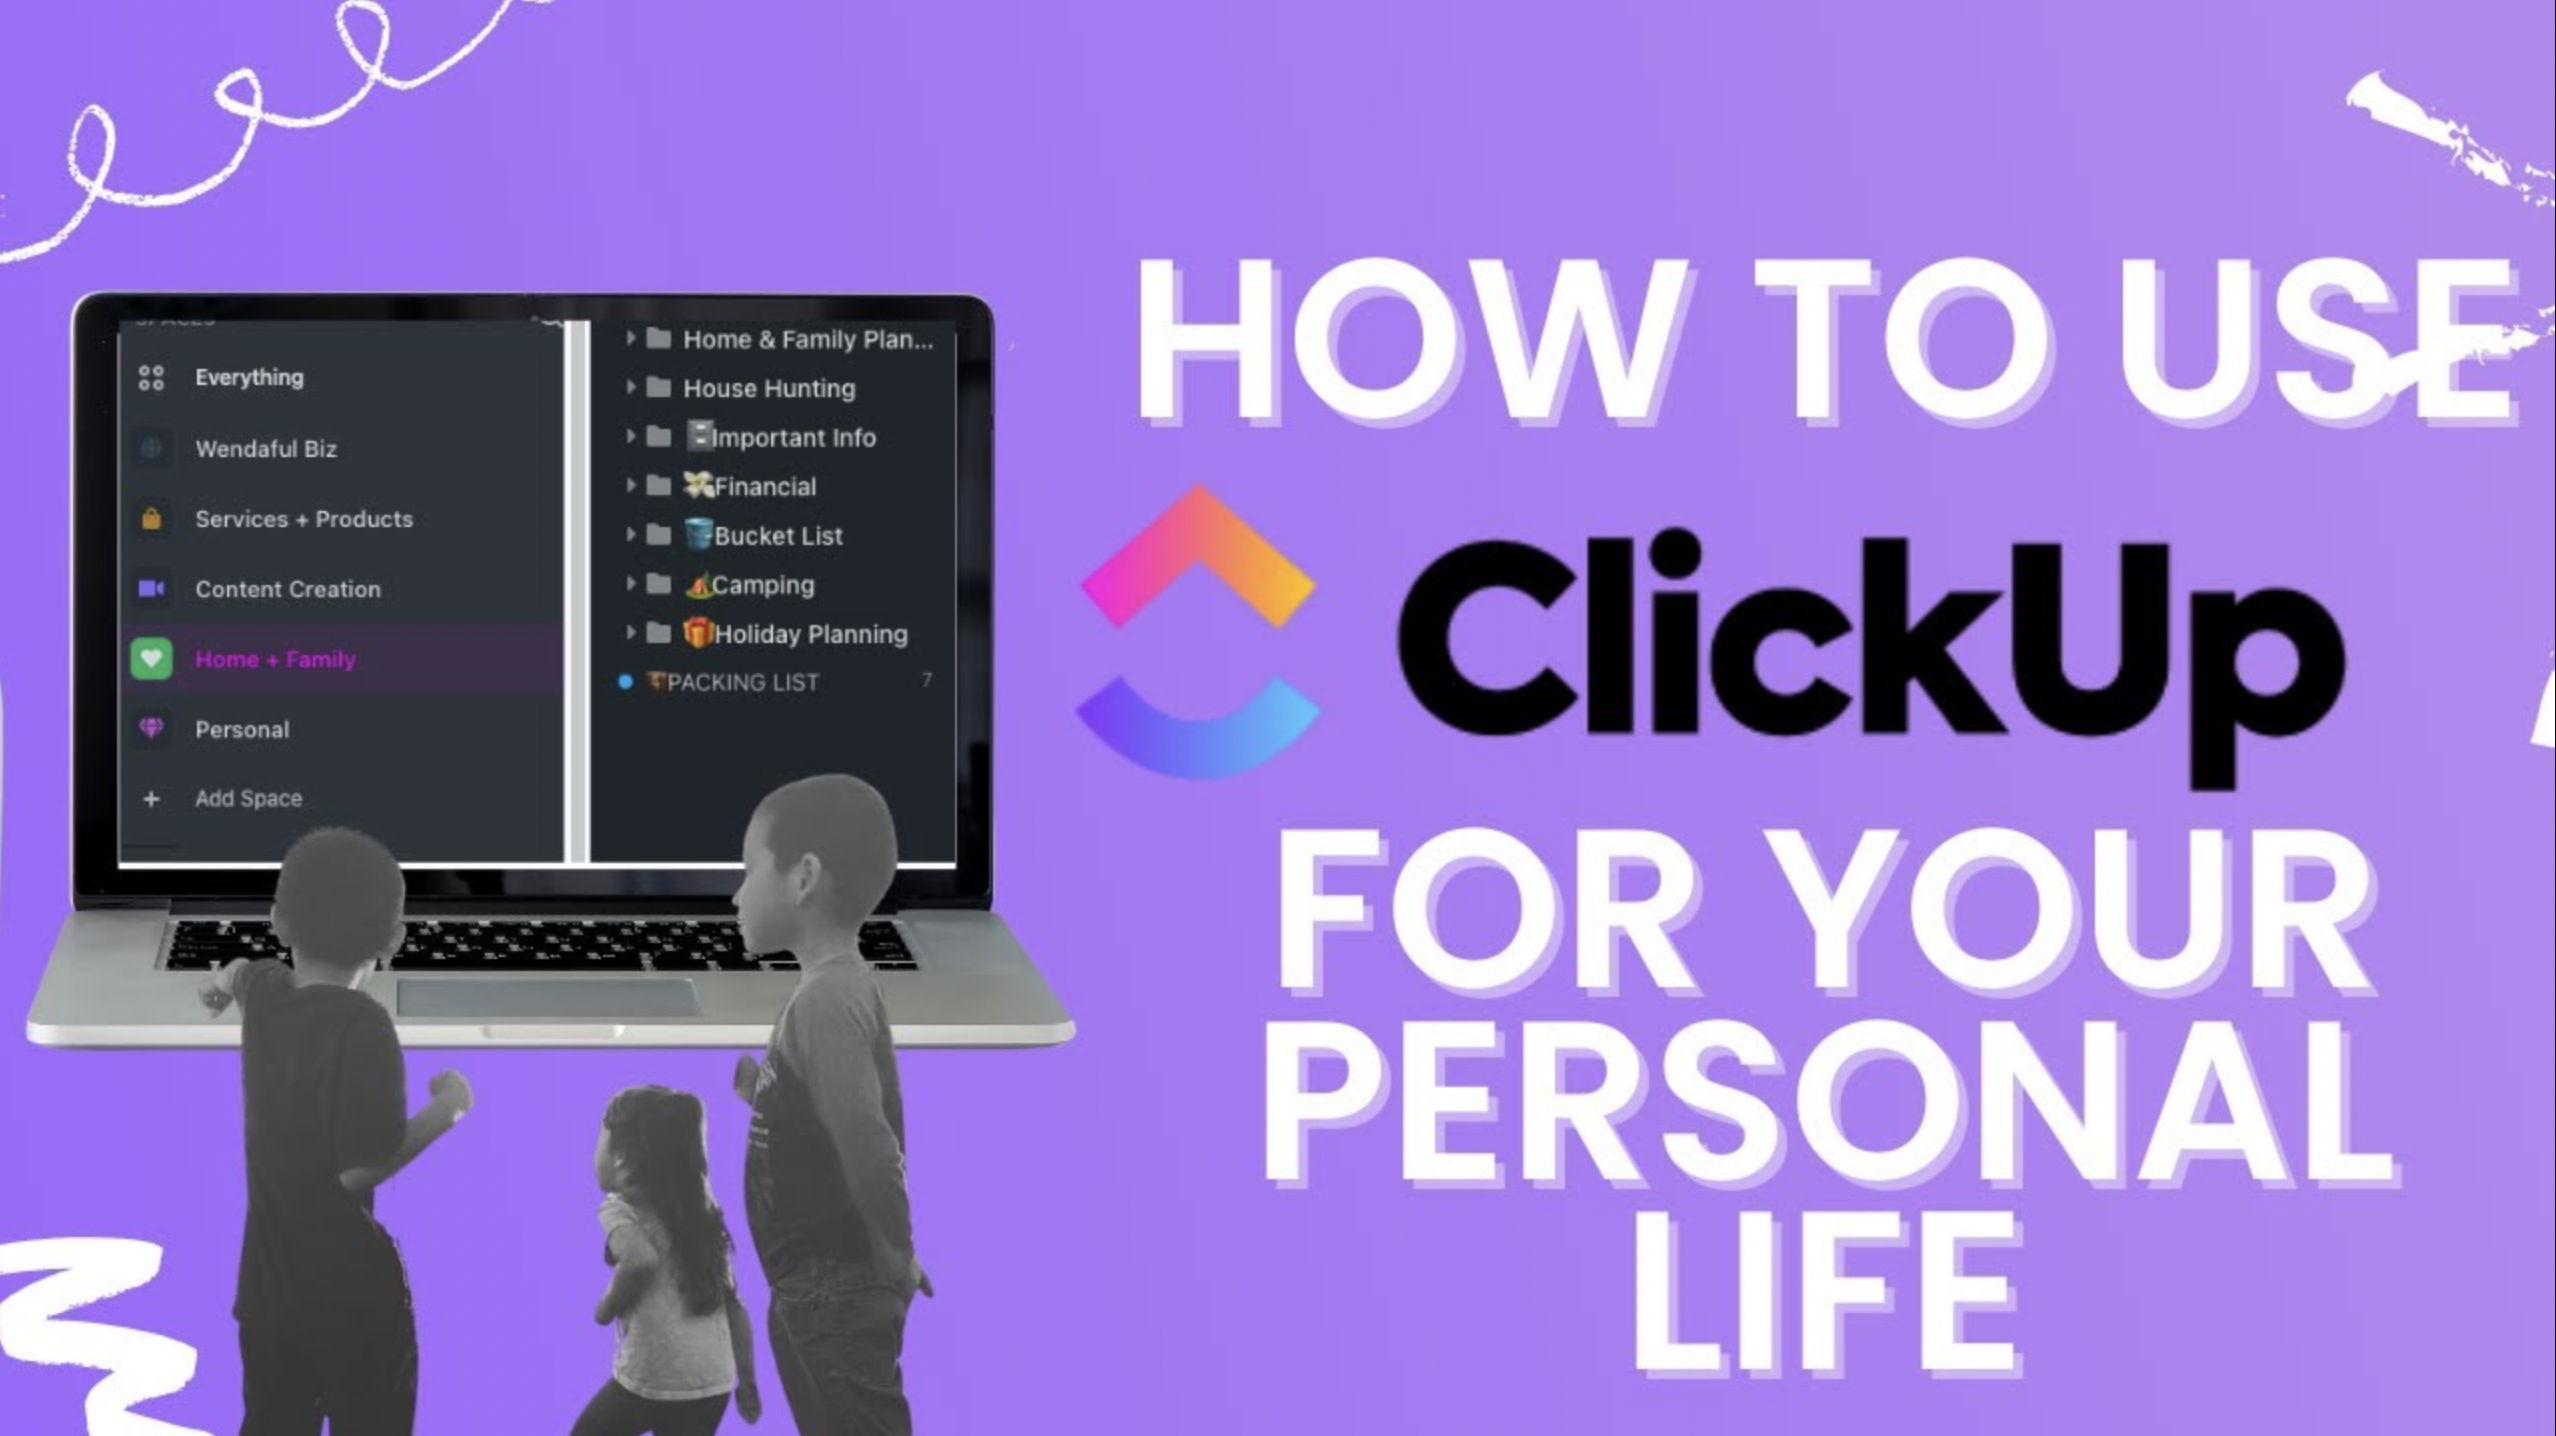
Hey, everyone! Welcome back to my blog. Today, we’re diving into one of my favorite productivity tools—ClickUp. I’ll be sharing some of my most-used features and how I’ve tailored clickup for personal use. So grab a cup of coffee, and let’s get started!
If you don’t have clickup yet sign up here: clickup.pxf.io/4PyX90
The Home Screen: Your Daily Dashboard
Why I Love It
The home screen in ClickUp is a game-changer for planning your day. It organizes tasks by date and even allows you to integrate your Google Calendar. It’s like having a personal assistant right on your screen!
How to Integrate Google Calendar
To integrate your Google Calendar, simply go to the settings icon on the home screen and select “Integrations.” From there, you can link your Google account and have your calendar events displayed alongside your ClickUp tasks.
Time-Blocking Your Day
One feature I adore is the drag-and-drop functionality. You can easily time-block your day, ensuring you’re making the most out of every minute.
Time-Blocking Tips
- Use different colors for different types of tasks (e.g., work, personal, family).
- Allocate specific time slots for breaks and leisure activities.
- Review and adjust your time blocks at the end of the day for better planning tomorrow.
Weekly Planning: The “Everything” Space
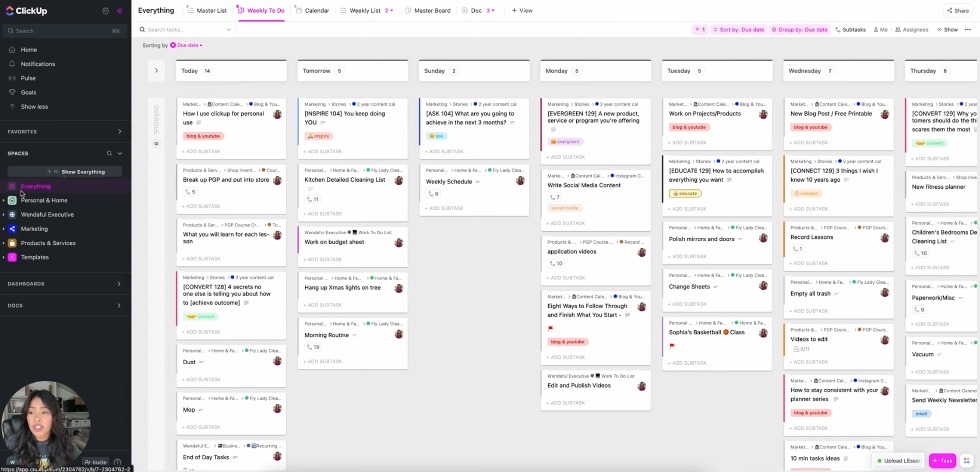
Setting Up Your Weekly To-Do
The “Everything” space is my go-to for weekly planning. It aggregates tasks from all my lists into a single board with a vertical layout. To set this up, create a new view, filter tasks due within the next seven days, and sort them by due date. Voila! You have your week at a glance.
Step-by-Step Guide to Create Your Weekly To-Do
- Go to the “Everything” space.
- Click on “Add View” and select “Board View.”
- Use the filter option to select tasks due within the next seven days.
- Sort these tasks by their due date.
Custom Categories
I’ve also set up custom fields like “Master Categories” to automatically categorize tasks into areas like business, home and family, and personal care. This way, I can easily see what needs attention in each category.
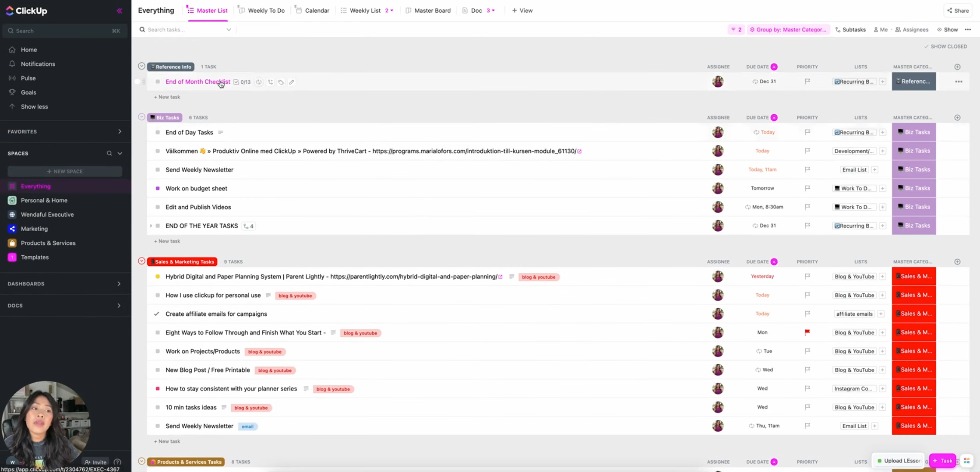
How to Set Up Custom Categories
- Go to the task settings.
- Add a custom field and name it “Master Categories.”
- Add the categories you want, like “Business,” “Home and Family,” etc.
- Set up automation to categorize tasks as they come in.
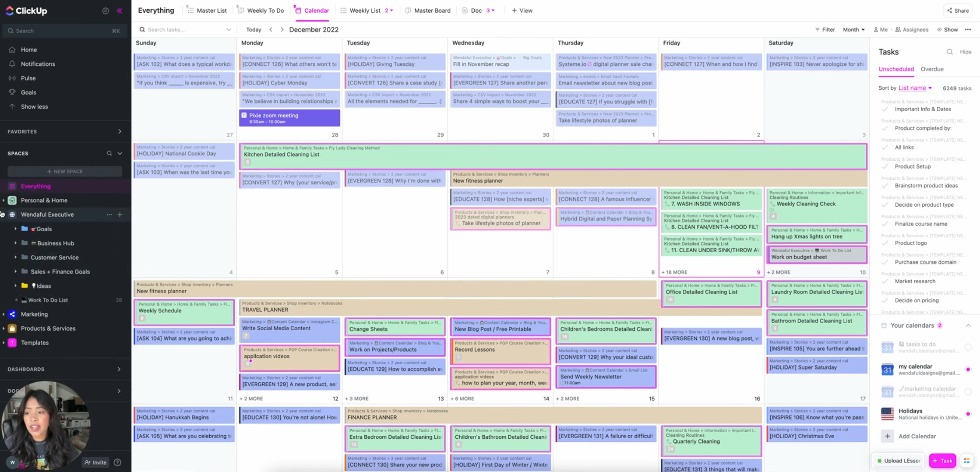
Calendar View: A Visual Snapshot
Color-Coding for Clarity
The calendar view is another gem. I’ve color-coded my tasks to easily distinguish between personal, business, and other categories. You can do this by hitting the “Show” button and selecting “Color Task by List.”
How to Color-Code Your Calendar
- Go to Calendar View.
- Click on the “Show” button.
- Select “Color Task by List.”
- Assign colors to different lists for easy identification.
Weekly or Monthly View
You can toggle between a weekly or monthly view, depending on how detailed you want your planning to be.
When to Use Weekly vs. Monthly View
- Use the weekly view for detailed planning and to focus on immediate tasks.
- Use the monthly view for long-term planning and to get an overview of your month.
Personal and Home Management: The Folders You Need
The “Personal” Section
In my ClickUp, I have a section called “Personal” where I manage everything from meal plans to important information like medical and financial records.
Folders and Their Colors
- Home and Family Tasks: Green
- Meal Plans: Green
- Personal Planner: Pink
- Wish List: Green
- Important Information: Green
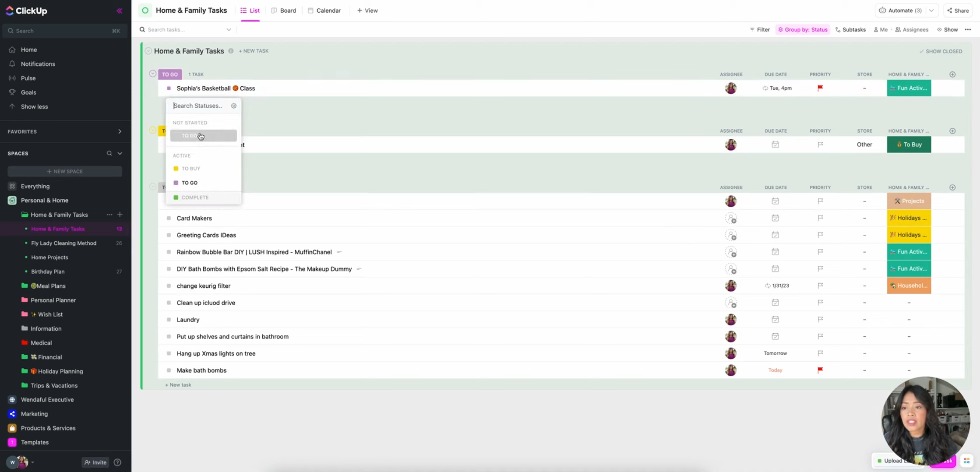
Home and Family Tasks
This folder is the hub for all family-related tasks. I’ve got different statuses like “To Do,” “To Buy,” and “To Go.” For example, basketball class every Monday is under “To Go,” and my ongoing shopping list is under “To Buy.”
Special Mention: Birthday Planning
Since my daughter’s birthday is coming up, I’ve added a special “Birthday Plan” list to keep track of all the preparations.
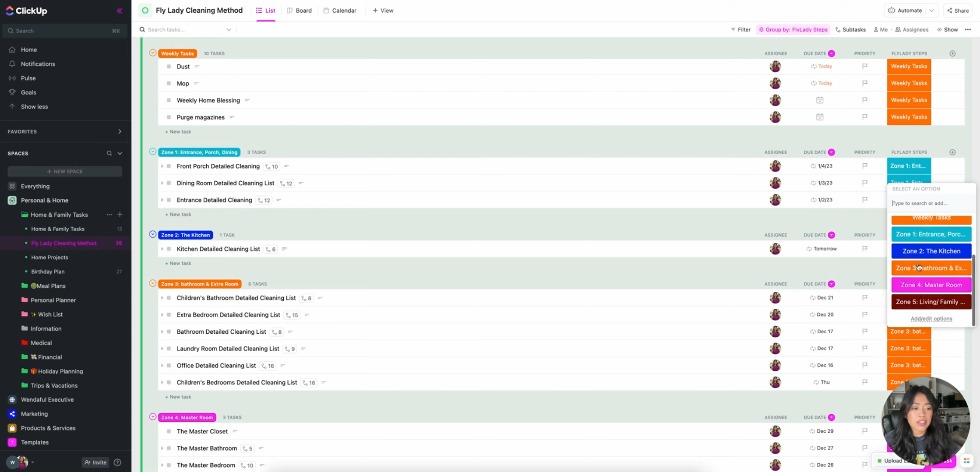
The FlyLady Cleaning Method: A Cleaner Home, Simplified
I’ve adapted the FlyLady Cleaning Method into my ClickUp. This involves setting up daily tasks, morning routines, and even detailed cleaning lists for different zones in the house. I’ve set these tasks to recur weekly, so I never miss a spot!
Meal Planning Made Easy
I used a template for meal planning that I got from a course. It includes different types of meals like salads, sandwiches, and tacos. I’ve grouped them by meal type and even have a grocery shopping list that pops up with items I need to buy.
Personal Planner: More Than Just Tasks
This is where I keep track of books to read, self-care actions, and even my bucket list. I’ve got custom fields to show locations, whether they’re abroad, in town, in-state, or in the U.S.
Crystal Collection & Makeup Inventory
I also have a document for my crystal collection and an inventory of my makeup, complete with pictures, so I don’t end up buying the same shades again.
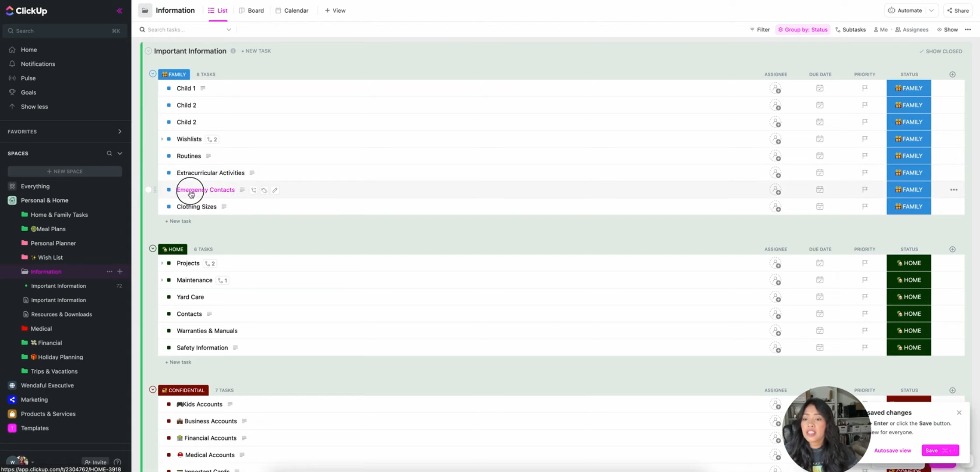
Important Information: Keep It All in One Place
This is the folder where I keep all the crucial information. From medical receipts to car information and even school IDs, everything is organized in tables within each task. It’s like having a digital home management binder! If you want this as a template you can find it here.
Categories in Important Information
- INBOX
- ✅ TO DO’S
- 👨👩👧👦 FAMILY
- 🏡 HOME
- 🔐 CONFIDENTIAL
- 🛒 SHOPPING
- 🥗 FOOD
- 👌RECOMMENDATIONS
- 🏋️♀️ HEALTH & FITNESS
- 💁♀️ PERSONAL
- ⛑MEDICAL
- 💵 FINANCIAL
- 🚗 AUTO
- 📓 SCHOOL
- 🪪 MEMBERSHIPS
- 🎉 SOCIAL
- 🏝TRAVEL/VACATION
Conclusion
So there you have it! That’s how I use ClickUp to manage my personal life. From color-coding tasks to setting up detailed folders for every aspect of my life, ClickUp has been a lifesaver. I hope this guide helps you as much as it has helped me. Thanks for reading, and I’ll catch you in the next post!