
 *Please note that some of the links in this post are affiliate links. If you click on the link and purchase the item I will receive a small commission or referral fee at no extra cost to you. Regardless, I only recommend products or services I use personally and believe will add value to my readers. Thank you for supporting this blog!*
Have you ever wanted to start a blog? Maybe you wanted to share something you’re great at. Or maybe you have a wonderful hobby (like planning) and want to share all of your tips, tricks, and beautiful ideas!
The internet is booming, you can make money so many ways online these days. Blogging is how I started. Now I work from home and make money passively. It’s really a dream come true. Do you want to learn how easy it is to start a blog? Well lucky for you, today I am going to show you how to start a blog so you can start making money from home!
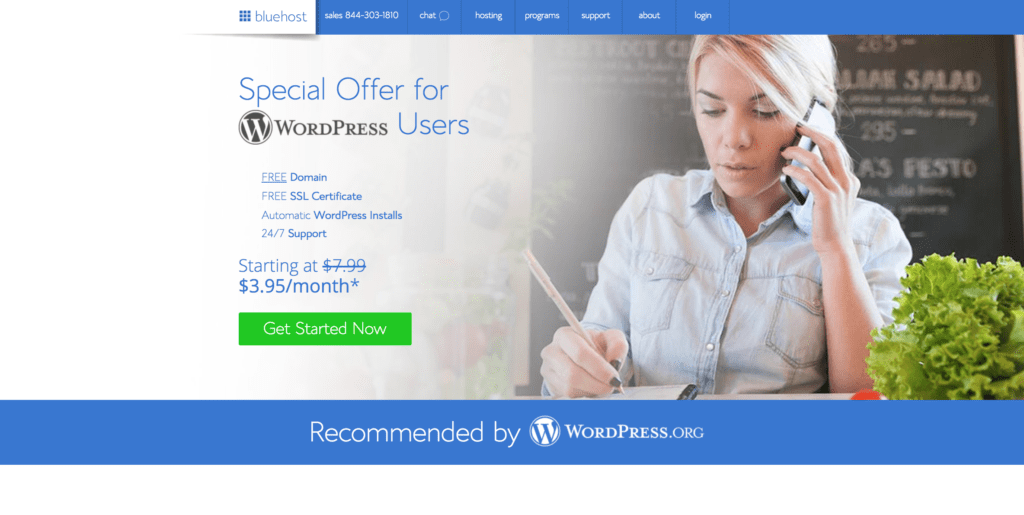
I use Bluehost for my blog and I absolutely love how quick and easy it is to set up. Most of all, I love their prices! I have been with Bluehost since the beginning and wouldn’t have it any other way.
Table of Contents
Step 1: Decide on Your Topic
What do you want to blog about? Are you going to choose a specific niche or maybe you’re going to have a lifestyle blog?
Step 2: Name Your Blog
The fun part. Choose a name for your blog!
Will it be professional or fun? Maybe you’ll choose your own name. Make it something easy to remember, and avoid anything hard to spell or too long. You want something people will remember. My blog’s name used to be MsWenduhh which was hosted on Blogspot, when I switched over to WordPress I changed my name to Wendaful. So mine is just a play on my real name: Wenda.
Be sure to check domains to see if it is available.
Domain is your URL address without the “www.” or “.com”, mine is “wendaful”. You don’t want to end up with a blog whose URL address is different from your actual blog name because someone else already owns the original name. And I recommend getting a .com because it’s the most popular and easy to remember when typing in a URL address.
Step 3: Decide on Your Hosting
After choosing a name for your blog, head over to Bluehost to choose what kind of hosting level you think you’ll need. What is hosting, you ask? Hosting is the same as cloud storage. It’s basically a place holding all our data.
First, click where it says WordPress made easy then click the “get started now”.

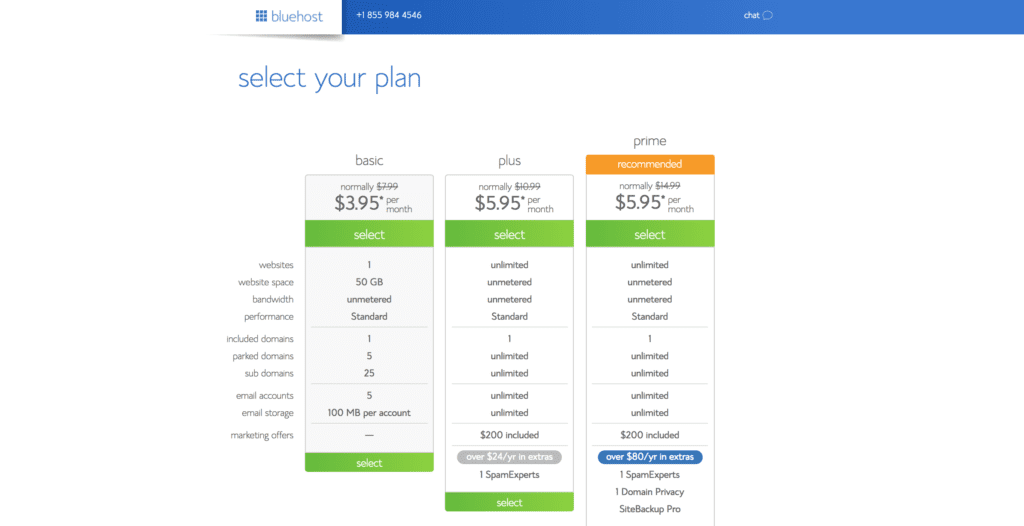
 I recommend starting with the cheapest plan since you’re just starting out, you can always upgrade later if your blog blows up!
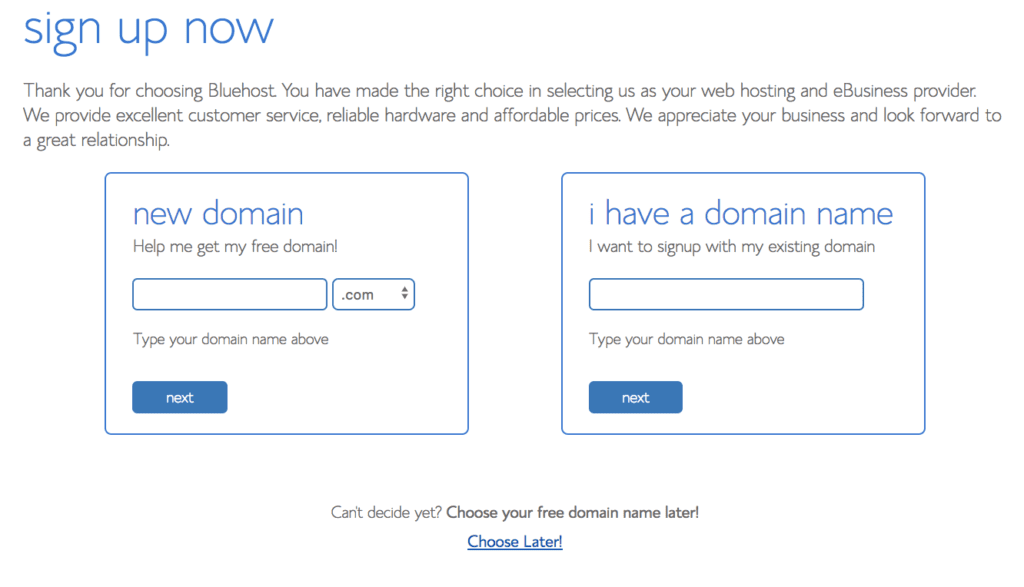
Next, type in your domain name, they even have the option to decide later if you can’t think of one now. If the one you want isn’t available, keep trying variations until the one you want is available.
 After that, you will enter some personal information and choose your account plan. 36 months for $3.95 is the best deal. I know this might seem like a big investment, but trust me if you want to be successful in blogging this is the best way to do it.
I started off with Blogspot and having to switch over to a self-hosted blog was a real pain. Most of my picture links are still broken to this day! If blogging doesn’t work out for you, you can always ask for a refund for your unused portion, so there’s no risk.
After creating a password your Bluehost account is ready to go! Just log in now!
Step 4: Install WordPress & Launch
To install WordPress just click “Start Building”. You’ll choose a theme for WordPress. You can always change it later. (WordPress is the software that makes your site a blog and makes it easy for you to create posts and things. It’s very user-friendly and easy to install with Bluehost.)
After WordPress is installed on your site, you’ll go through a few prompts.
Finally, just click “Launch” to launch your site. I know it looks blank right now but don’t be overwhelmed. Designing your blog is fun and easy!
Step 5: Build Your Beautiful Blog
To start writing and editing the look of your new blog you’ll have to log into your WordPress dashboard.
To do that, just navigate to http://www.YOURSITE.com/wp-admin and you can log in to your WordPress dashboard using the username and password you created earlier.
This dashboard is where you will do all of the behind the scenes work for your blog.
Once you are logged in to your dashboard, you can start choosing which themes and plugins you might need. WordPress has a lot of free options. Just go to appearance, and themes to see. There are also tons of other websites with free themes, if you want something nicer definitely check out etsy or retored316 for themes.
I currently use Georgia Lou Designs, but she just recently switched over to focus only on Blogger so she no longer makes WordPress themes.
Personalize your blog and then start writing! Once you’re up and running you can start monetizing it with ad networks like Google Adsense or start writing sponsored posts!
Now you’re a step closer to achieving your goal of working from home with your brand new blog!