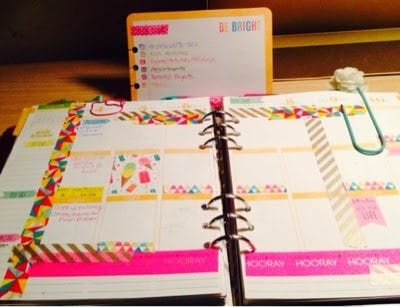
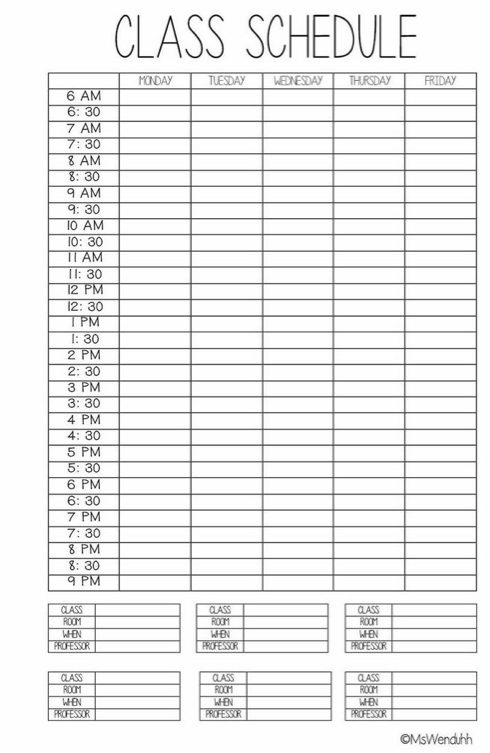
• Planner Stickers

    I had to make my own planner stickers because the ones that came with my Erin Condren planner was not very suitable to my life style, I definitely do not party as often as they think, and I probably won’t be going to Vegas anytime soon.

    I made one that is perfect for people like me, a stay at home mom. Here is a preview of the stickers:

    I printed these out on card stock, cut them into strips and rolled them through my sticker machine (Xyron 250) and have them in my zipper pouch ready to cut and paste into my weekly boxes.

    These stickers include:

    • H2O – to track your water intake
    • Laundry Days – a never ending story
    • Appointments – for doctors, or anything really with space for who and time!
    • Workouts – got to stay in shape
    • Grocery Shopping
    • To Buy – for lists (I put these on the side)
    • Mommy Time – We all need our own time alone
    • To Write – snail mailing or RAKs!


     Here is an example of one of the appointment stickers in my erin condren box!
     preview of the rest of the planner stickers!

    DOWNLOAD HERE:

    🔗 FREE PLANNER STICKERS

    For more stickers check these ones out:

    Custom Planner Stickers

    Erin Condren Horizontal Planner Stickers

    New Stickers

    Please do NOT share the actual file or file link. Instead send your friends here to download my free printables, thanks

    Enjoy!

    Be on the lookout for more planner stickers  !

    PLANNING STICKER TOOLS

    Keep Reading

  • How to organize All of your Coupons and Inserts

    These are my binders that I use. Couponing is serious business. If you aren’t organized there is no way you can find your coupons to use and get the great deals. If I didn’t find this method of organizing it would have made Couponing so much more stressful for me. Anyways here is the breakdown on how I stay organized. 
    How I organize my coupons:
    Binder #1: 
      -A mini binder with dividers and 2/4 pocket holders
        –Clipped coupons in A-Z order
           – I only clip coupons I think I might use
        –Store coupons 
           – ones from their website or printed from stores

    Binder #2:
      -my shopping mini zippered planner/binder 
        –holds all rewards cards
        –has pocket on inside that I labeled “in cart”
        –dividers and sheet pocket holders 
            – tabs include:
                 – today’s trip, must-haves, baby items, moneymakers & specific stores
        –also has notepad in back and a pen holder
            – in back of pocket to hold the notepad I put all of the store’s coupon policies with tabbed labels 

    Binder #3:
      – a zippered full size binder with sheet protectors
         — I use the clip less organization method from fabulesslyfrugal.com 
         — I also print out their coupon insert list and put it in sheet protectors so I don’t have to look through the insert! It’s amazing! 
         — I also check off coupons that I’ve clipped and cross out ones that I didn’t get in my inserts 
    Here is the link: fabulesslyfrugal.com/coupon-orginization-making-it-work-for_24/

    So that’s how I organize and shop with my coupons! Hope it helped you!

    Keep Reading

  • DIY Bridesmaids Invitations for free or very cheap!

    So after looking at several DIY bridesmaids invitations, I found one I absolutely love. It was from Bethany’s blog. I loved the way she asked her bridesmaid and wished I could have done it exactly like hers! But I didn’t want to spend a lot of money so I came up with my own version. 
    Here is what you will need:
    – cardstock paper
    -printer with ink
    -lace ribbons
    -color swatches from paint store or home depot/lowe’s
    – inspirational photos
    I spent absolutely nothing on these! I had the lace, I had ink, I had cardstock, and the color swatches were free! oh how I love the internet!
    For the card itself, I found a printable for the bridesmaid invitation on weddingchicks.com. I printed those out using the setting where I print two copies per page and folded it in half so the design can show up on the back and the front. You can get this free printable here.
    Next, I loved her idea of scalloped postcards. For mine I used card stock, this template, and photoshop. I made each box progressively smaller like she did and then I hand cut each one. I also used the same content. I totally feel the same way as she does about having bridesmaids. I just want them to be there for me on one of my most important days of my life! I don’t care about the showers or parties or gifts! It was beautiful!
    click here for template
    After that I went on my Pinterest board and picked out my favorite themes from my wedding board. I took about four pictures and put them all on one document in photoshop and printed four copies of it on one page and cut each one out for each of my bridesmaids (gotta save paper you know!) I wanted them to see what I saw as my dream wedding.
    I then went to get color swatches from Home Depot and placed them in the card as well.
    I didn’t like how everything could fall out so easily so I found some lace at the thrift store and used them to tie both horizontally and vertically across the card to make sure nothing would fall out.
    And that’s about it. I can’t wait to see the faces of my bridesmaids when I give them this !

    Keep Reading

  • How to Make a DIY Photoshoot for Your Baby

    Hey everyone! So the other day, my fiancé and I were bored and decided to make a Christmas photoshoot for our son. We had our camera but needed somewhere nice to shoot and we of course needed props. The lighting in our house was pretty bad as well. So here is what we gathered to make our pictures looks professional:

    Equipment:
    – Camera (of course)
    – Bright light – lamp from target
    – Reflector – mirror from target

    Environment & Props:
    For the Xmas shoot:
    – fireplace
    – white Xmas teddy bear
    For the library shoot:
    – books in bookshelves
    – books stacked
    – metal tin bucket
    For the outdoor drummer shoot:
    – grassy outdoors (best if just before sunset)
    – drum piece
    – drum sticks

    Subject:
    Darling baby
    Cute simple outfit
    Pierce is wearing:
    – H&M jeans with suspenders
    – white onesie
    – old navy tan moccasins

    So for the first two shoots that were indoors we used the lamp and mirror. All we did was plug in the lamp and shined it onto the mirror and placed it facing the baby wherever we got the best light. You will have to test and keep moving around until you like it. After that you just take a million pictures and try to make your baby look at you by making loud funny noises!

    For the outdoor shoot, we just placed him at an ideal spot on the grass and took pictures of him at his level.

    After taking pictures get on your computer and go on photoshop! Adjust the lighting add more contrast if needed sharpen up etc. or you can download some actions that do this for you already and just use actions to so all the work for you. Adjust to your liking. For most of my pictures i used the vintage action and tweaked it by deleting several layers until it was perfect. Here I show you how I edited my pictures several different ways using actions that I downloaded from …

    And that’s basically it! That’s how I got these wonderful darling pictures of my baby boy! Not bad for an amateur, I must say.

    I am already making Xmas cards with these pictures!!

    Keep Reading

  • Baby Pierce's First Halloween

    What a night! Carrying a 20 pound baby door to door is a workout for sure. Pierce was so amazed by all the face paints and masks he saw today. He especially liked staring at his oldest cousin Jaiden who was a skeleton football player. All day today, he kept looking at me and smiling and laughing. I’m glad he didn’t get scared though! Halfway through he started getting really tired so I let him sit in the stroller and he knocked out for about 20 minutes. After going through several blocks we went home and dumped out all the candy! He loved looking and picking up each one and trying to eat it haha. We got a big bag of candy but only that my fiancé and I can enjoy! Sorry Pierce! Anyways hope you enjoy these pictures of my baby’s first halloween.

    Keep Reading

  • DIY Toad (Mario) Costume

    Here is a DIY on how I made this costume for my son. My son is only 8 months old so the white beanie fit his mushroom head, if you plan on making this for someone bigger you might need a chef’s hat or white fabric. To see how I made the vest look at the video..

    The Hat:

    You will need a cowboy hat or semi-sturdy hat with a brim that fits your person, and a cardboard cut out into a circle around brim of hat then cut the inside of the circle like this

    Tape the cardboard circle to the hat

    Stuff some socks with plastic bags and tape around the hat above the cardboard

    get your white beanie with red felt circles sewed onto it and wrap it over the whole hat

     The Costume on my son:

    for Halloween I will let him wear a tan or white long sleeved shirt underneath his vest

    So hard to get a good picture with this boy!

    White pants are from the thrift store

    Blue vest was a shirt or cardigan, I cut off the sleeves and added gold ribbon to the trim of the whole shirt using hem tape!

    not the best work but he still looks like a mushroom head!

    My little Toad!

    Keep Reading