
This is a sponsored post in which I received a free set of 3D Wall Panels from CSI Wall Panels in exchange for writing a review on my blog. All opinions are my own.
I have been wanting a beautiful modern headboard for our bed for so long! However, we didn’t want to shell out the big bucks for something that was more of a luxury than a necessity. I also wanted a headboard that would be functional. I asked my husband to build a headboard that can also be used as a shelf to put my glasses and books on in the middle of the night. Today, I’m going to show you, step-by-step, how to build a modern headboard that completely changes the look of your bedroom! This project only took us a few hours to make from start to finish!
Our bed is a Cal-King pillow top mattress. We never bought a bed frame for it because of how tall it is (plus our babies co-sleep with us still, and we didn’t want them falling off an even higher bed.)
Since all beds are a bit different, I won’t be providing exact measurements, but instead, I will show how I measured everything. To learn more on how to build a modern headboard, keep reading!
If you’d like to see more home and family posts, you can start here.
Table of Contents
Review: CSI 3D Wall Panels
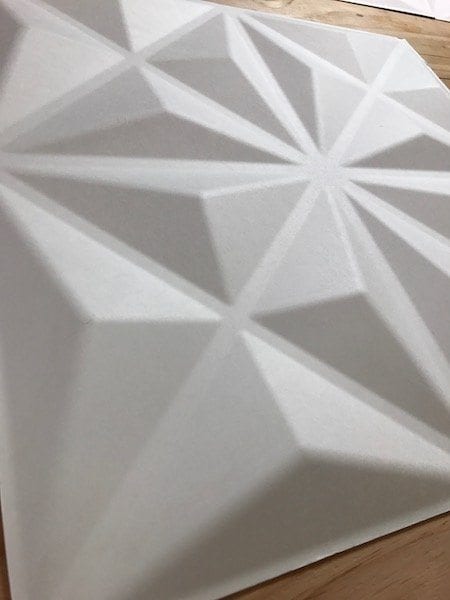
First, I’d like to share with you the 3D wall panels we received in order to make this headboard beautiful and unique. We received these 3D wall panels from csiwallpanels.com. They sell all kinds of 3D wall panels that are eco-friendly and includes a variety of patterns and designs to choose from. You can also paint them to the color of your choice! These wall panels are so lightweight and easy to work with. You can easily transform a room with these products.
I chose the “Cullinans” design because I loved the look of how modern and sleek it was. Since we are renting an apartment, we didn’t want to attach it to our walls. So we opted to use it as headboard
The wall panels are so sturdy despite it being made with such a light material. I was afraid that if we used it as a headboard, that it would dent, but it doesn’t! Even when I forcefully tried to push it in, it still didn’t budge! It’s extremely well made!
We went with plant fiber but honestly, I wished we had chosen the wood panels instead (I’ve listed the specs and details to compare the two down below). I feel like the plant fiber would be harder to clean since it’s somewhat of a cardboard material.
 SPECS/DETAILS:
[one-half-first]
3D PLANT FIBER PANELS
Panel Size: 19.68″x 19.68″inch, 275g
Material: Sugarcane fiber (Bagasse) Paper pulp.
Thickness: 1.5mm on flat areas, .50″ on Dimension areas.
Features: DIY Product, flexible, Lightweight & Paintable
Package: 12 panels/Box. Covers 32.29 sqft/box
[/one-half-first]
[one-half]
3D Wood Wall Panels
Panel Size: 19.68″x 19.68″inch, 725g
Material: MDF Wood fibre.
Thickness: 3mm on flat areas, Up to 1/2 inch on Dimensional areas.
Features: DIY Product, Eco-Friendly, Lightweight & Paintable
Package: 10 panels/Box. Covers 27 sqft/box
Color: Comes only in its Natural off white color
[/one-half]
More About CSI Wall Panels (from their website):
CSI Wall Panels is a leading designer, manufacturer and installer of decorative wall panels exclusively for commercial applications including Hotels, Restaurants, Corporate, Retail and more. Spanning 7 collections featuring over 160 designs, 6 core materials, and over 500 finishes our selection of wall panels is industry leading
Starting with your vision, our staff Architects design and present wall panel solutions that respect the integrity of the architectural design all while offering an impactful and rich outcome to the space. We don’t just sell you stock wall panels, rather we collaborate with you to design a space that tells your story on the walls.
Follow them on social media to learn more:
Although these wall panels are meant for walls, since we only had 12 panels in the box, we decided we didn’t want to use it on a small part of our walls. The transformation of how simple these 3D wall panels are so dramatic. It’s unbelievable how something this easy to install can completely change the look and feel of a room. Here are some examples of what these wall panels would like on a wall:
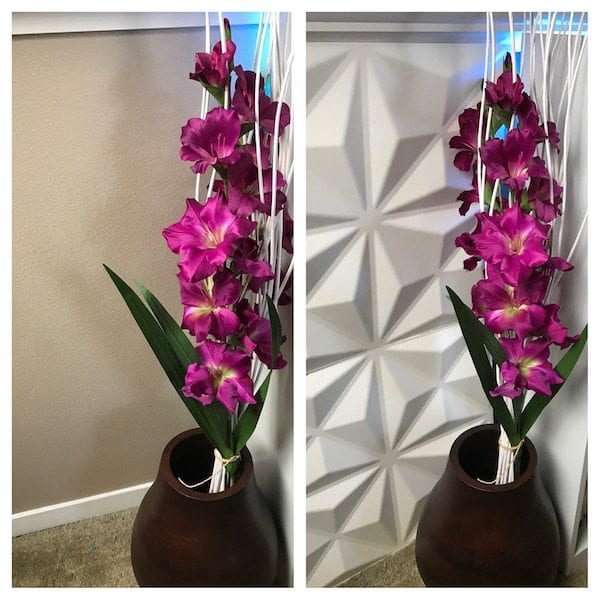
If you’d like to see their complete collection of wall panels from please check out their site at http://www.csiwallpanels.com.
How To Build a Modern Headboard:
Design:
The design my husband came up with for our headboard is super simple. It includes a large plywood for the headboard, two boards to be used as our shelves, & several small support beams. Alternatively, to make this project even more simple you can just get only the plywood and opt out of getting the extra wood for the shelves. That would save you a ton of work. However we really wanted a shelf for decor and functionality purposes. If you do decide to just go with the headboard you can just measure your bed and skip to attaching the wall panels! Even easier!
1. Measure:
- Cut the plywood according to the measurements that match your bed
- Measure the width of your bed. First figure out if you’d like your headboard to line up exactly as wide as the bed is, or if you want it larger than the width of the bed (like the way we did ours).
- our measurement came out to 96″ wide
- Measure the height of the bed + how much higher you want your headboard to be. Since our bed sits on the floor we didn’t really need much more wood. If you have a bed frame, your bed may be taller and thus require more wood for the headboard.
- our bed height was 24” tall. We wanted the headboard to be only about 1 panel high above the bed (each panel is 500mm or 19.68″ so we added the height of the bed plus the panel size)
- Our plyboard was 96” wide by 43.68”
- our bed height was 24” tall. We wanted the headboard to be only about 1 panel high above the bed (each panel is 500mm or 19.68″ so we added the height of the bed plus the panel size)
- After getting your measurements, you will also need to measure the support beams that would be in between the shelves so the employees in the store can cut it for you (or you can get a handsaw and cut it yourself so you don’t have to measure beforehand)
- Measure the width of your bed. First figure out if you’d like your headboard to line up exactly as wide as the bed is, or if you want it larger than the width of the bed (like the way we did ours).
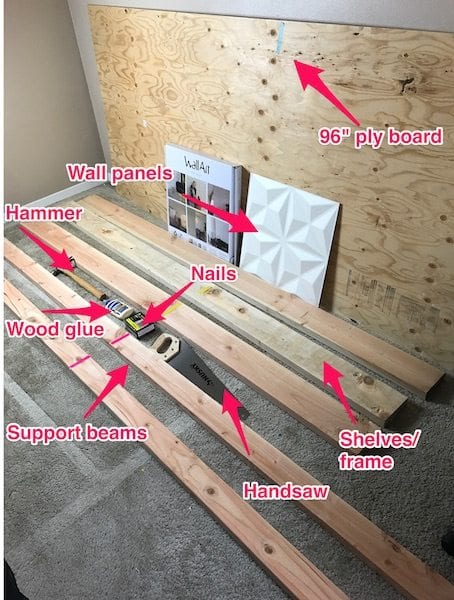
2. Gather Supplies
We picked up our supplies at Home Depot. They cut the boards for us so it made things so much easier for us!
- Wood
- 1x – large plywood (main headboard)
- 3x – 2”x”6’x”8 that are as long as the width of your headboard measurement (ours was 96”) – (top, middle, & bottom shelves)
- 2x – 2”x4”x10” shelf support beams (measure in between the top, middle, and bottom shelves)
- Nails
- Sandpaper
- 3D wall panels
- You can find a small pack of 12 at home depot/lowe’s or any other home improvement store as well as on Amazon as linked. There are tons of designs to choose from! Choose a style that speaks to you!
- Wood glue
- Wood stain
(optional)


If you don’t have these, grab them as well:
- Hammer
- Measuring Tape
- Hand saw
(optional, if you didn’t have the home improvement store cut them for you)


When you have your wood and boards, head over to the cutting station in the back of the store and ask one of the employees to cut the boards for you.
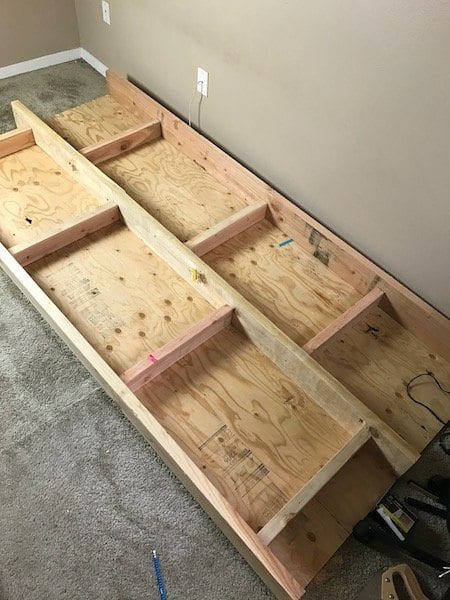
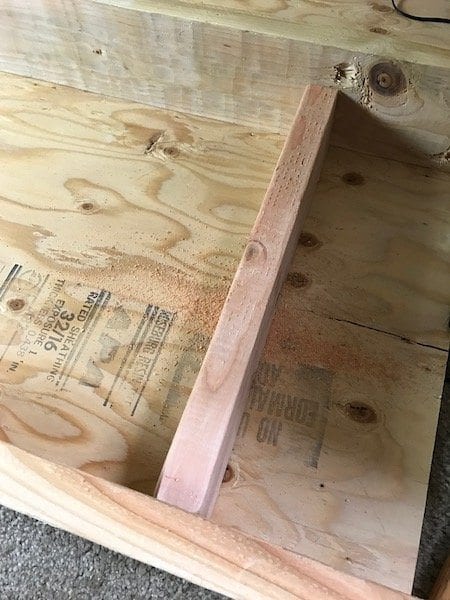
3. Assembly
- The thick wood pieces (2”x”6’x”8) are for the shelves/support. You want these to be flush against the plywood on the top, middle, and bottom.
- Nail in each shelf to the plyboard. The bottom one is mainly to stand your headboard.
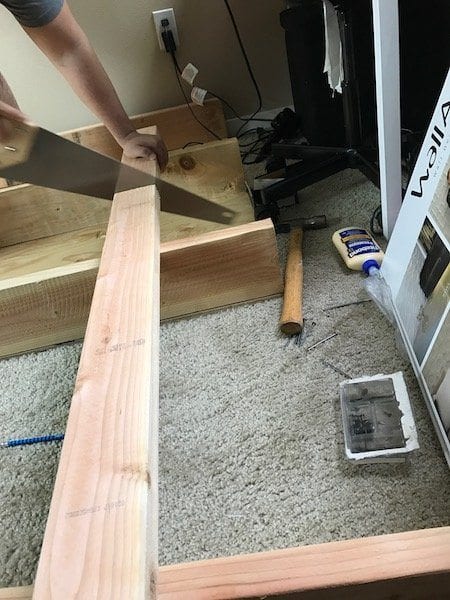
- Measure in between each of the shelves. Cut the support beams with your handsaw and place them in an alternating pattern and nail them in.
[one-third-first]
[/one-third-first][one-third]
[/one-third][one-third]
[/one-third]
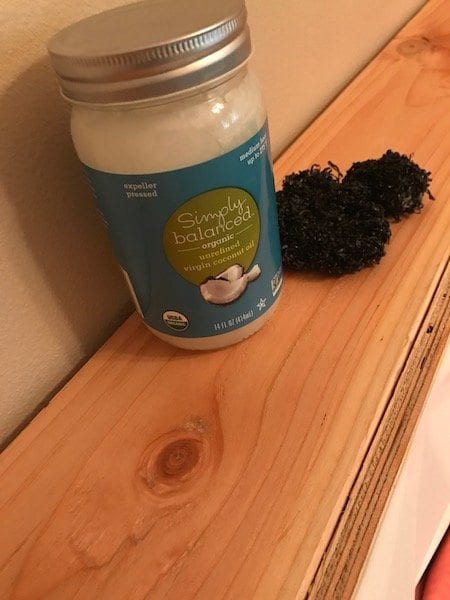
4. Sanding
- Sand the top of the shelf and sides of the headboard to ensure no one gets a splinter. Since we didn’t have any sanding paper, we just DIY’ed using coconut oil and a scrubber (it made it way smoother!)
- You can also stain the wood to your liking if you’d like (we didn’t do this step as we liked the natural color of it already).
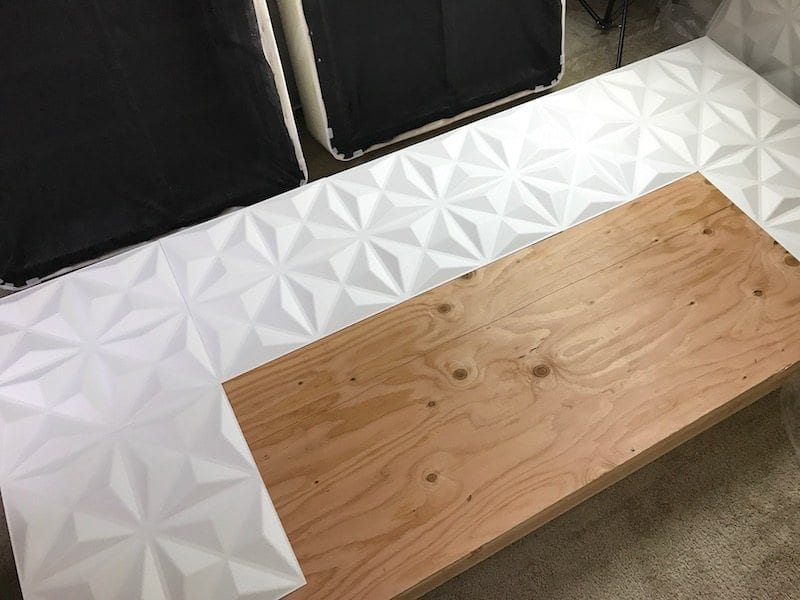
 5. Attach 3D Wall Panels
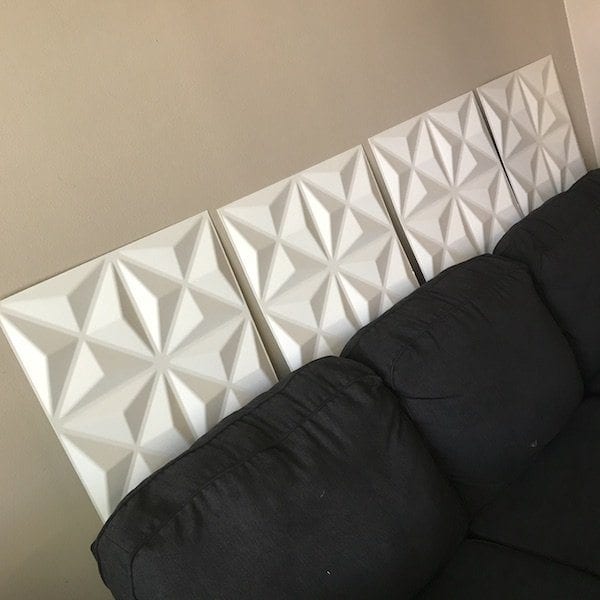
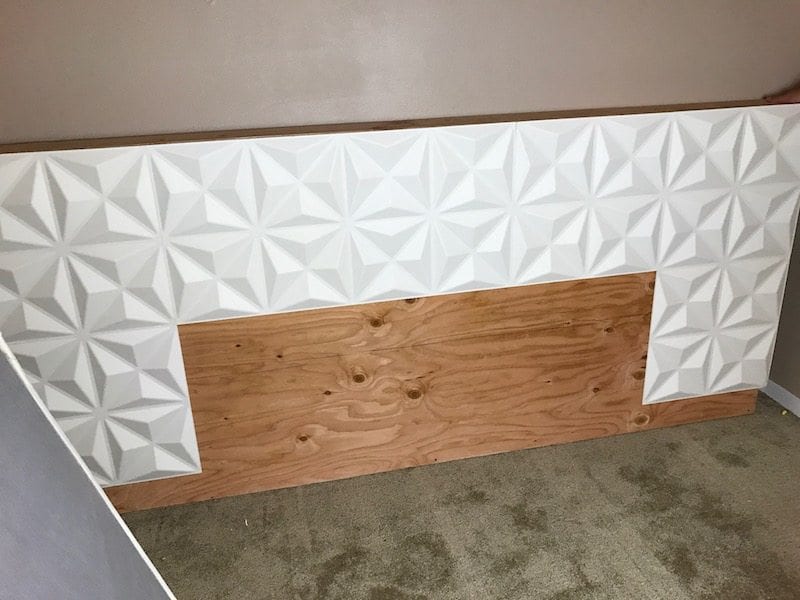
- Start placing the 3D wall panels onto your headboard. Start from the middle and go outwards. We had a bit of overhang on both sides since we didn’t want to cut the panels, which is why it’s important to start from the middle.
- If you left extra room on the sides of the bed be sure to place a few down that way as well. Leave room in the middle and bottom where your bed will be (no need in wasting any wall panels if your bed will be covering it anyways)
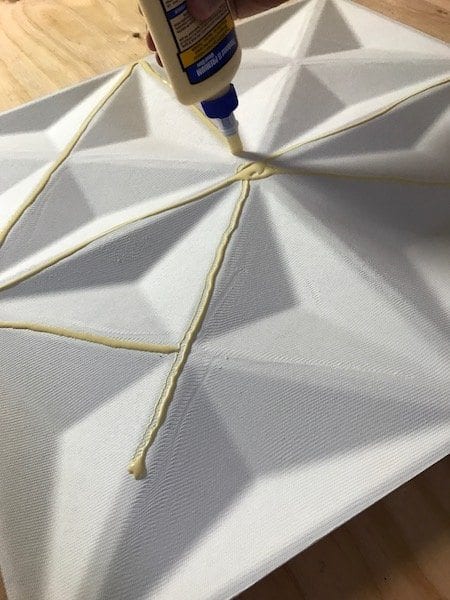
- Then start applying wood glue to each panel and placing it onto the plywood (headboard).
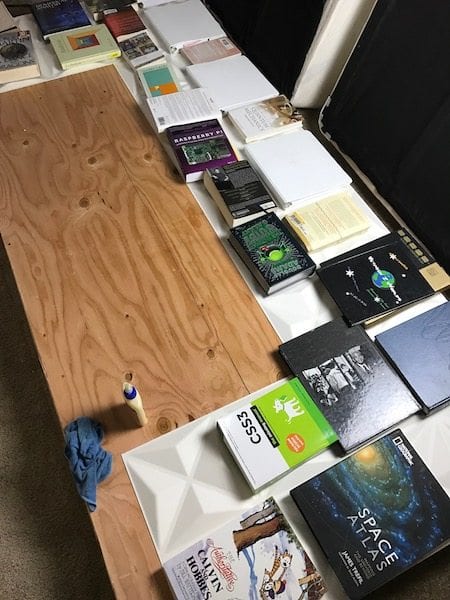
- After that is complete, let it dry for a few hours. We needed weight to hold the glue down so we also placed heavy books on top of it to ensure the glue would stick.
[one-half-first]
[/one-half-first]
[one-half]
[/one-half]
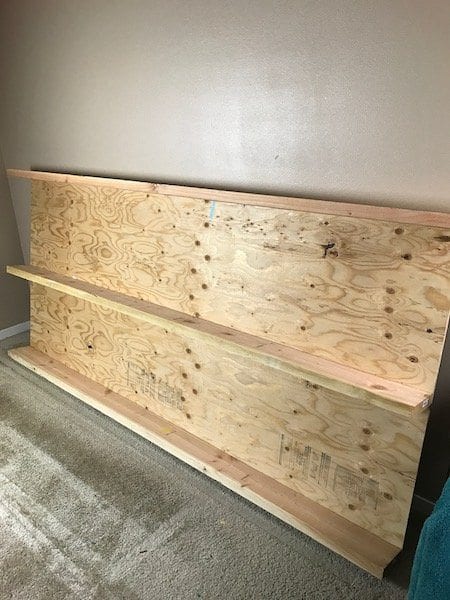
6. Set up Your New Bed
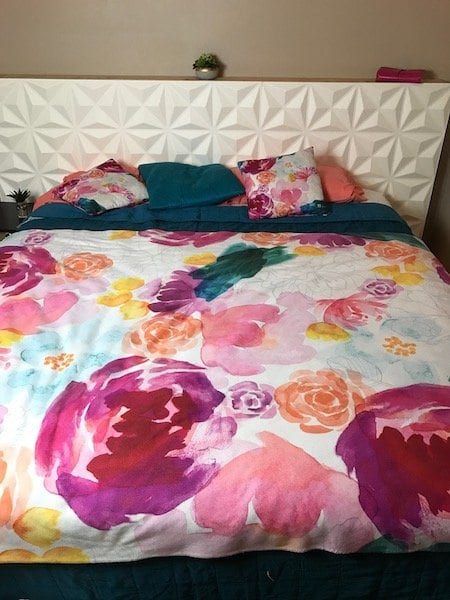
- Stand up your new headboard against the wall and place your bed right under it in the center! (Please note: the final product was pretty heavy, and wouldn’t stand on its own until you placed your bed against it!)
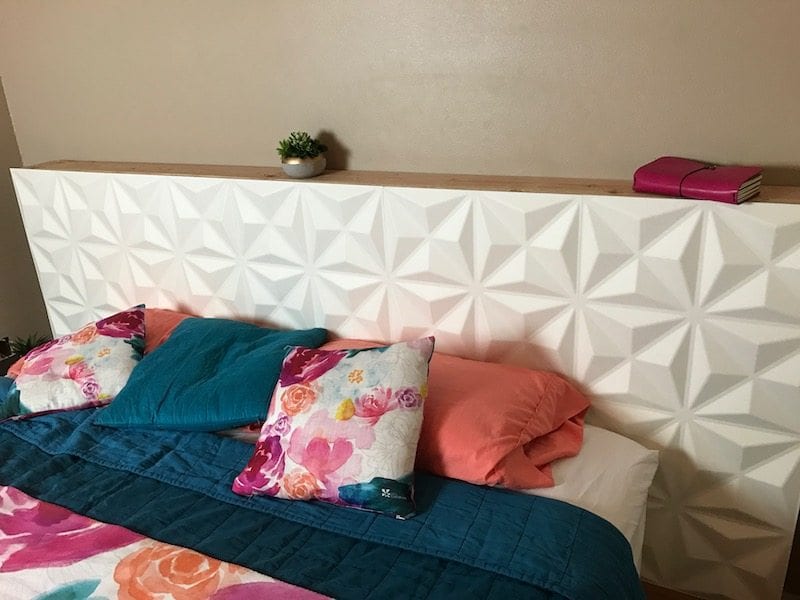
- Now you have a shelf to place your books on and a secret middle shelf to hide your flashlight or diary!
- Enjoy your beautiful new modern headboard!
By the way, my beautiful watercolor floral pillows and blanket were from Erin Condren
 Final Thoughts/Notes:
- We are complete newbies to building anything. Neither my husband nor I are carpenters.
- The headboard was very heavy, maybe we could find better materials next time.
- Add rubber/felt padding to the back of the headboard to avoid it from scratching your walls and to dampen the sounds of knocking on the walls.
- I love how modern our room looks with these 3D wall panels!
- We are extremely happy with the finished product.
That’s it! I hope you enjoyed this post and it was easy to follow. If you make one, I’d love to see a photo of it! Share it with us by tagging us on Facebook or Instagram #wendaful
[Disclaimer: This product has been provided for my review, all opinions are still my own. I only review products I am truly interested in. There are no affiliate links in this review nor am I getting paid for this post.]
Wow!!! What a great idea it is! I was in need of some Headboards for my kid’s bed and was in a confusion that “how to make it”. This article made me a great solution of my problem! On the way to make some of them like yours. Wish me good luck! 🙂