
I just upgraded my Silhouette Studio Software to the Designer Edition
and can now see why it is so worth the price! I’ll go over all the
differences that I can find below. (Please note that I have only played
with it for two days, so if you find that I am missing something let me
know in the comments below!) Luckily right now through December 8th, the
Designer Edition Upgrade is on sale for 40% off! Just click here to shop and use promo code: WENDA at checkout to get it for only $29.99!
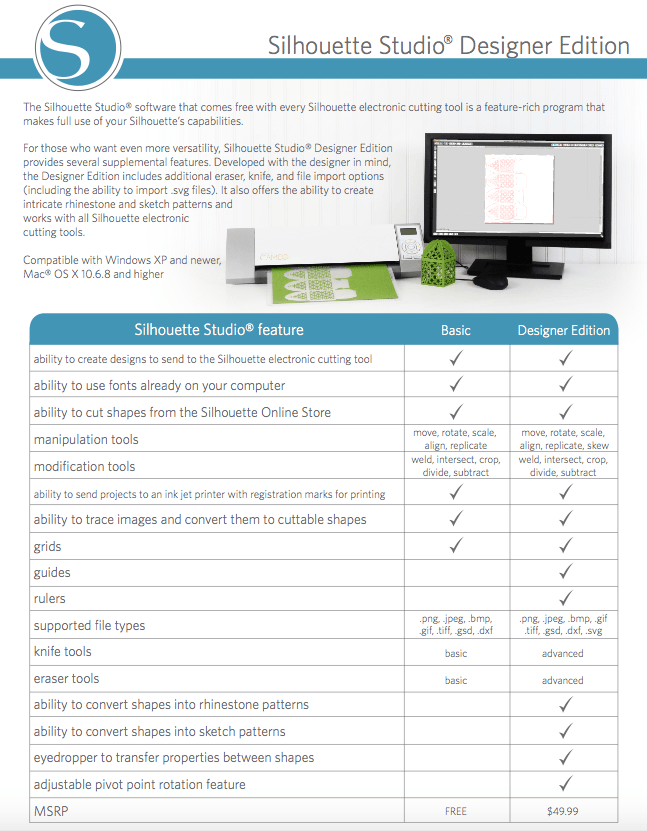
Here’s a quick overview of the differences before I go into more detail:
Topics I will be covering:
- SVG File Support
- Rulers/Guides
- Advanced Knife Tools
- Advanced Eraser Tools
- Shearing Tool
- Shadow Features
- Nesting Feature
- Adjustable Pivot Point
- Sketch Conversion
- Rhinestones
- Layers
New Icons/Tools:

Use of SVG files:

Rulers/Guides

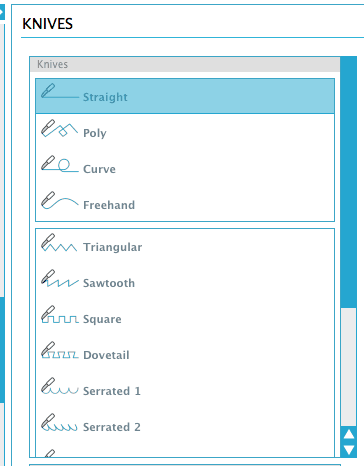
Advanced Knife Functions
Look at all of the ways you can cut your projects! So many new designs! How easy would it be to make a chevron pattern or a scalloped pattern?! I love this new feature!

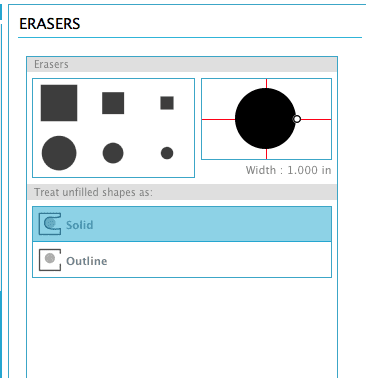
Advanced Erasers Functions
Now this didn’t seem to different to me from SS version 3. The only difference I found was that I can now adjust the eraser to a different size, any size aside from the main ones shown below!
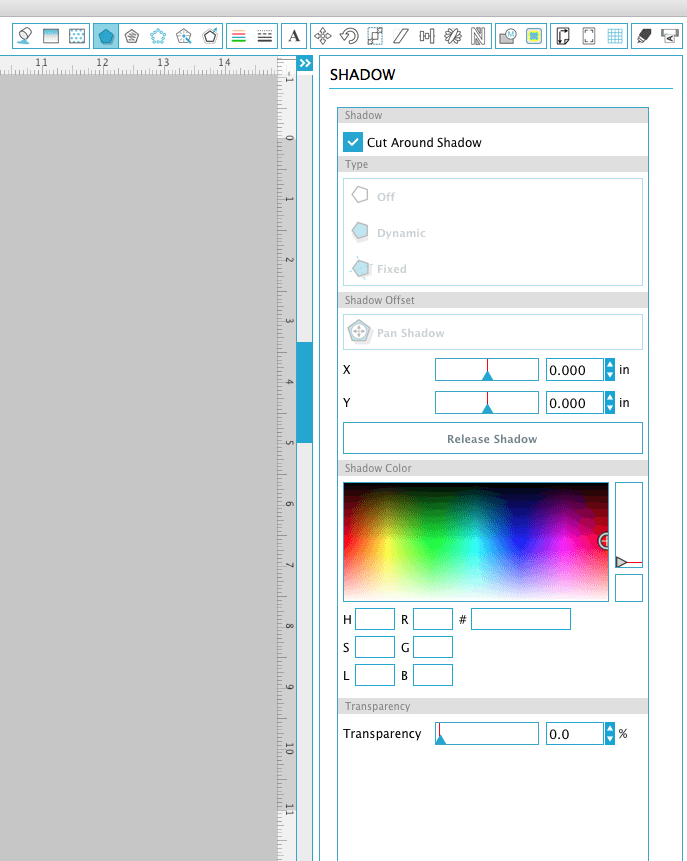
Shadow
You can add more dimension to your designs with this new feature! It makes my artwork look even more fancy. I love how it looks and is so easy to use!

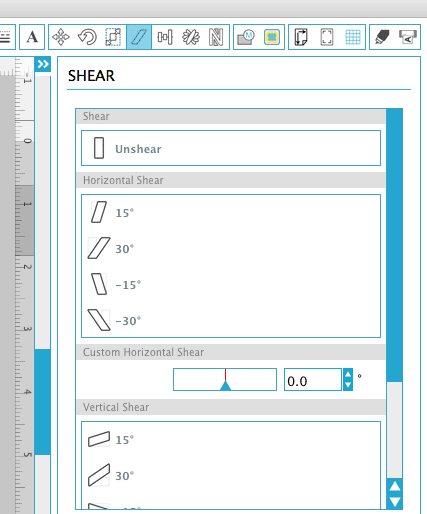
Shear
You can now adjust your designs to angle any way you like!

Nesting Tool
Now this is brilliant! If you want
to get the most use out of every sheet of paper or card stock and not waste any space then this feature is for you. The Nesting tool will automatically reposition objects in
order make the most use of the space available on your sheet.

Transfer Properties
You can now use the eyedropper tool and select the image you want to be the same, then use the eyedropper to copy the color/line and it will transfer those properties to the image selected!

Layers
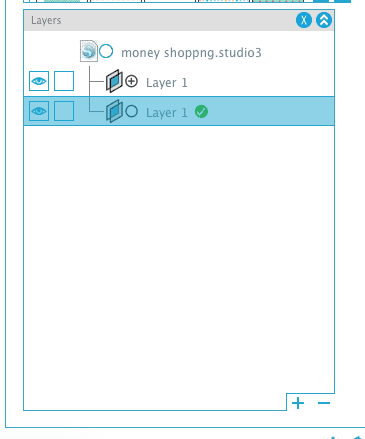
Another very useful addition to the features for more serious users is the Layers support. To access it you have to go to Edit>then click on layers. If you’ve ever used applications like Photoshop, you will probably be used to this concept. The use of Layers makes it very easy to manage several objects within a single file. You can also make different version/colors of the same design in a file by and by taking advantage of the layer visibility.
Sketch conversion
Now this is cool! The Sketch Conversion tools are perfect to use with a sketch pen and create artwork that looks hand drawn! This is perfect for me because I cannot draw or doodle nicely at all. I can’t wait to see what I can do with this new added feature. They have so many options for the line effects and filling too!

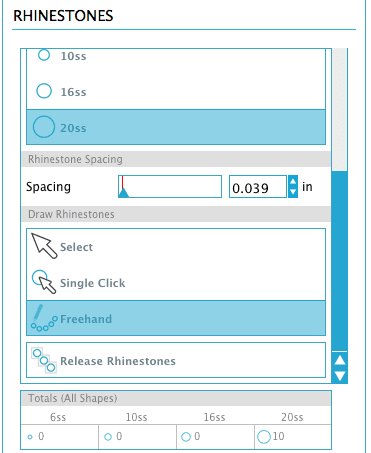
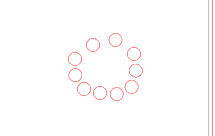
Rhinestones
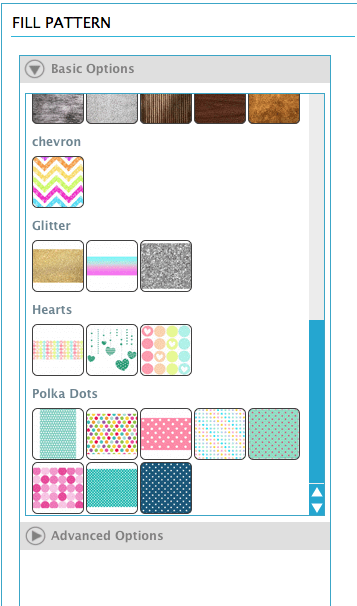
Patterns
Now I’m not sure if this is exclusive to Designer Edition or not but I just figured it out…If you want more options for filling your designs with different patterns, you can import image files into your library and then fill objects with them, with the same advanced controls allowing you to change scale and opacity.
Is the Designer Edition Upgrade for you?

If you do decide on getting it, now is the time to get it! Silhouette’s Black Friday Sales Event goes on until December 8th and the Designer Edition is included for 40% off! Just use promo code: WENDA at checkout! click here to shop
How to Install Designer Edition to Silhouette Studio
To upgrade your Silhouette Studio to the Ddesigner Edition all you need is your code that you should receive after purchasing it!
Just go to Help>Upgrade Silhouette Studio
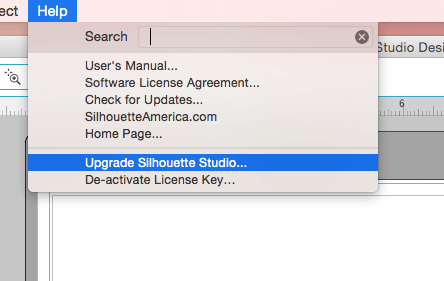
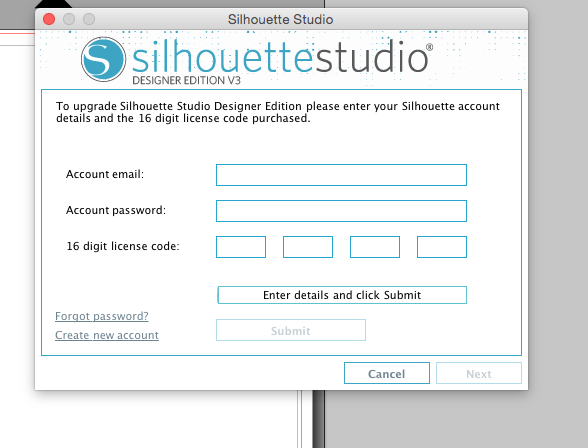
Easy right?!
Note: This post may contain affiliate links. But all opinions are completely my own!
Hope this helped you in deciding if the Designer Edition upgrade is right for you!
Until next time,
