
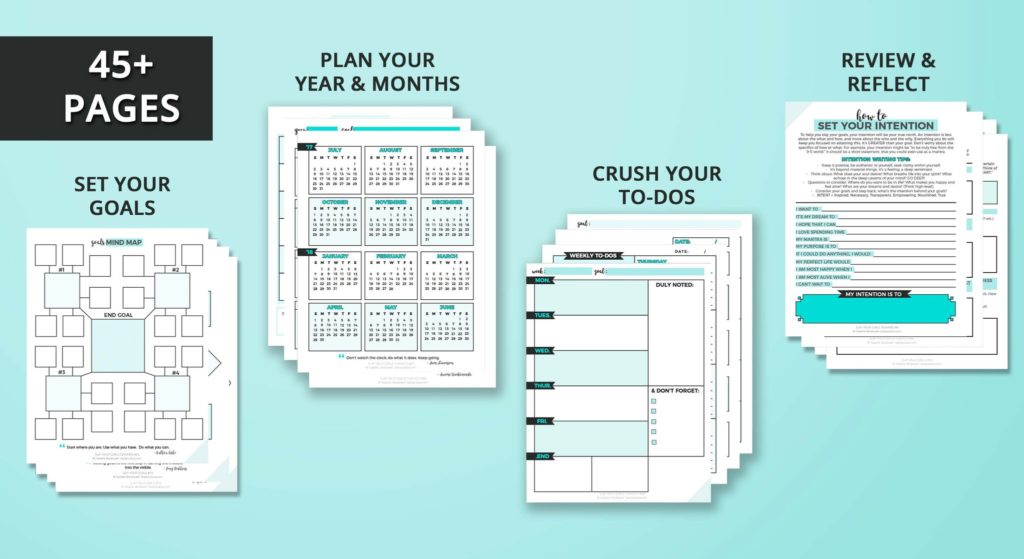
The most asked question I get is if I have a certain printable in a certain size. Unfortunately, I cannot make my printables in all the planner sizes there are these days. With so many planners and all the different sizes these days, it can be hard to find a printable that fits the one you are using. The majority of printables are either A4, letter or A5 size.
Today I’m going to show you some ways you can easily resize your printables to fit your planner.
I’ve posted a tutorial on how to print inserts here which is the same as this first method I use to resize my printables. To see how to print to a specific paper size and where to get it professionally cut at click here.
Method 1: Print to Custom Page Size
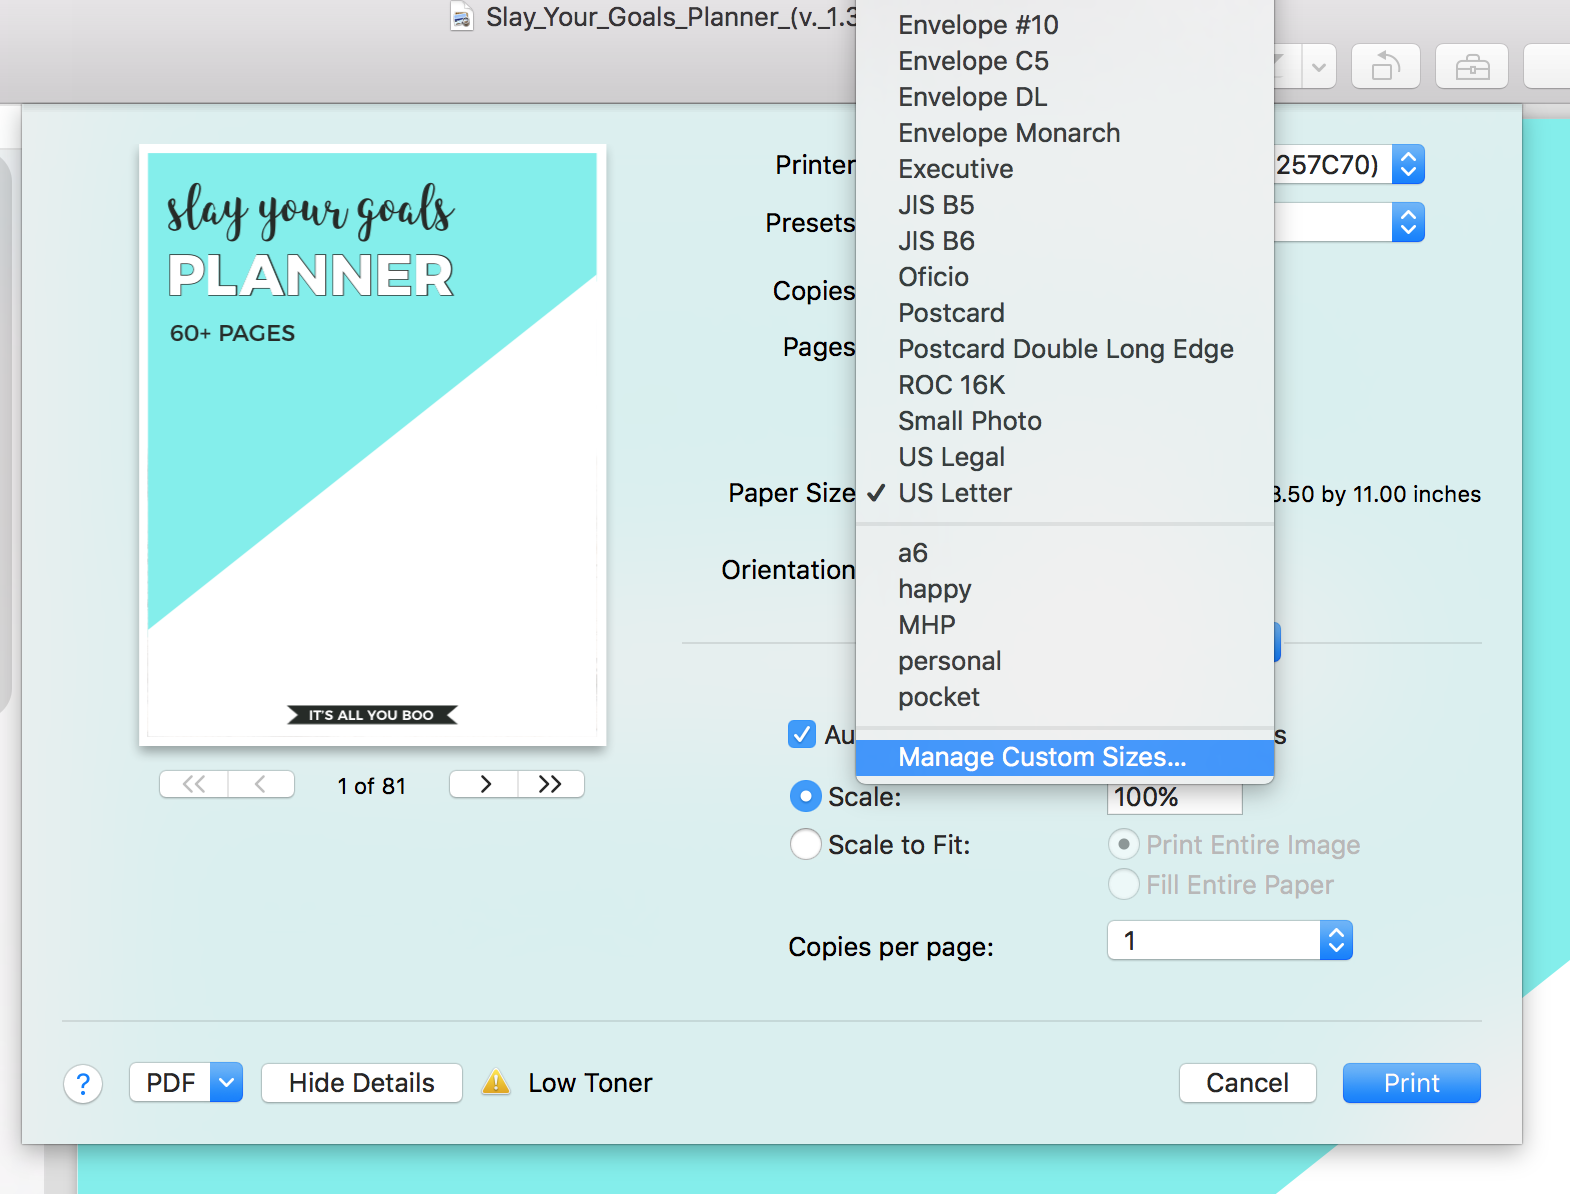
STEP 3: Click the “+” sign and name that size as your planner size
STEP 4: Use the measurements below to input the dimensions of your paper size’s width and height; make sure the non-printable area are all set to “0 in”
Inches:
- A5 – 5.83″ x 8.27″
- Half Letter – 5.5″ x 8.5″
- Happy Planner – 7″ x 9.25″
- Mini Happy Planner – 4.625″ x 7″
- Personal – 3.74″ x 6.73″
- A6 – 4.13″ x 5.83″
- Pocket – 3.19″ x 4.72″
Millimeters:
- A5 – 148mm x 210mm
- Half Letter – 139.7mm x 215.9mm
- Happy Planner – 177.8mm x 234.9mm
- Mini Happy Planner – 117.5mm x 177.8mm
- Personal – 95mm x 171mm
- A6 – 105mm x 148mm
- Pocket – 81mm x 120mm
Method 2: Print to a Custom Scale Percentage
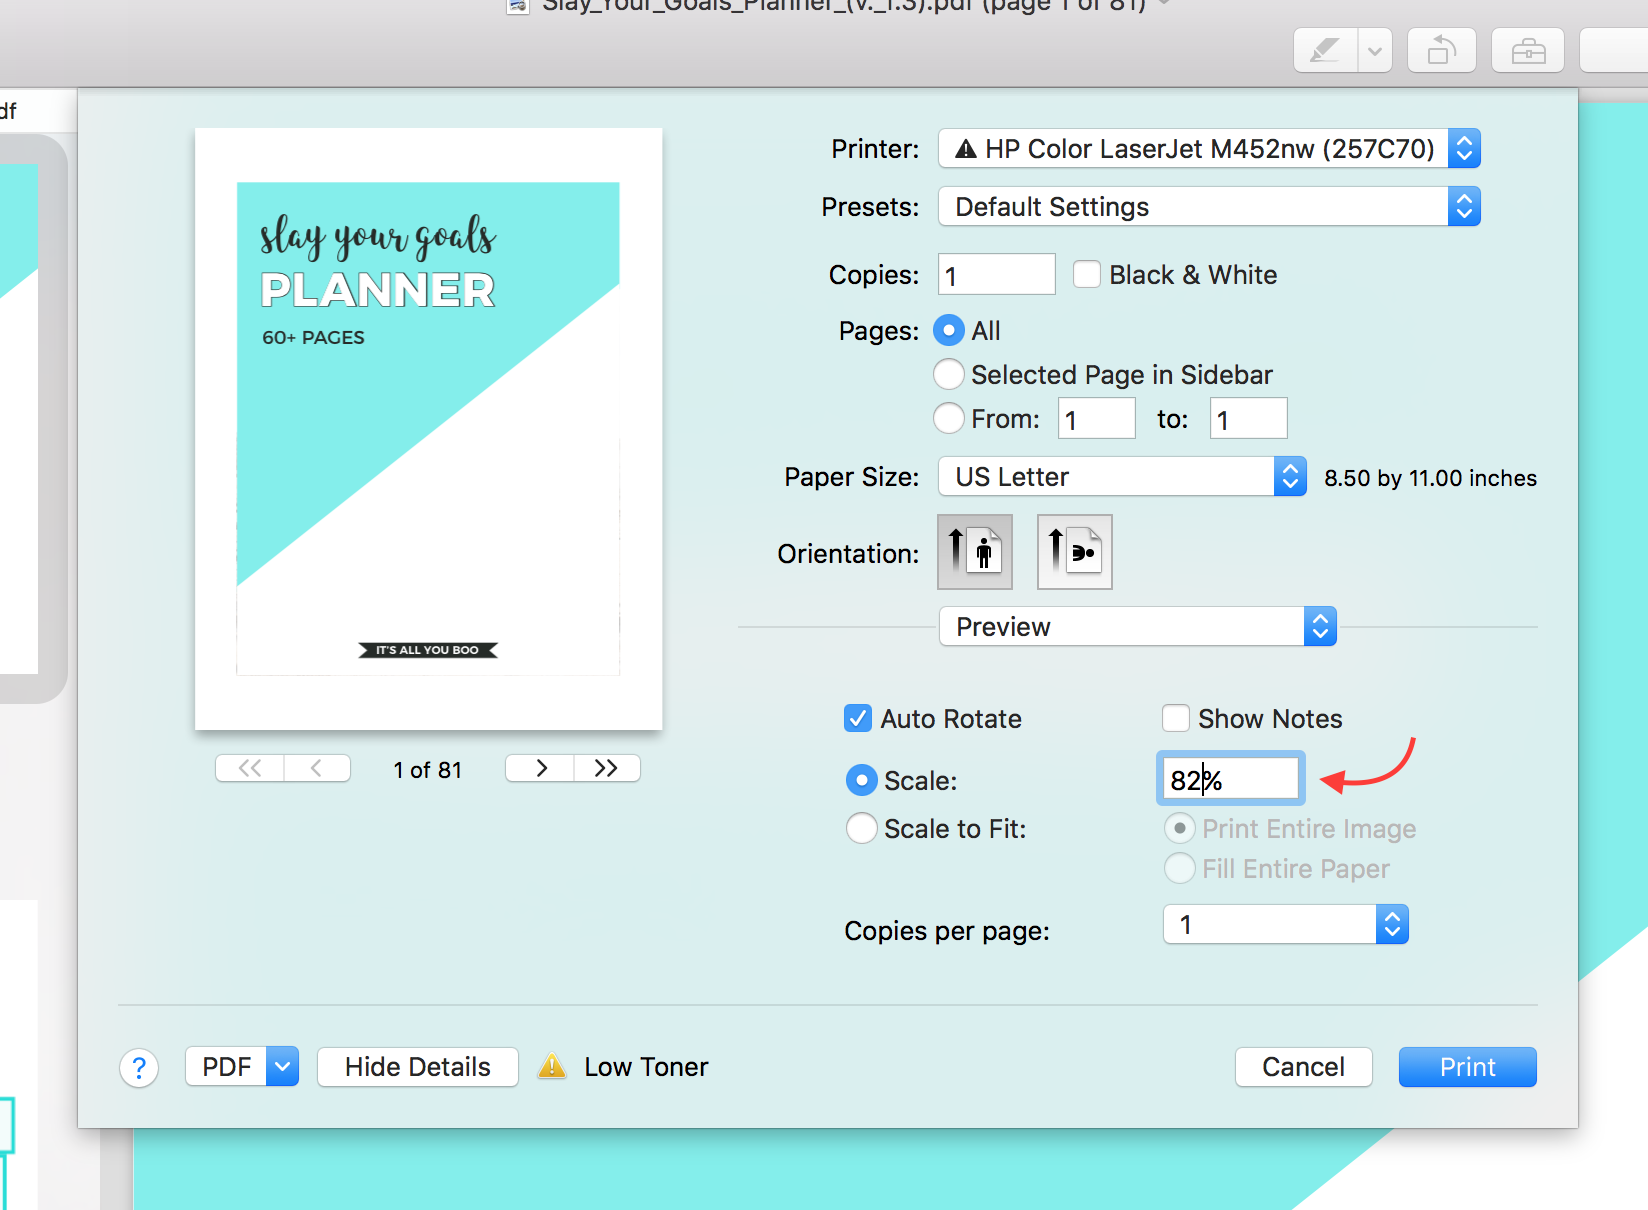
To print other sizes, you can also use the “scale” setting. You can use this simple formula to find out the percentage:
desired planner page size (use either length or width) / actual printable size (corresponding length or width) = %
Example using the width from letter size to a happy planner size:
width of happy planner size/width of letter size printable = % used to scale when printing/resizing
177.8mm / 215.9mm = %
82 = %
When printing just input that percentage (82%) in the scale area.
Be sure to save enough room in your margins for binding! If you need more space in your margins then the percentage option may be your best choice.
Method 3: Resize using Adobe InDesign
If you are familiar with Adobe InDesign this will help you resize your printable to and create more advanced formats such as traveler’s notebooks. With this method you will be able to reorder your planner inserts in a way you would see fit as well!
STEP 1: Open up a new file: File > New > Document. Open up a regular document in which the original printable size is in. The one I am using is letter size – 8.5 by 11.
STEP 2: Import your PDF into your InDesign document. If it is a large file like the Slay Your Goals Planner then use the script for “PlaceMultiplepagePDF.jsx”. To find the scripts go to Window > Utilities > Scripts.
Then in the scripts window go to Application > Samples > JavaScript. Find “PlaceMultipagePDF.jsx” and double-click it. Locate your PDF file and open it. Follow the “OK” prompts and allow it to automatically populate in inDesign.
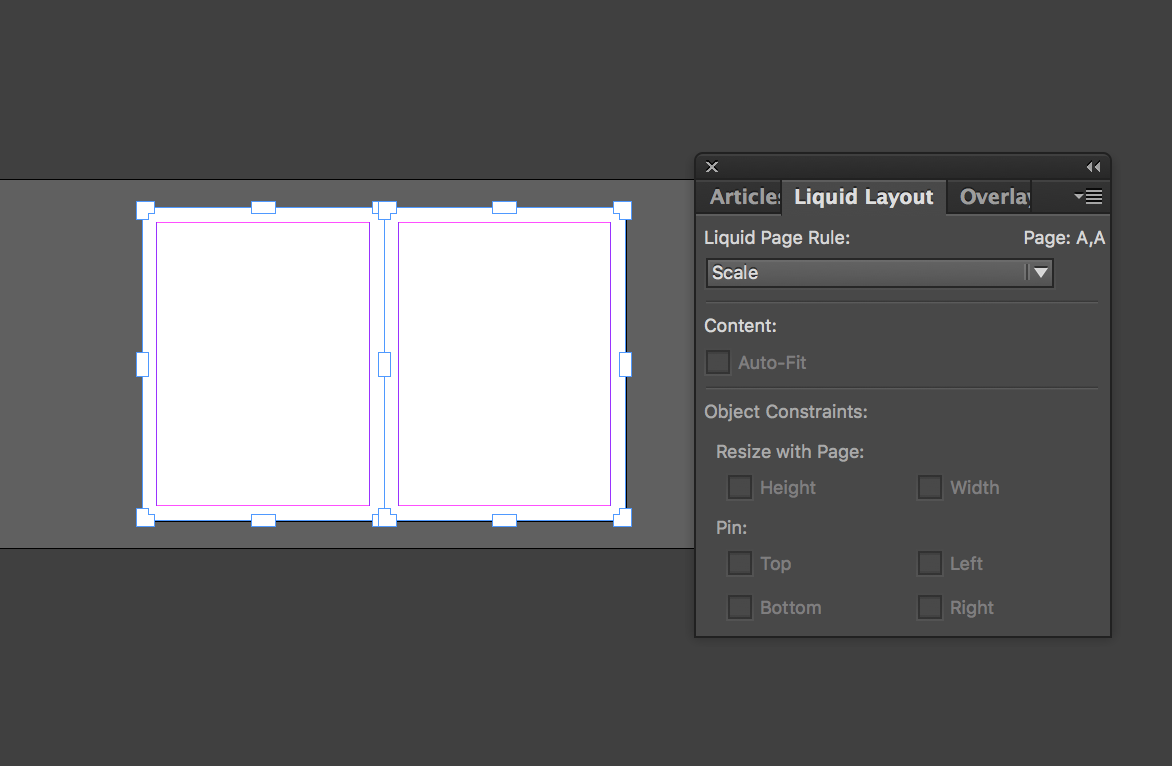
STEP 3: Click on the A-Master pages and click on both of them. Then go up to menu bar and go to Layout>Liquid Layout
STEP 4: In the Liquid Layout Window, use the drop-down for the Liquid Page Rule and set it to Scale
STEP 5: Select all the pages in your document and click on the small icon at the bottom of the pages panel that says “edit page size” and click on the page size which you’d like to change your printable to. If your size isn’t listed, just simply click on “custom” and create your new page size and use the measurements listed above.
STEP 6: Export your file – here you can set all the pages you want, how you want the order, crop marks, etc. Then save it!
I love using the liquid layout option especially when it’s for my own designed printables in Adobe InDesign. It makes it so everything is proportionate and even.
Please note it is much easier to print onto the actual size paper, but you can also print onto US Letter size paper and cut out the pages. For more info on how to print on actual sized paper click here.
My paper of choice is the 28lb Hammermill Paper

Also, note that adjusting the scale of the printable may not always turn out perfectly (things may be slightly skewed or there may be extra margins on top and bottom). However, I find that the extra margin and spaces in my layouts make it perfect for decorating! I have been able to print plenty of planner printables to fit into smaller sizes with great results. If you follow me on Instagram you may have seen me use the Slay Your Goals Planner inside of a Mini Happy Planner Size. The original file is Letter Sized but I was able to resize it to the smaller Mini Happy Planner Size.
If you are interested in this planner you can find more info about it here!
I hope this tutorial helps with resizing your printables! Let me know in the comments below if this helped you!
Thanks so much for this tutorial. Very helpful!
I guess B6 planners don’t exist lol
If you know the dimensions you can create a custom size in your printer’s settings. There are so many planner sizes these days.